
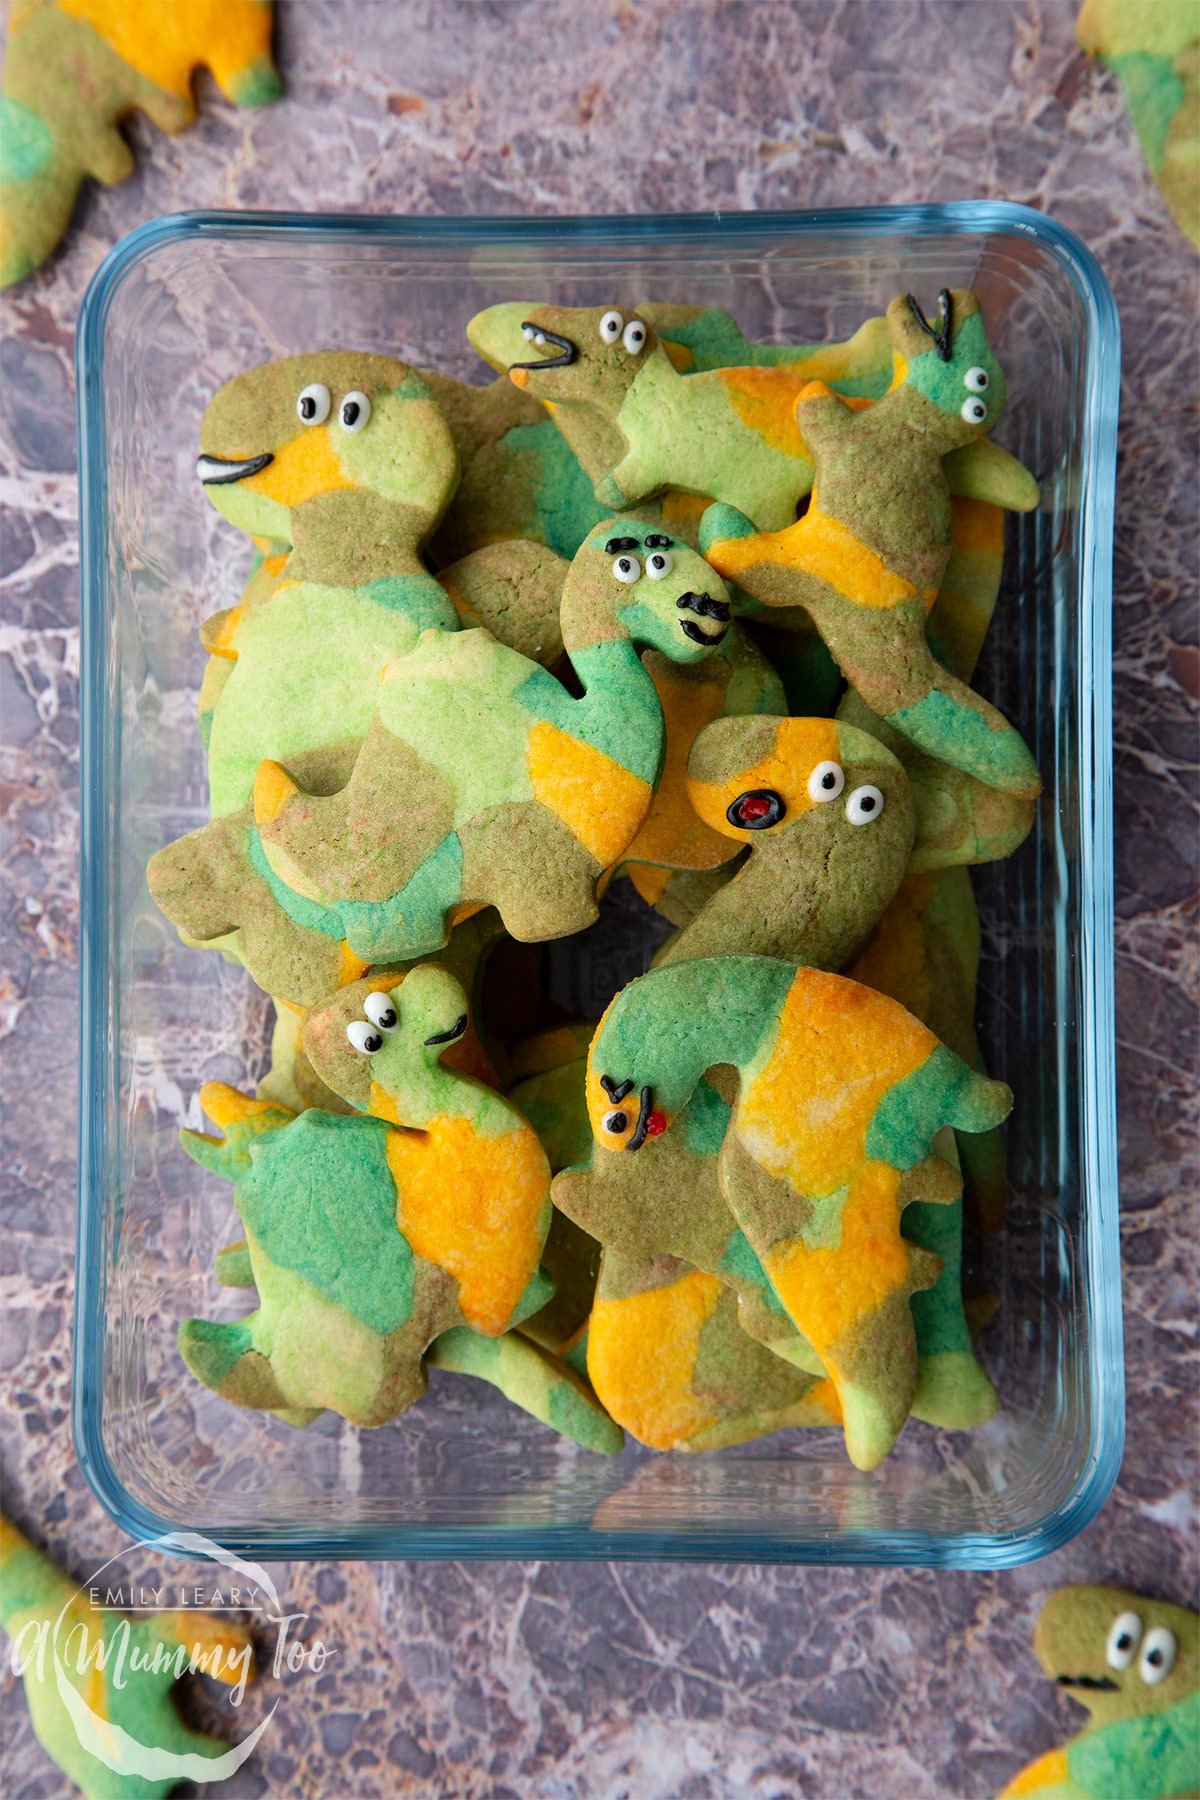
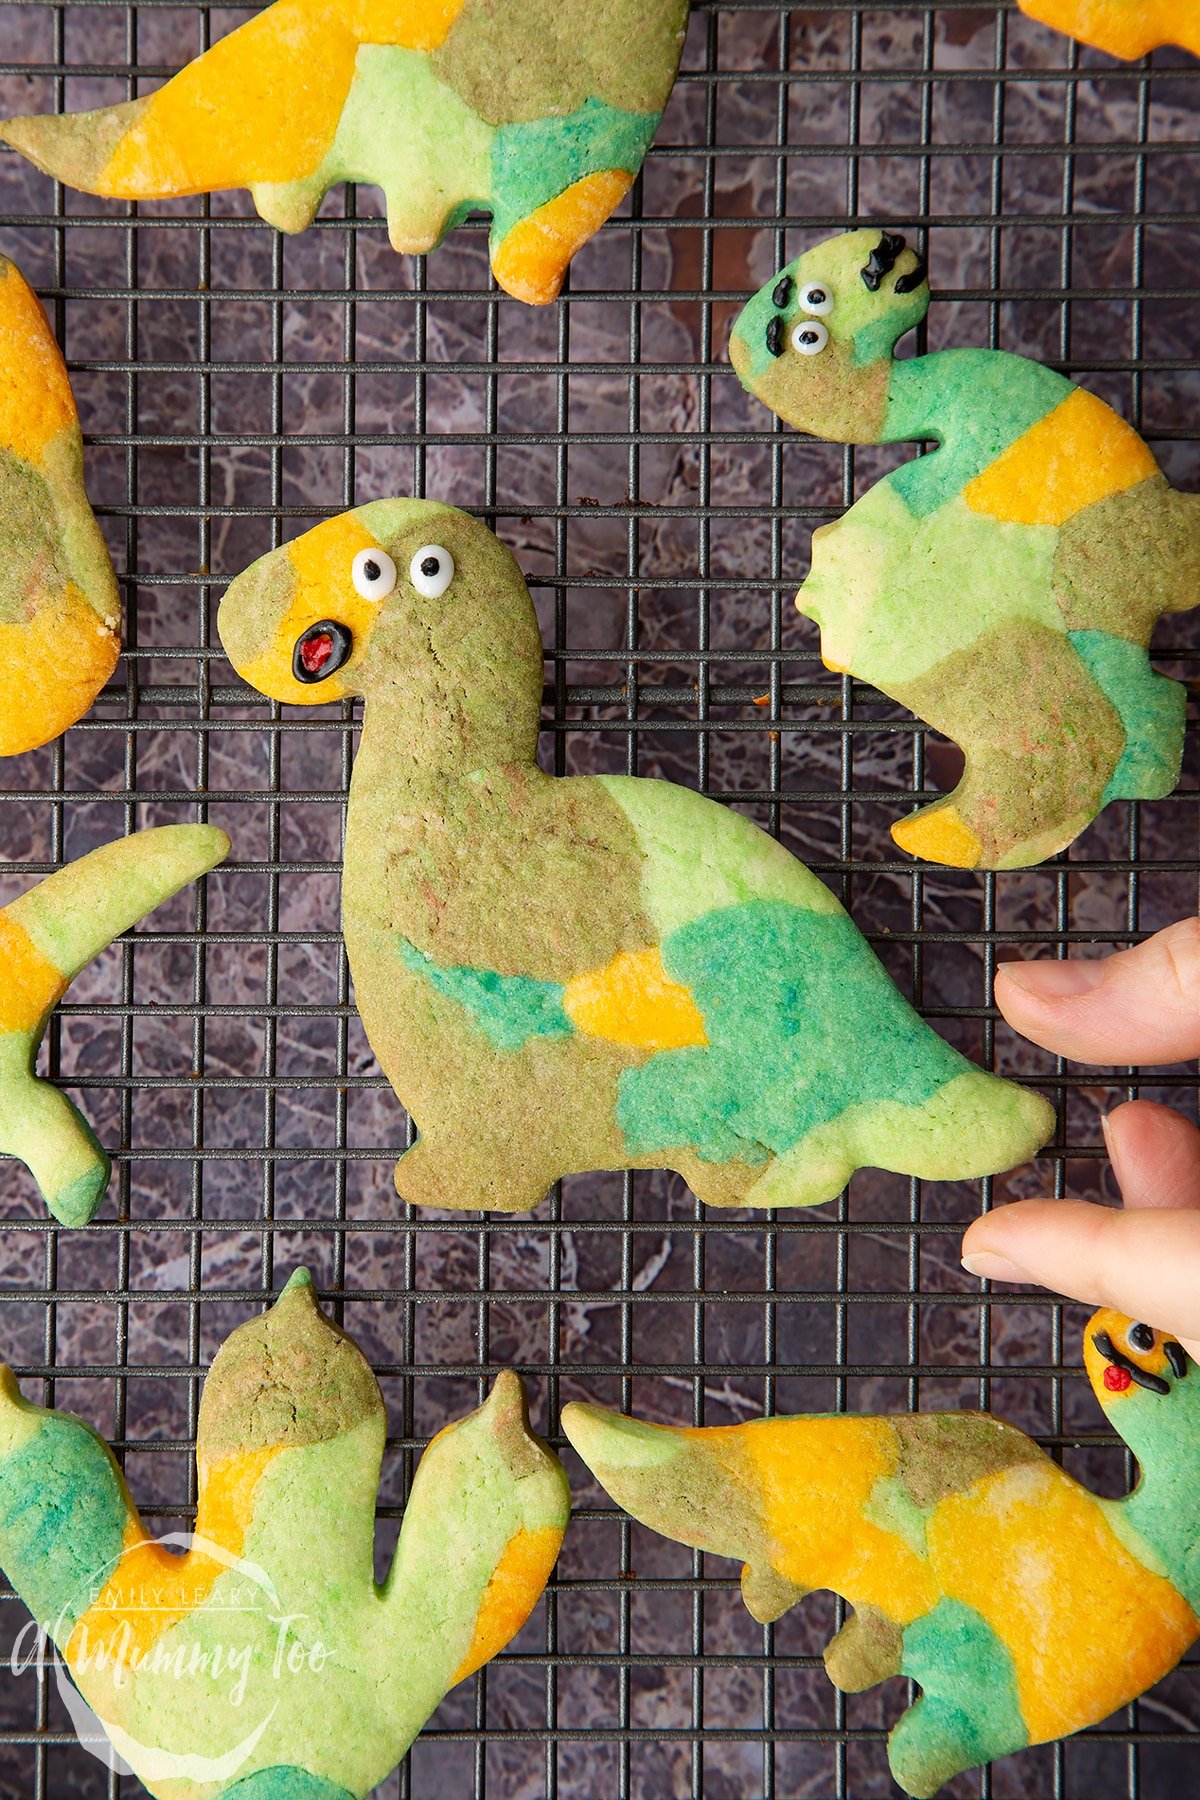
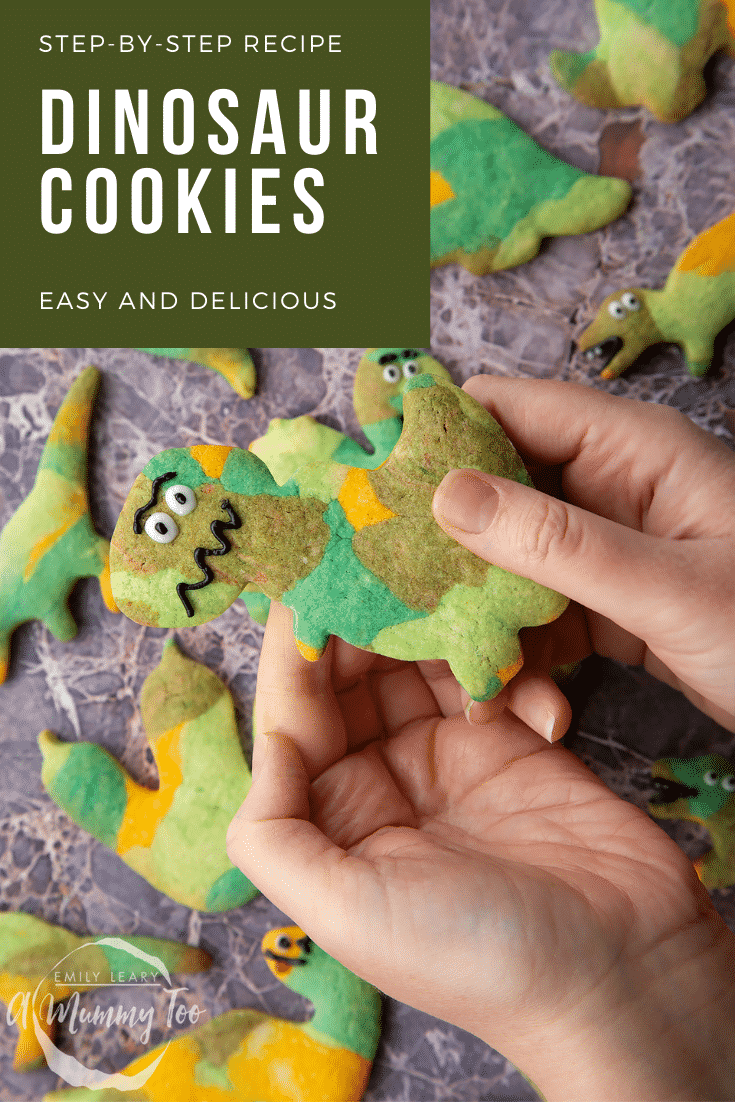
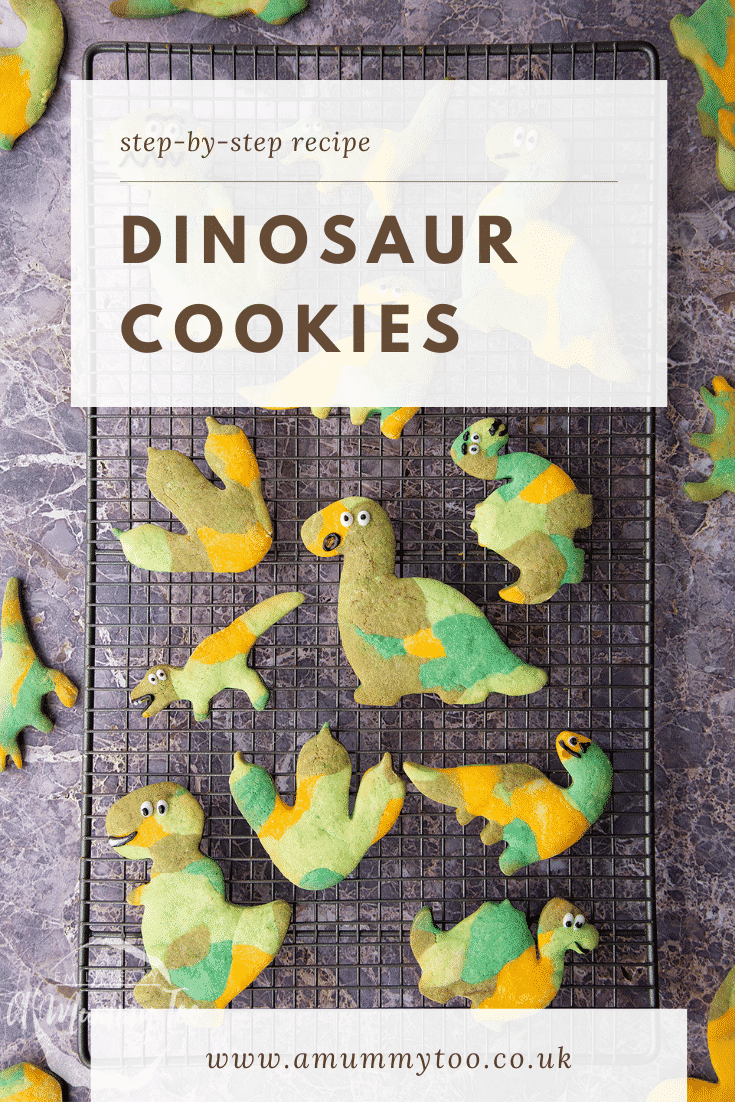
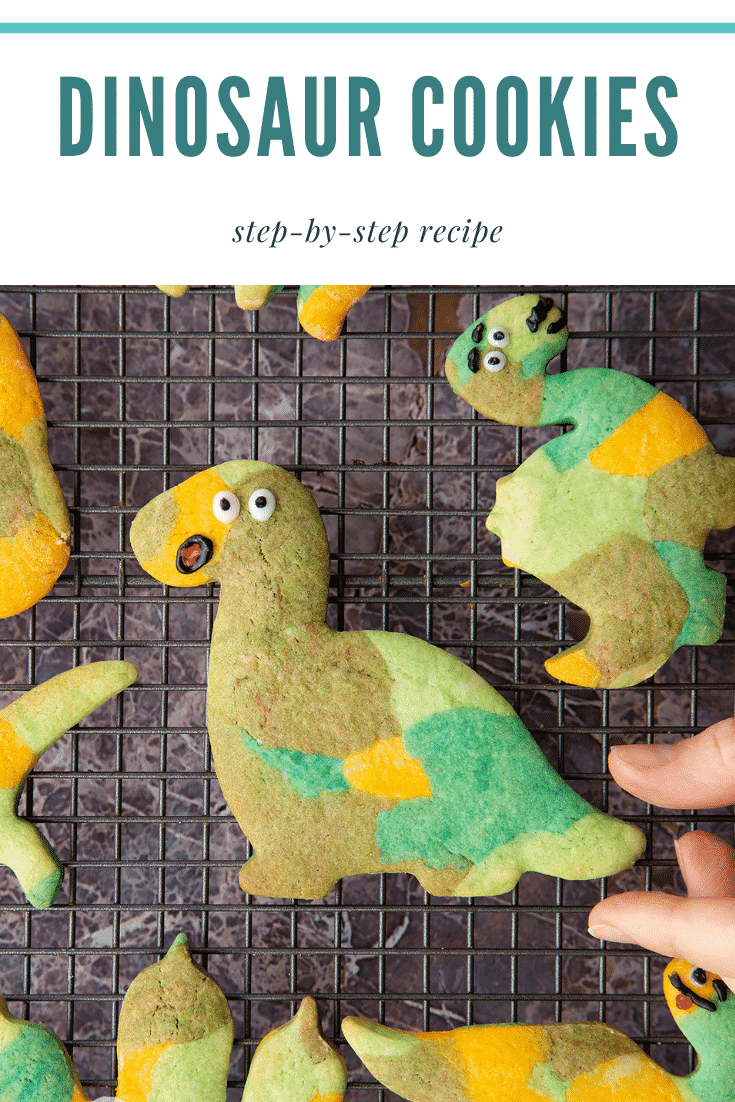
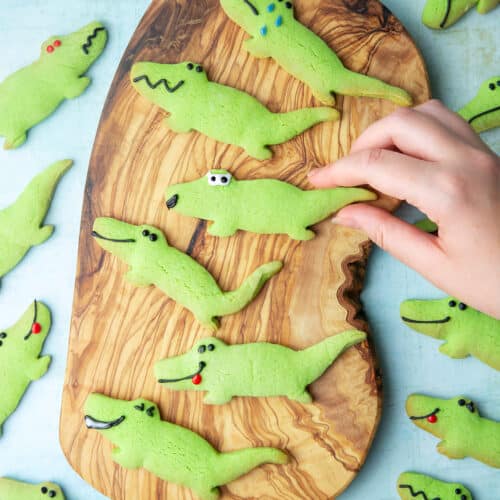
They're cute, they're multi-coloured, they're technically extinct! Here's how to make crisp, sweet dinosaur cookies you'll love every bite of.
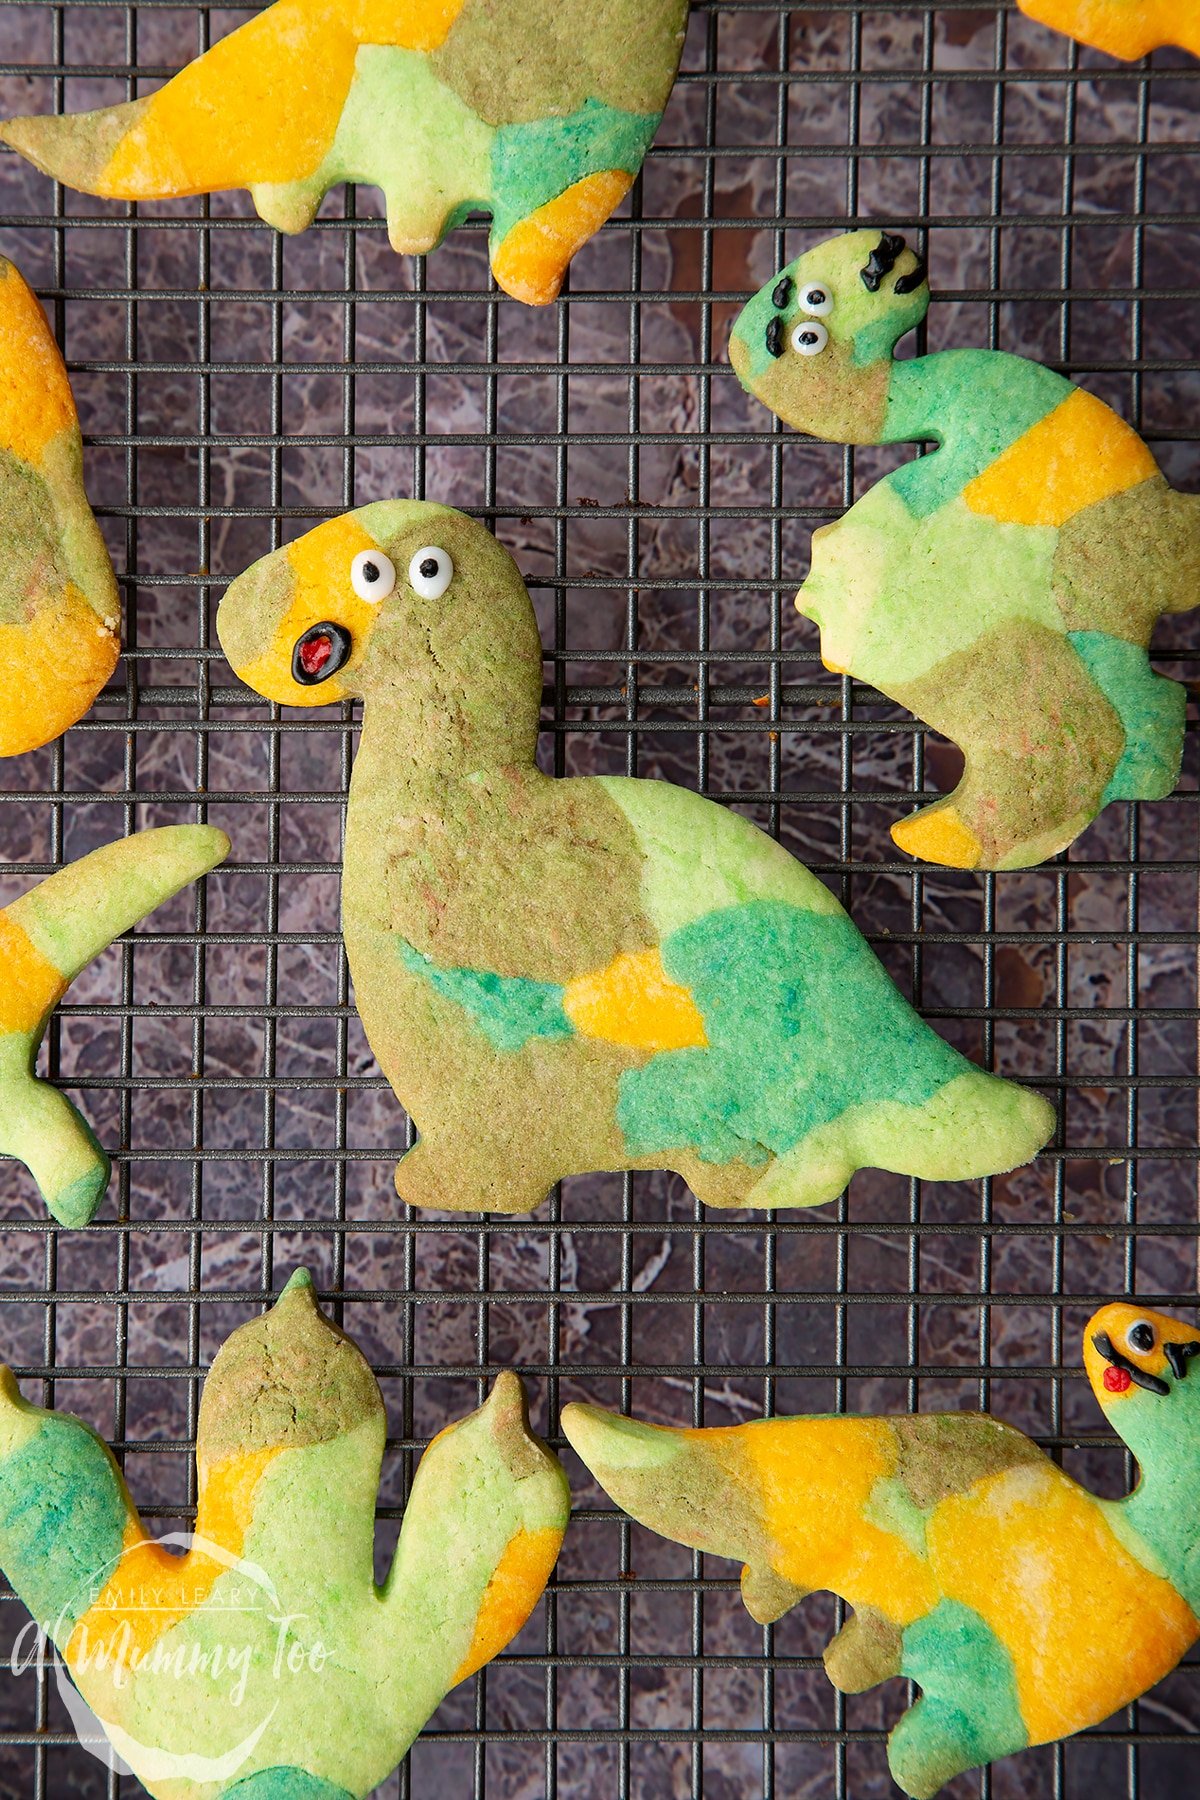
These dinosaur cookies are made with a simple sugar cookie dough that holds its shape every time to give well defined shapes.
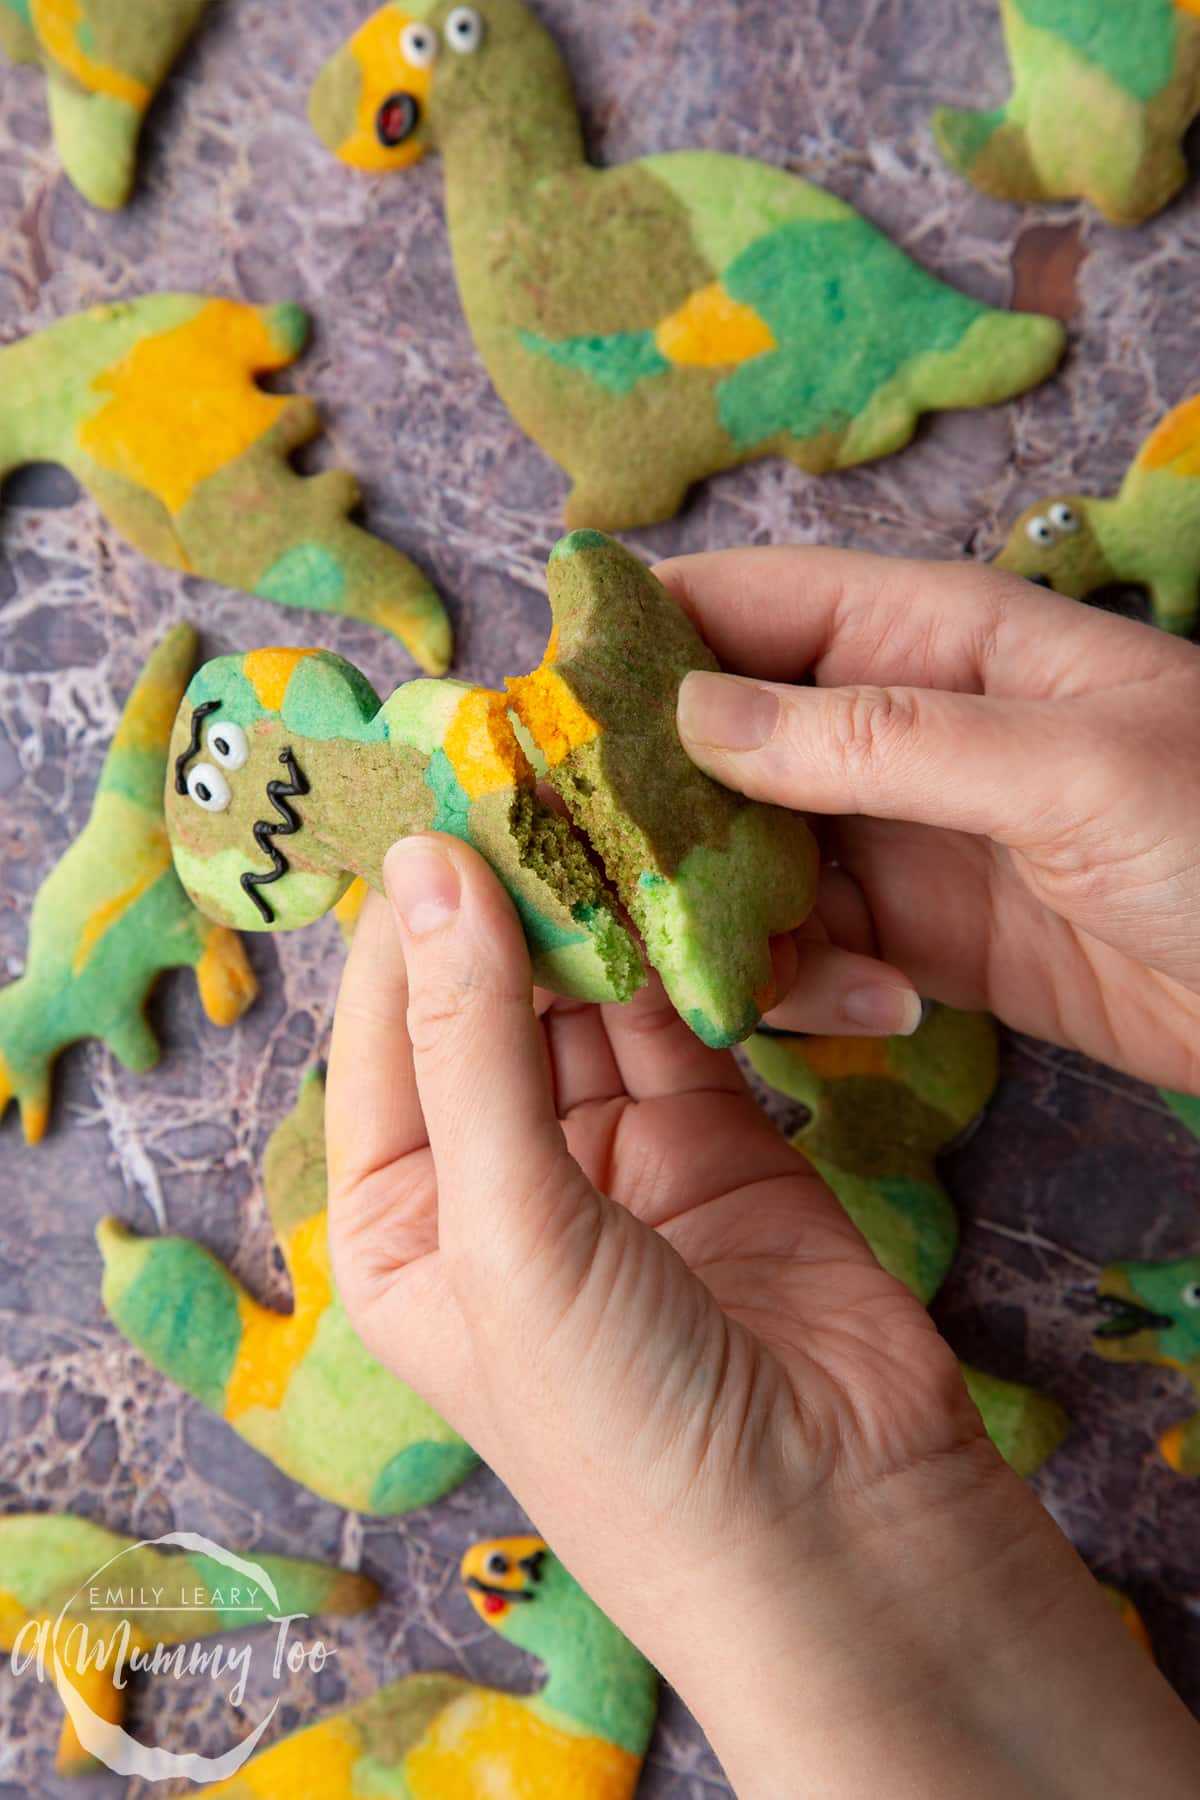
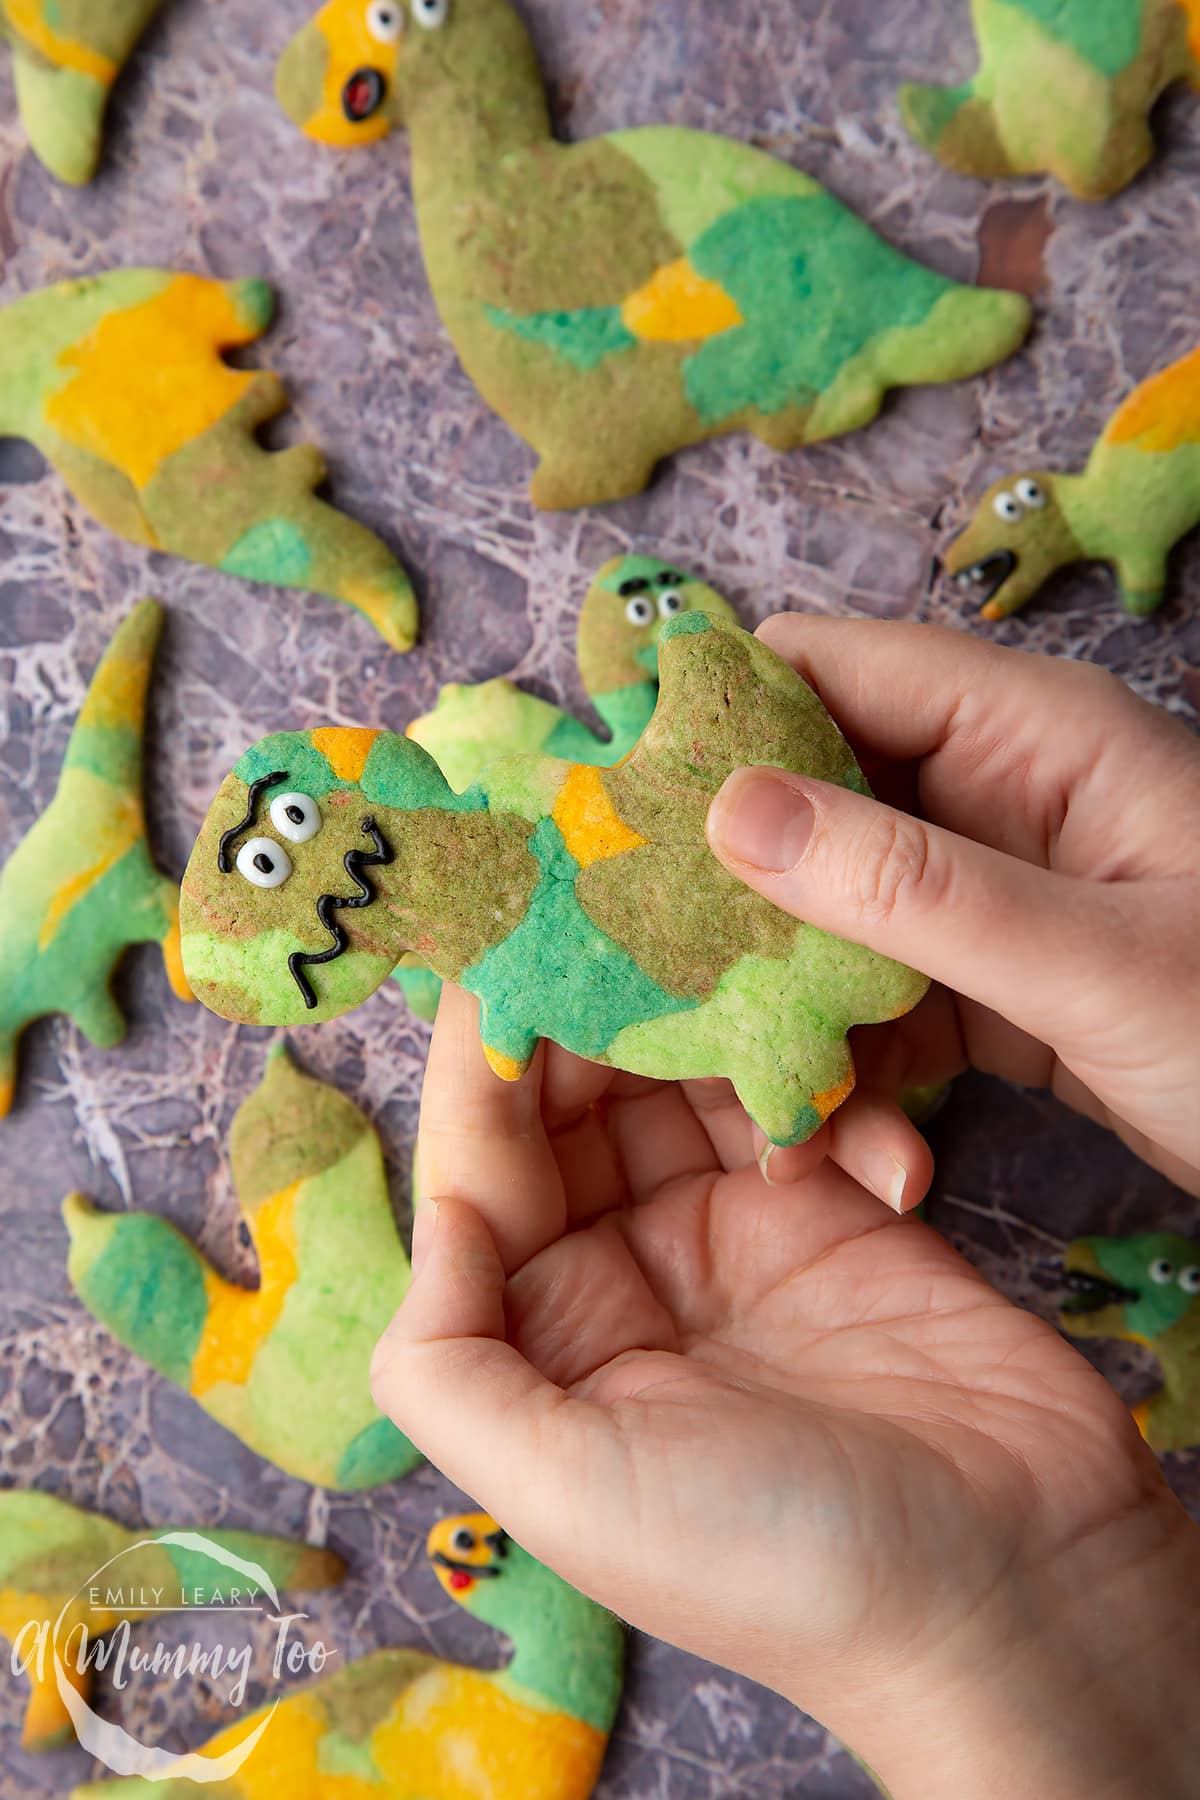
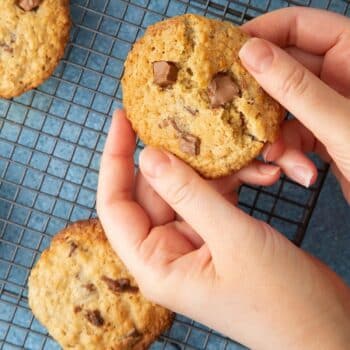
You'll get a lovely snap on every cookie, but they're soft enough to melt-in-the-mouth and perfect to dip in your favourite cuppa.
You'll make the dough in a single bowl with simple ingredients you probably already have in your kitchen. You'll then grab some natural food colouring and learn the secret to giving your dinosaurs some cool, camouflage patterns. It's surprisingly easy and great fun!
To cut out my dinosaur shapes, I used these dinosaur cookie cutters, but you can use any cutters you like, or even cut out your own freehand shapes.
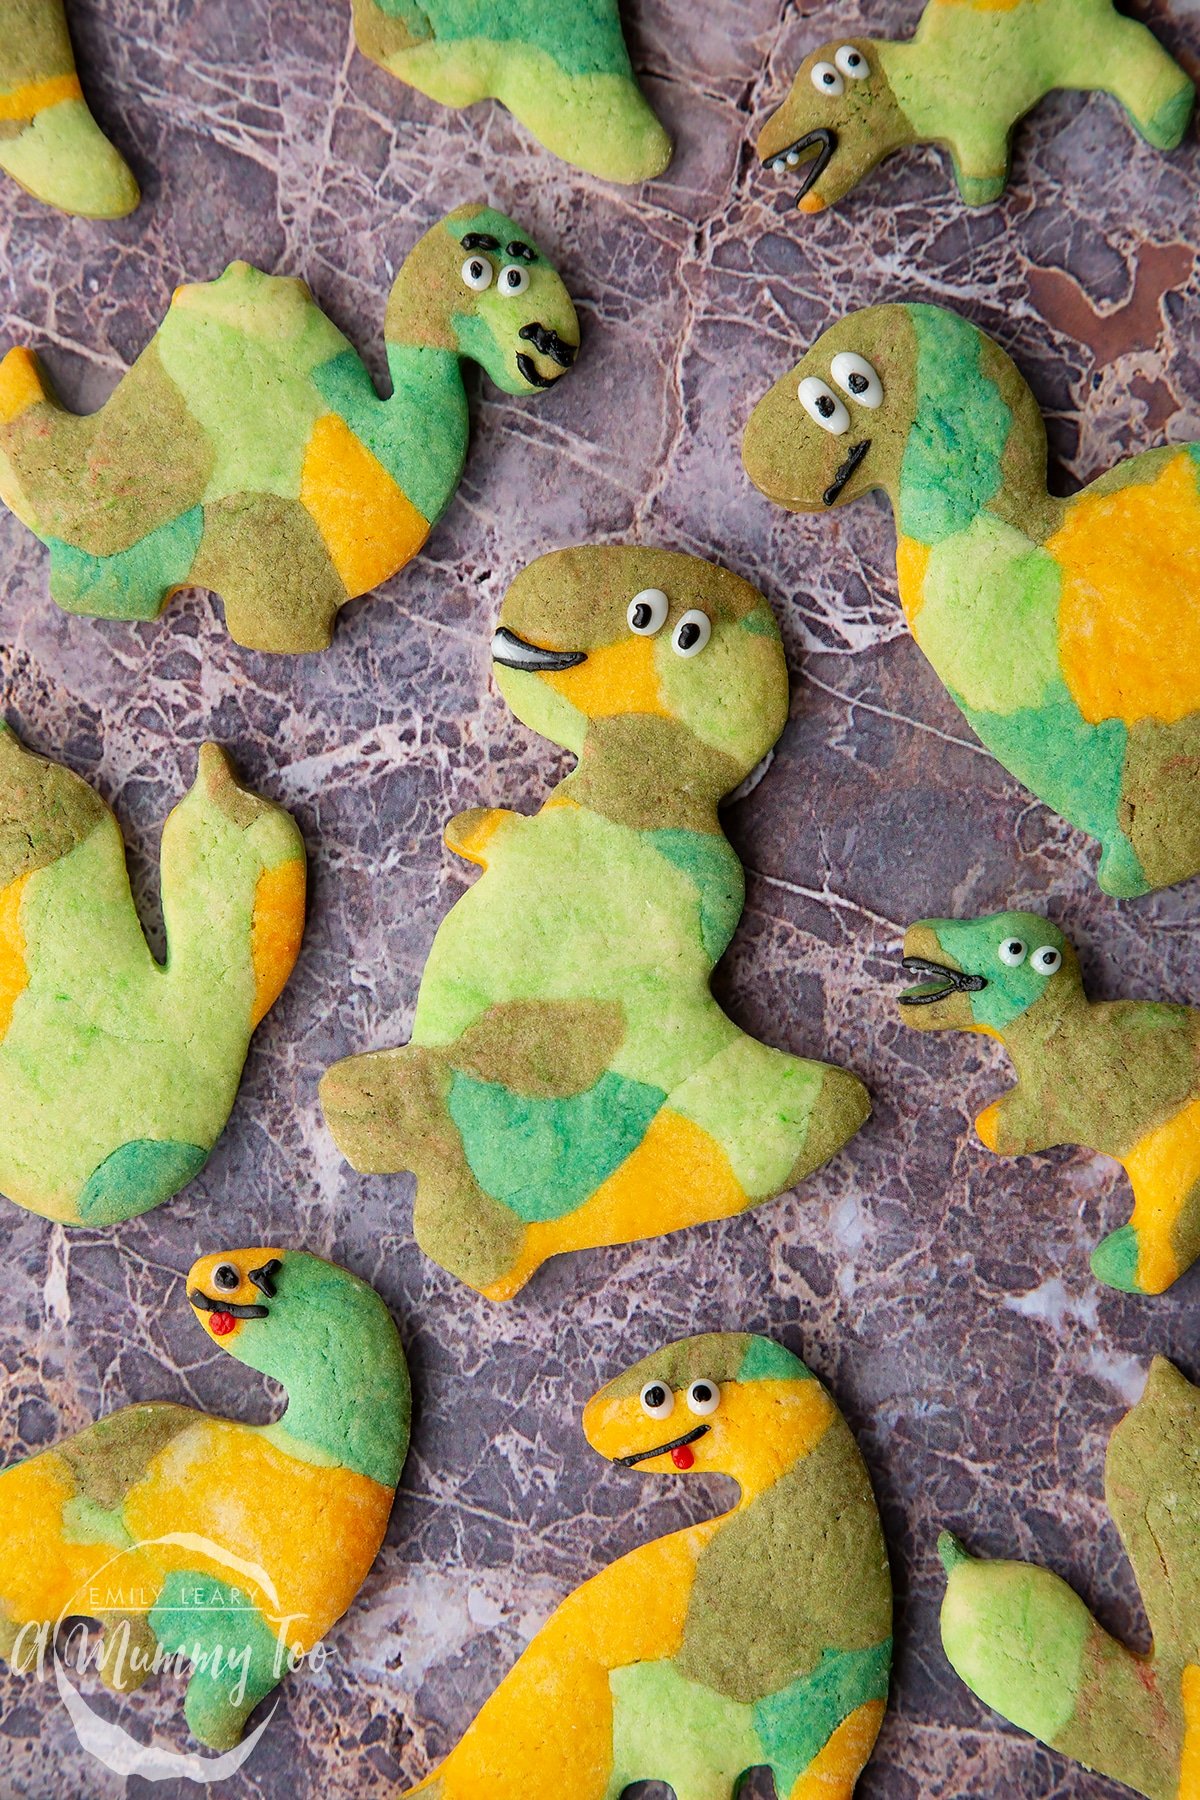
The little dinosaur sugar cookies take just 8 minutes to bake and cool really quickly, so in no time they'll be ready to decorate. As you can see, we've kept things really simple, just adding some facial features to give each dinosaur its own unique personality!
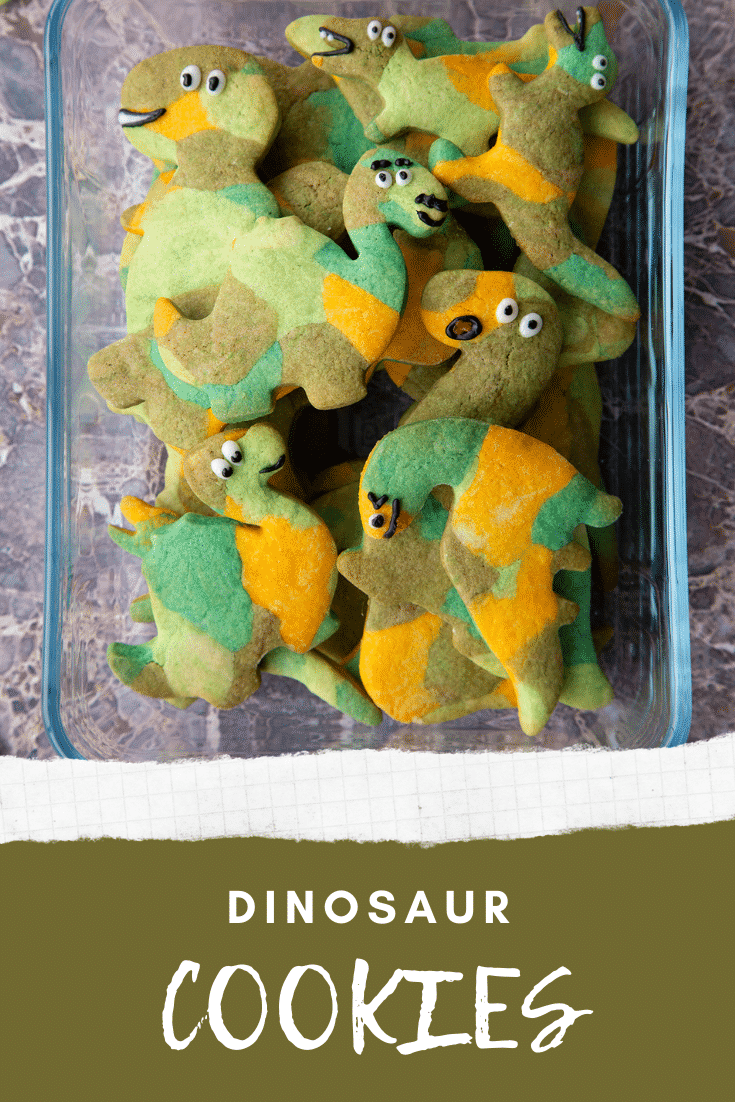
This recipe makes a good sized batch, so it's perfect for dinosaur-themed parties. Which design is your favourite?
Here's how to make my cute, simple dinosaur cookies.
Ingredients
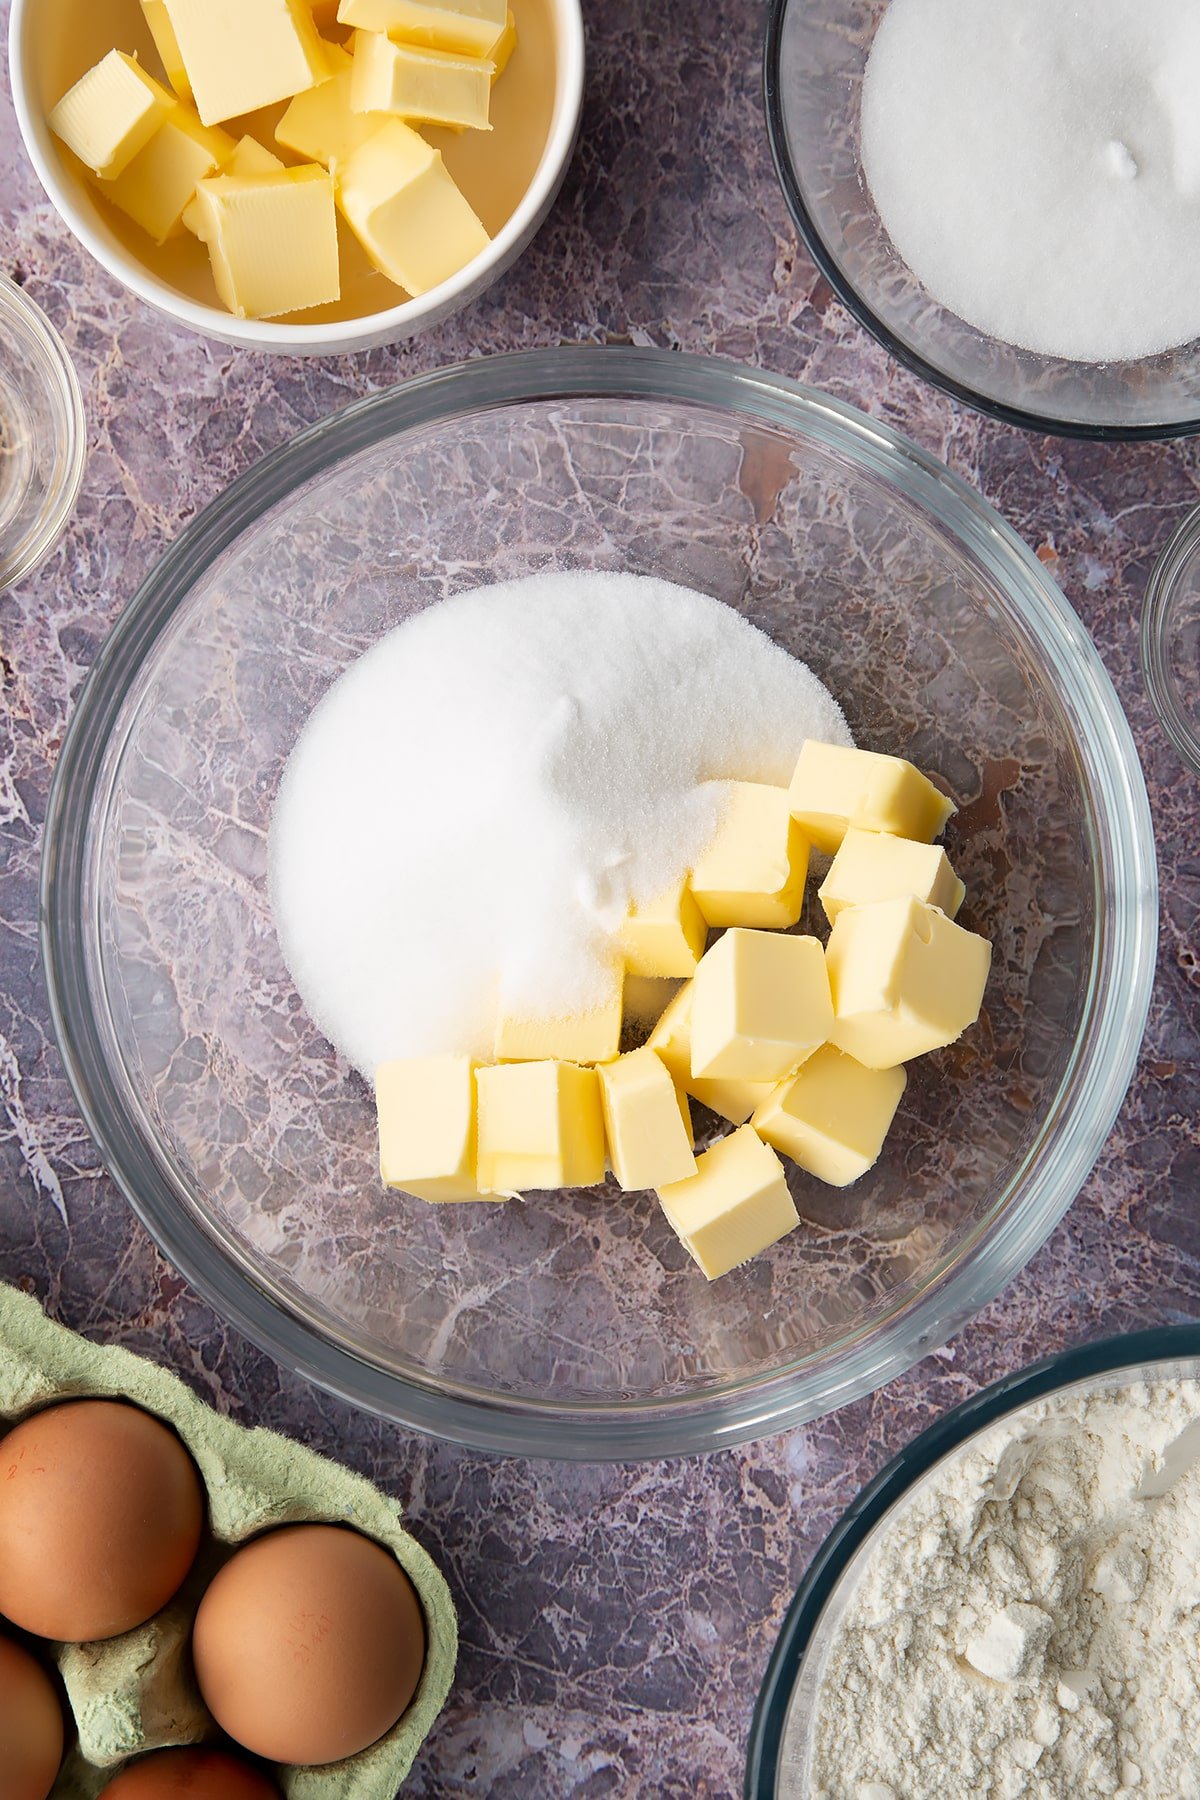
- 110 g (1 stick) margarine
- 100 g (½ cup + 1 tbsp) white caster sugar (superfine sugar)
- 1 medium free range eggs
- ½ tsp vanilla extract
- 250 g (1¾ cups) plain white flour (all purpose flour) plus extra for dusting
- ¼ tsp bicarbonate of soda (baking soda)
- ¼ tsp baking powder
- ¼ tsp salt leave out if using salted butter
- writing icing pens black, white and red
- food colouring green, blue, red and yellow
Instructions
Preheat the oven to 200C (180C fan assisted, 400F).
Put the butter and sugar in a bowl.
Whisk together until fluffy.

Add the egg and vanilla.
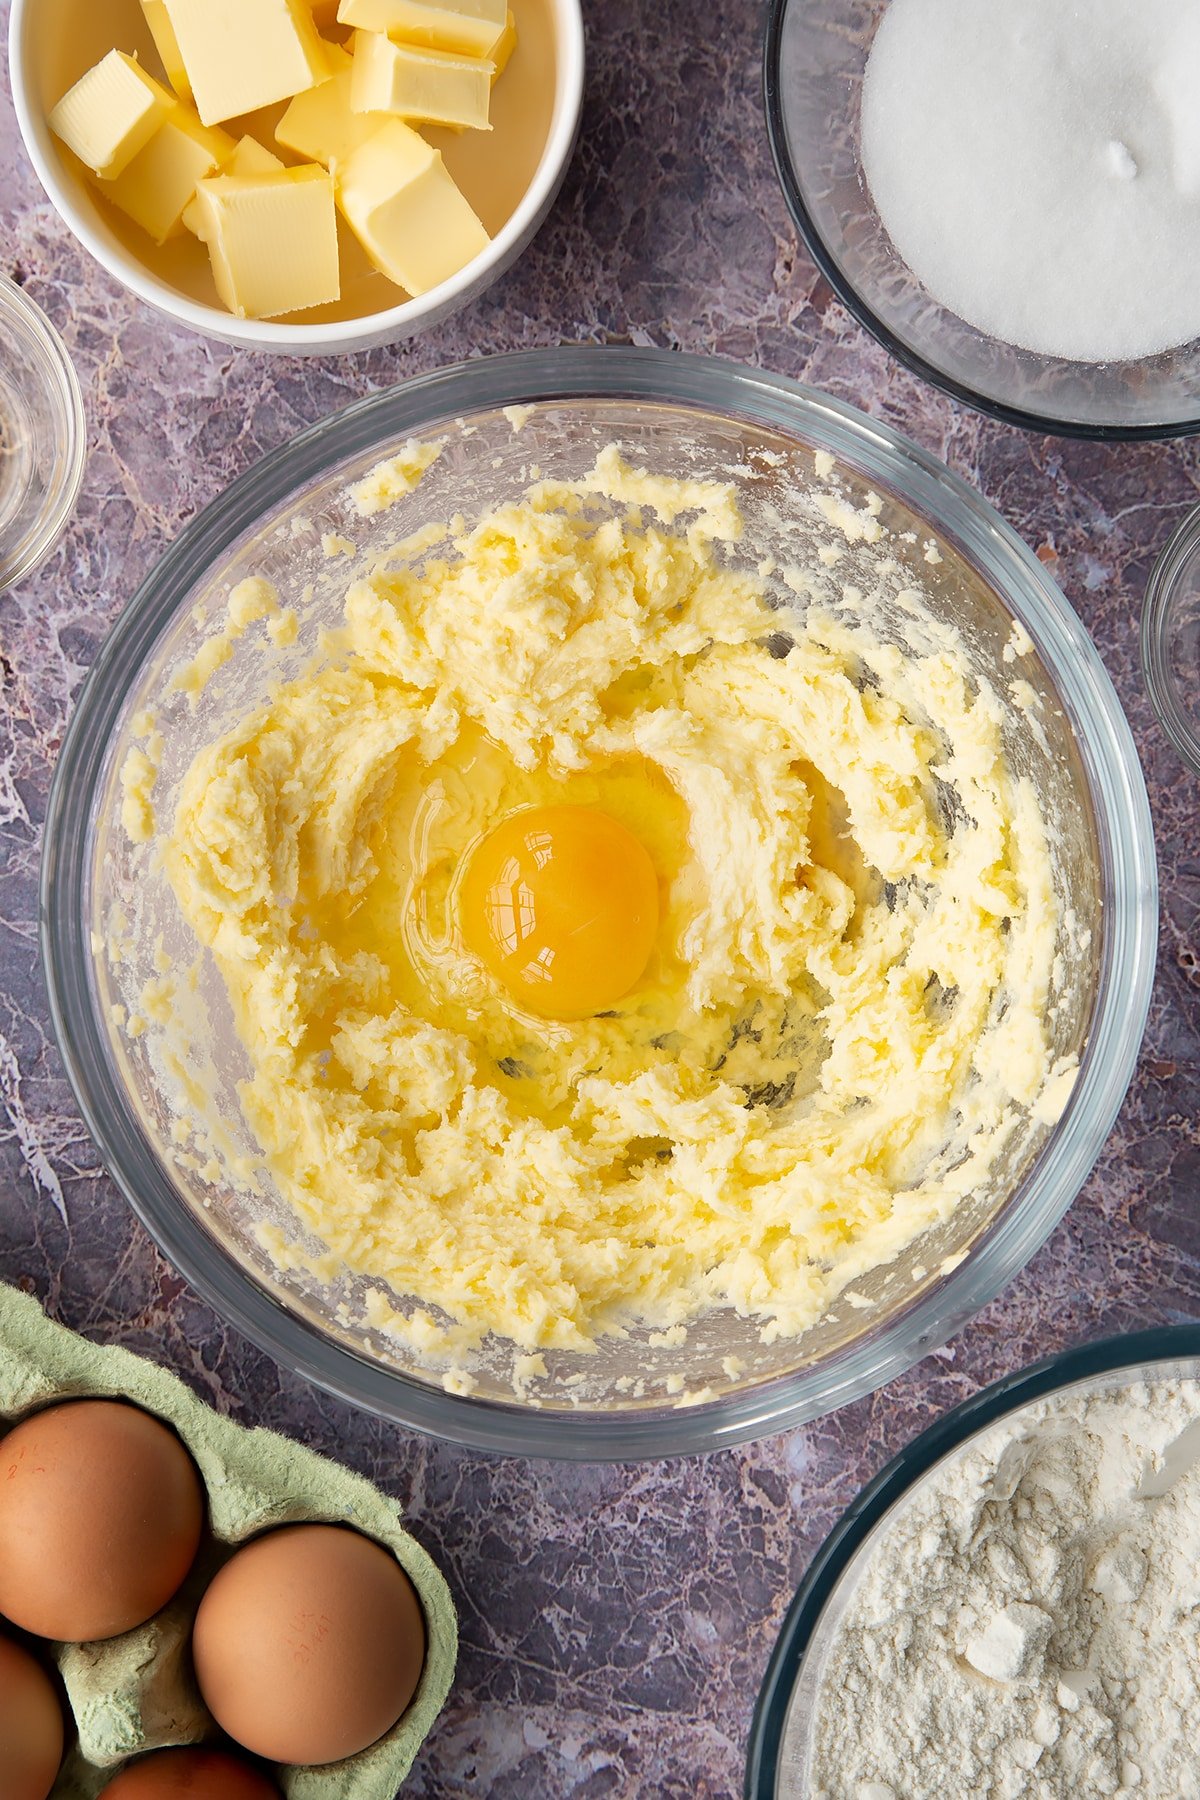
Whisk together.
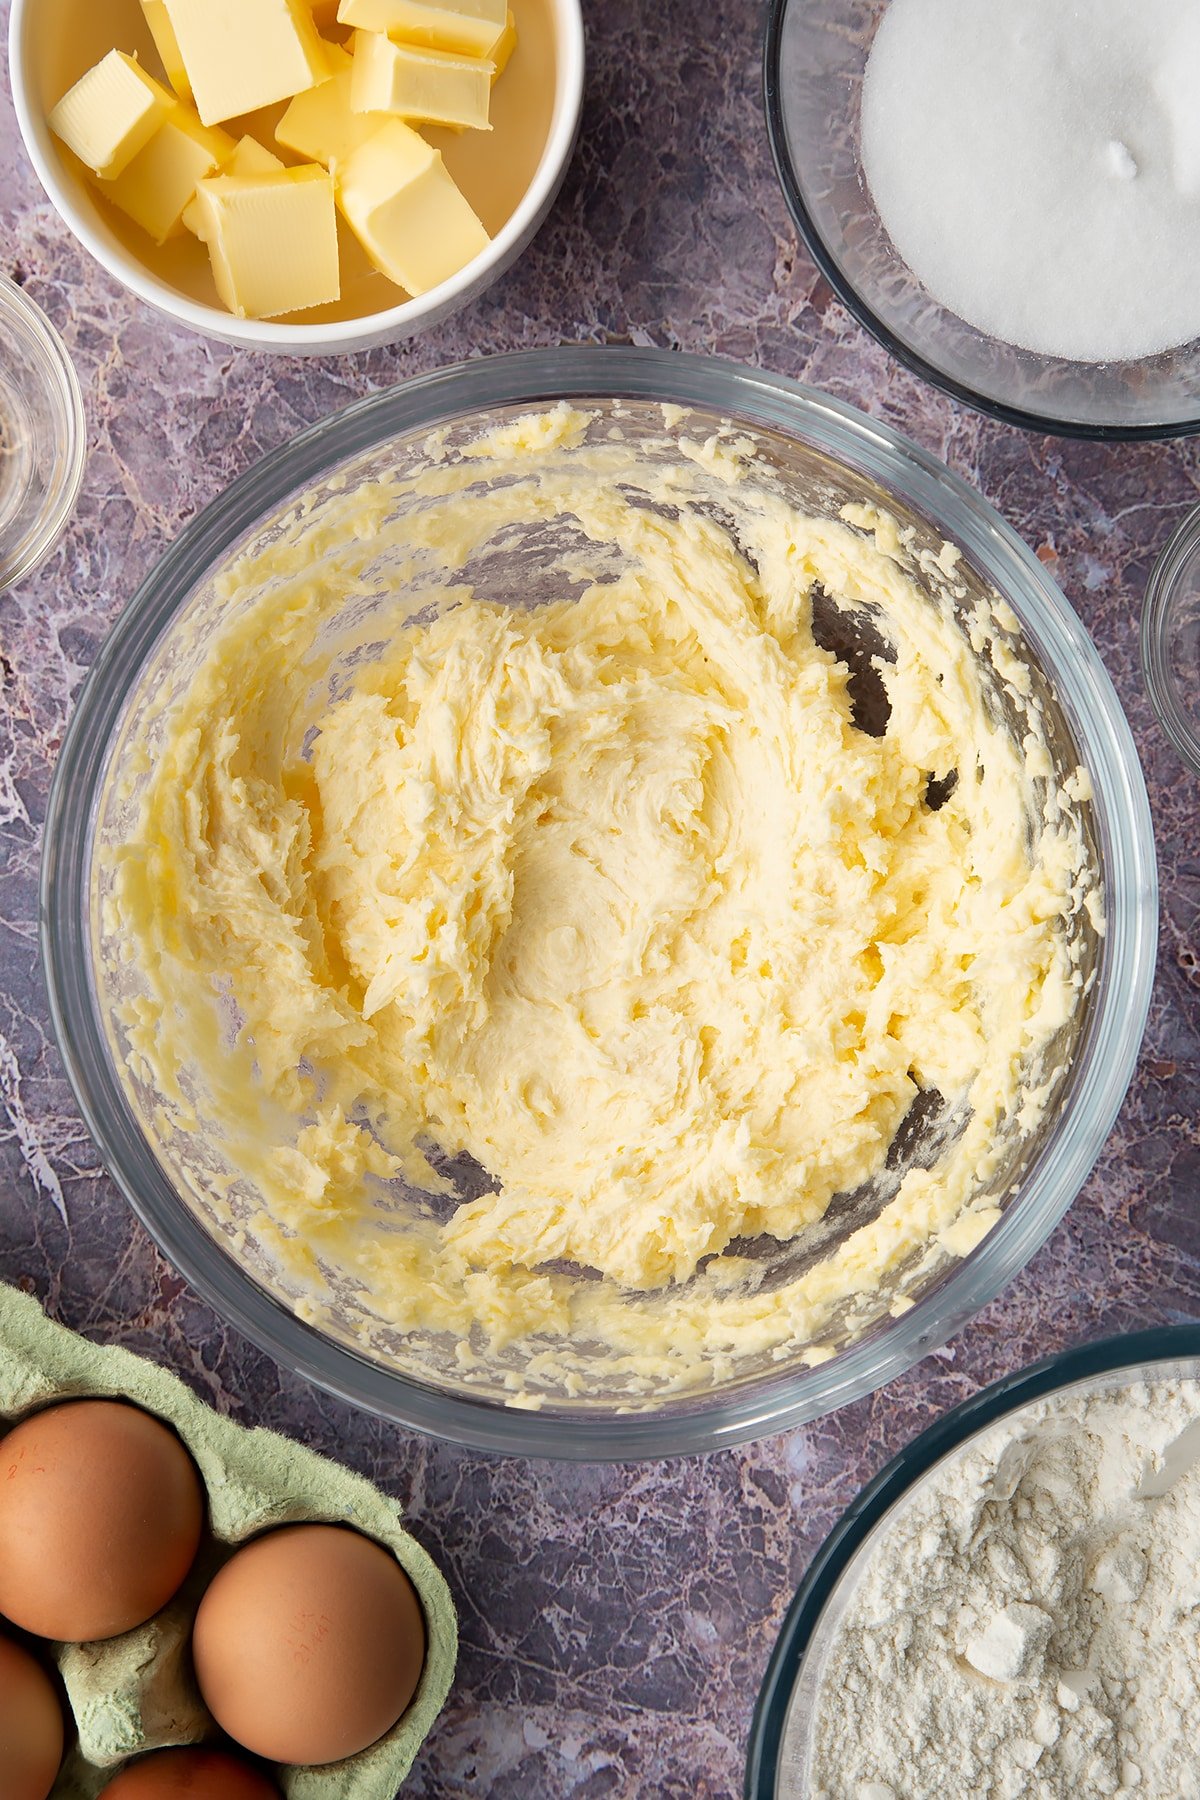
Add the flour, baking powder, bicarbonate of soda and salt (if using).
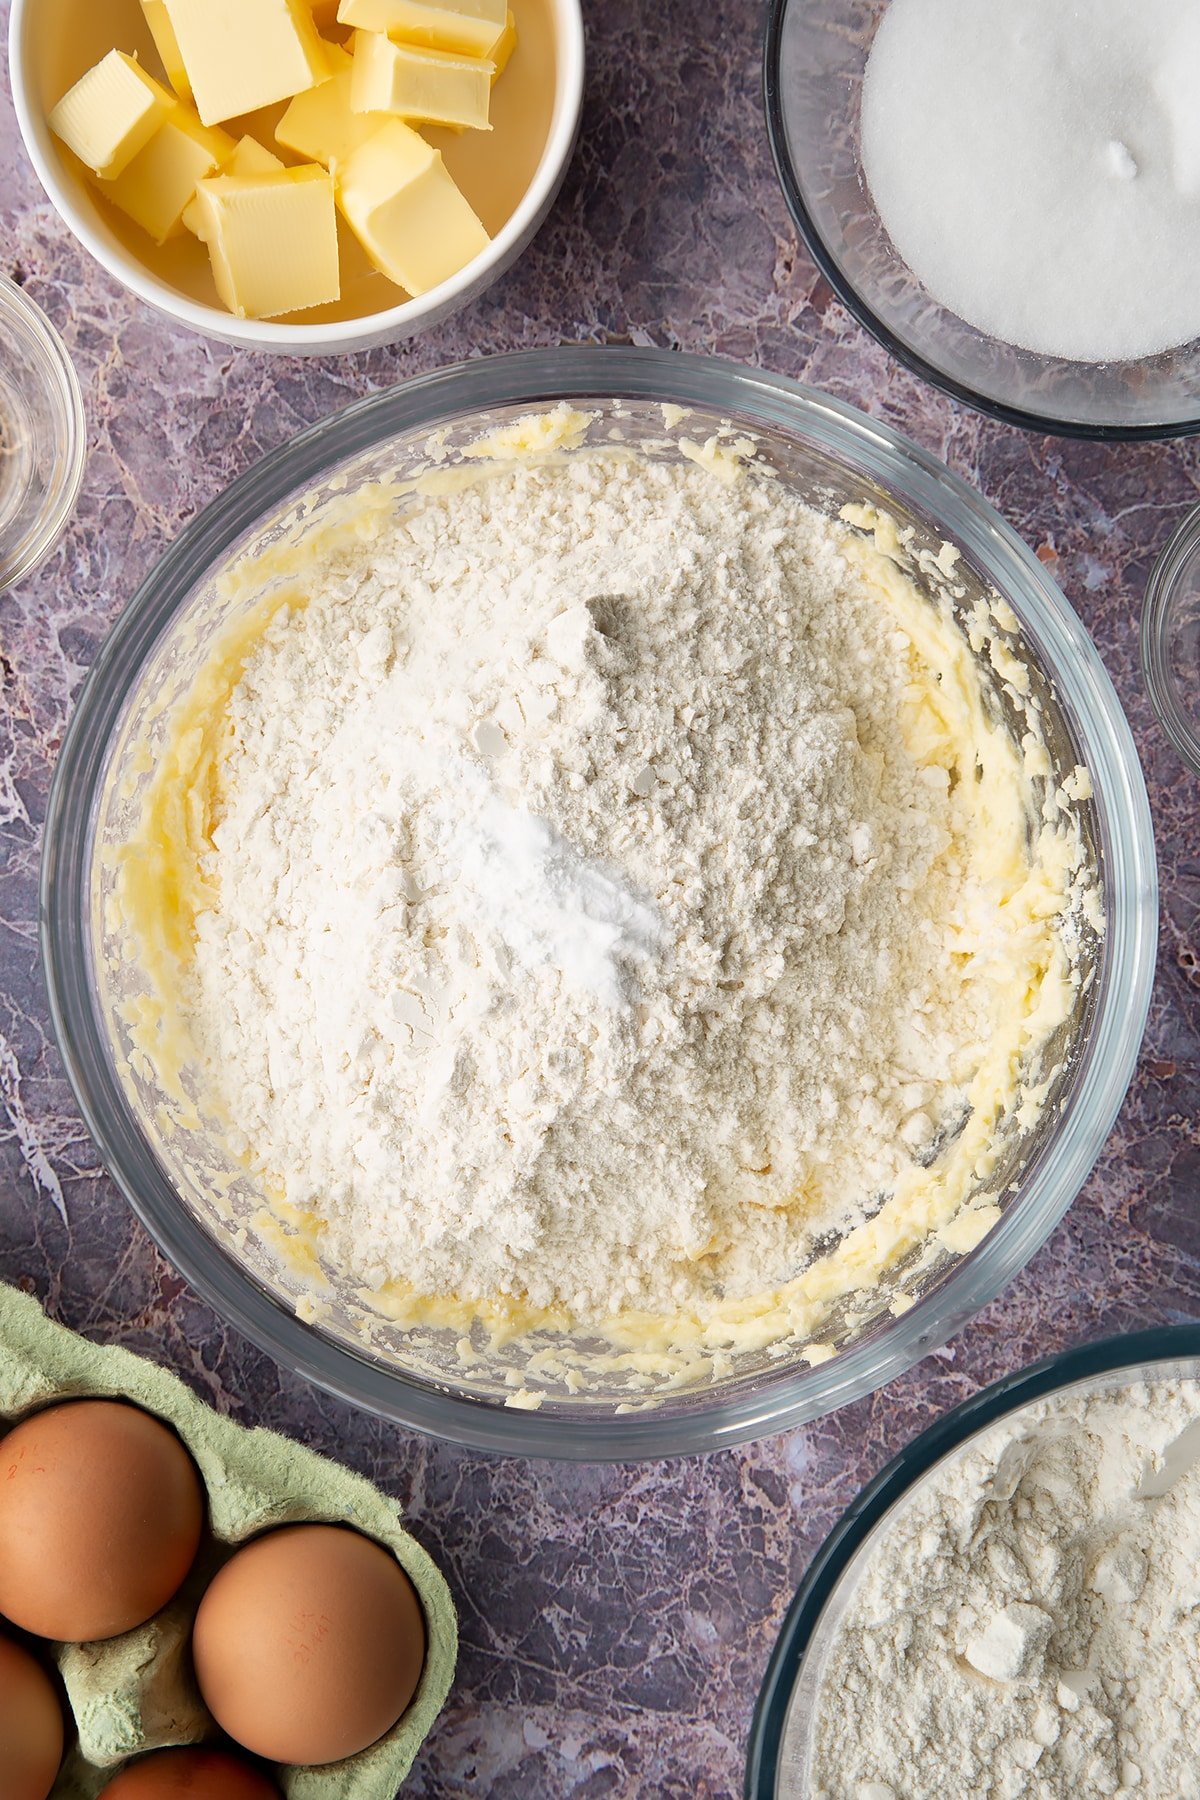
Mix until evenly combined and starting to clump.
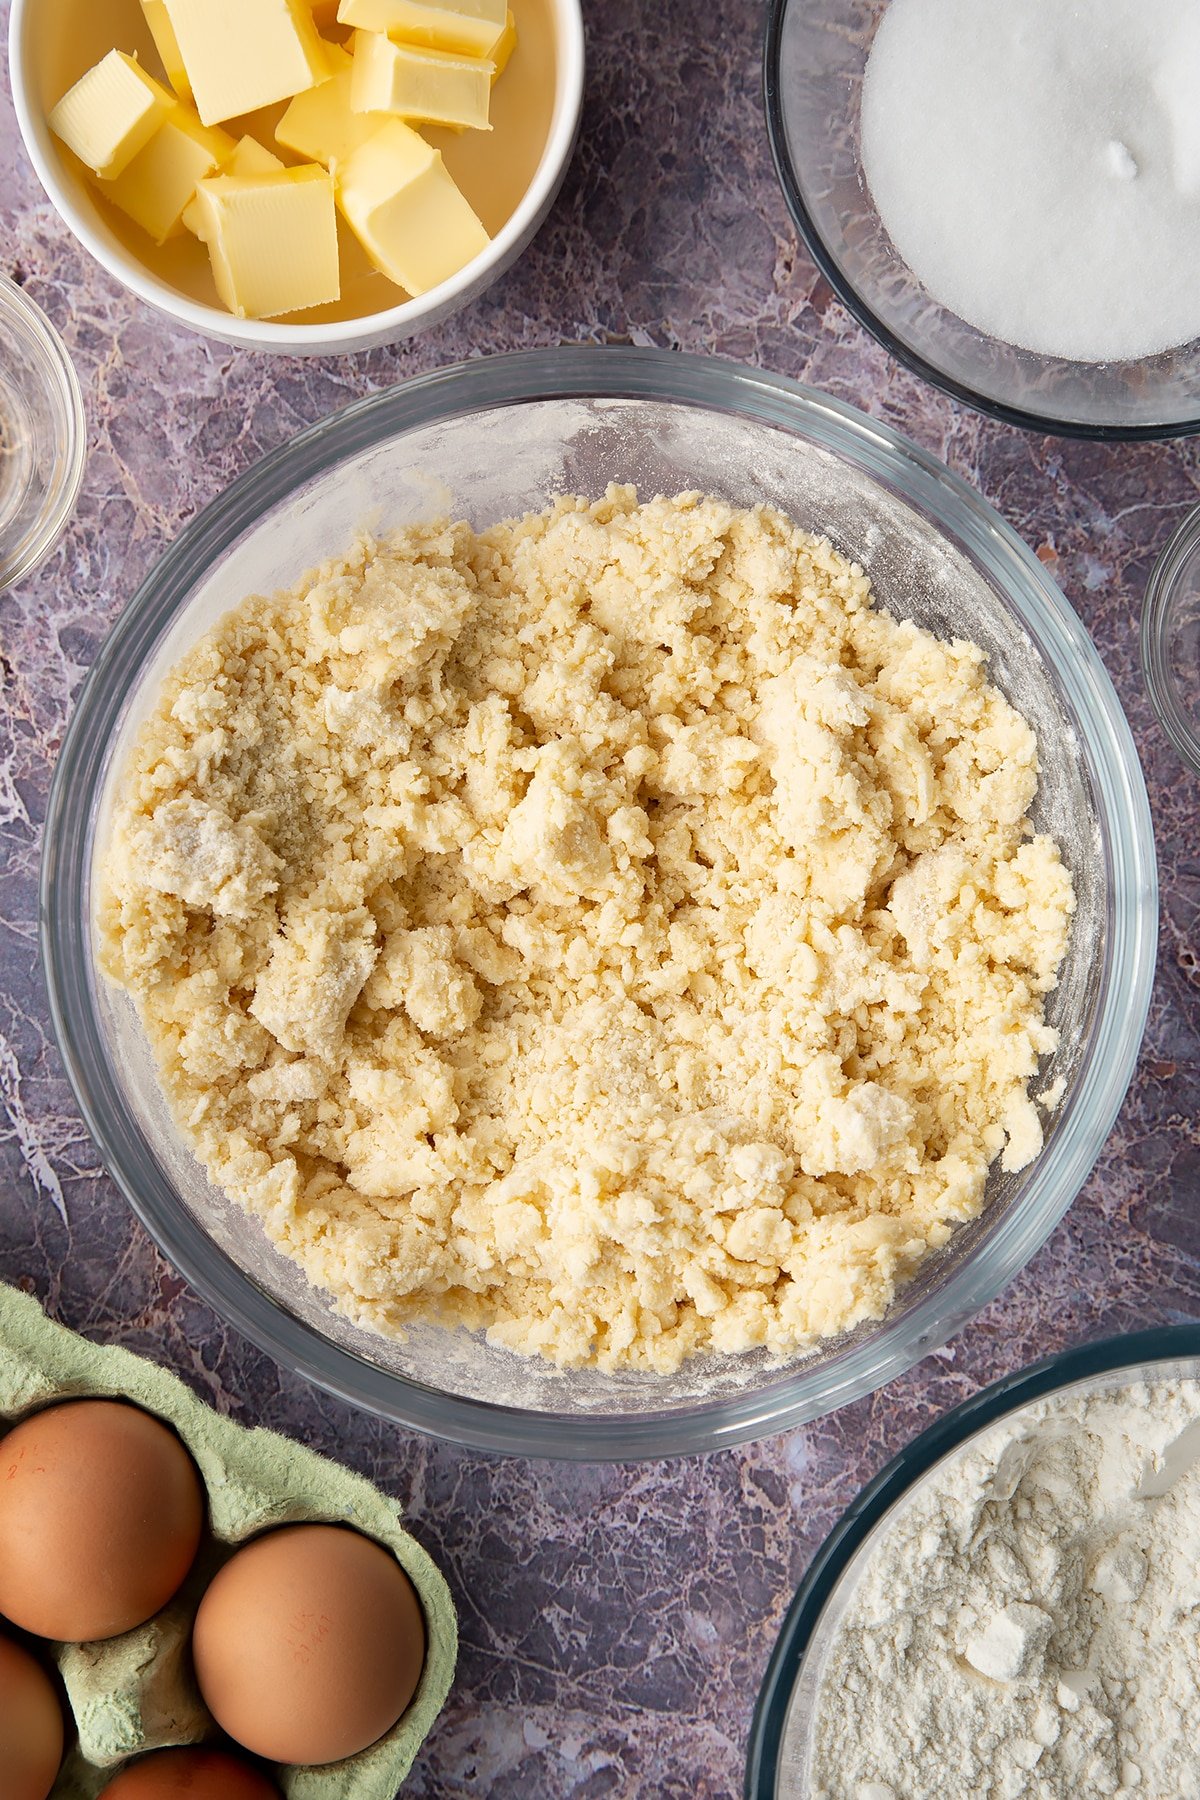
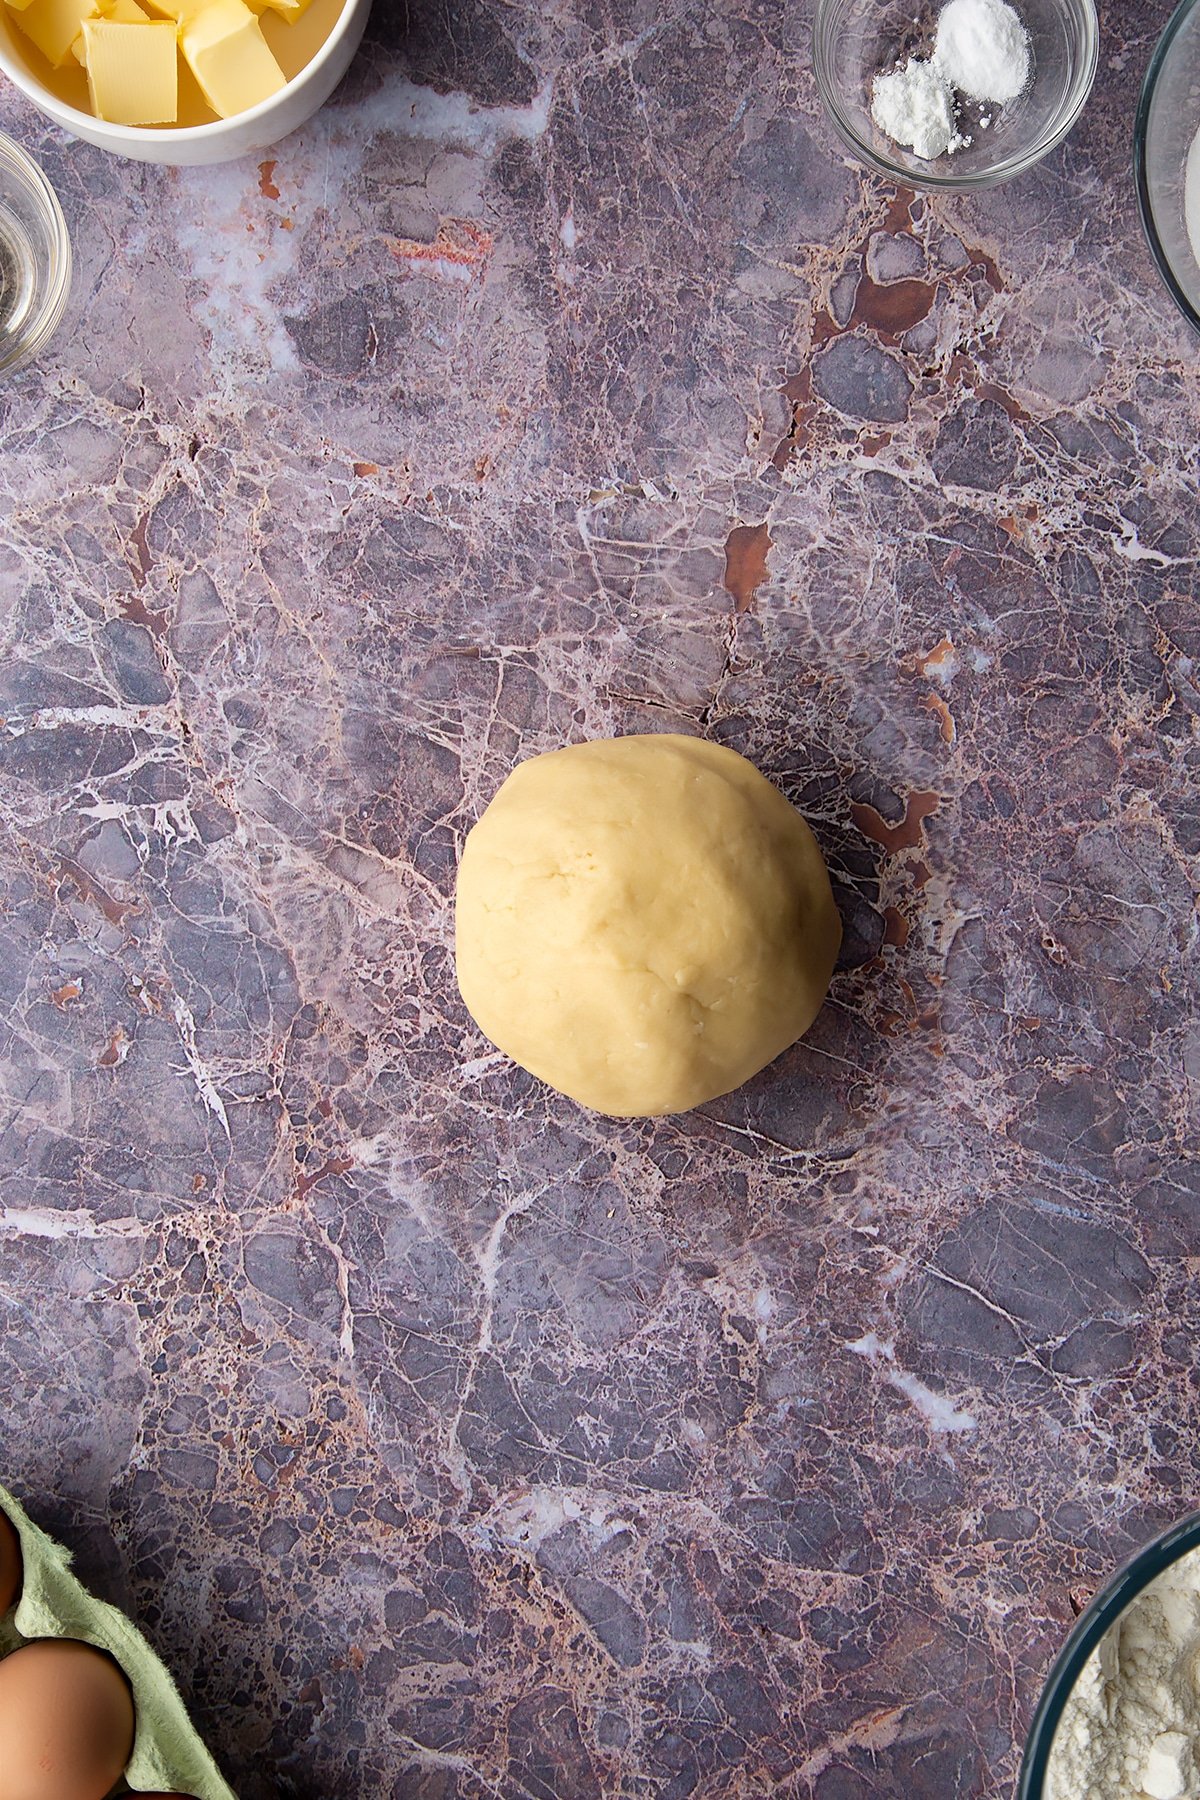
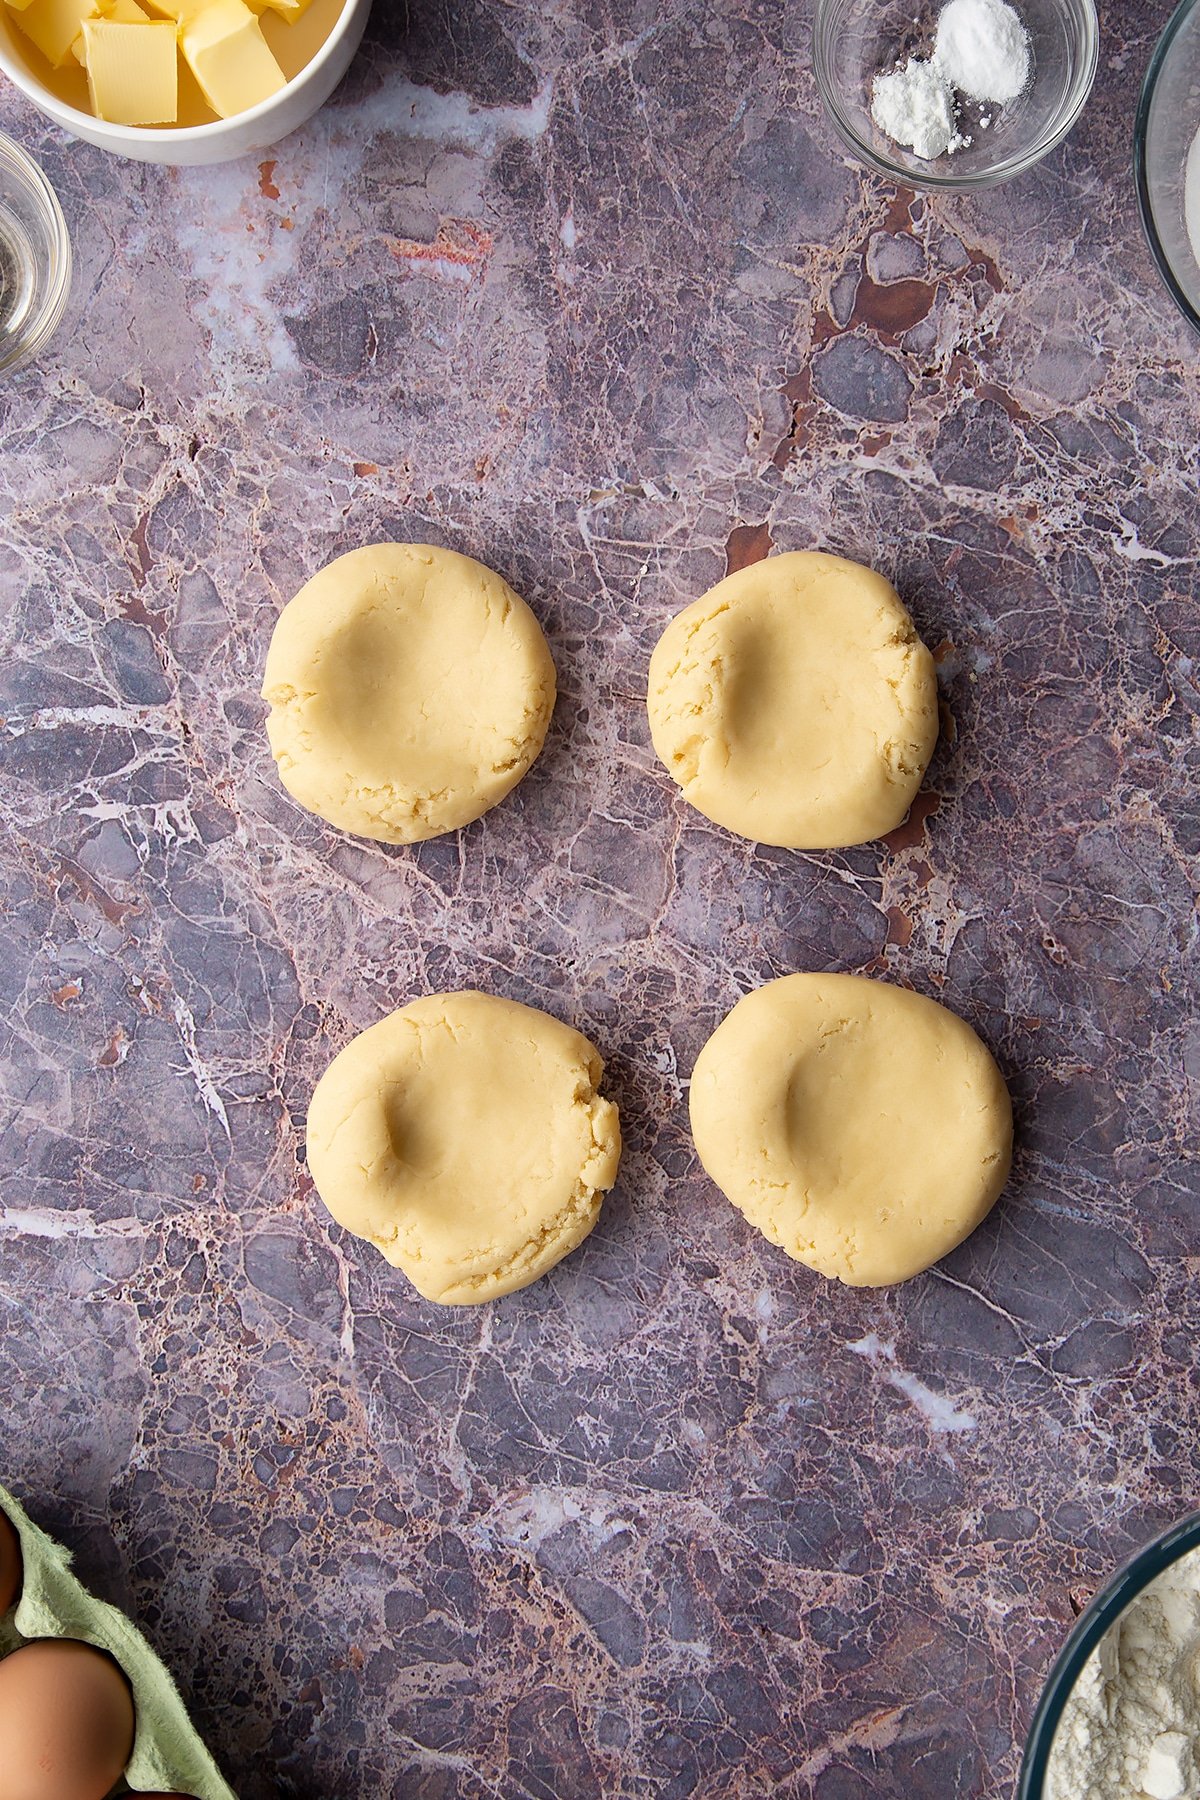
Turn out onto an un-floured board and knead only as much as it takes to get a smooth ball of dough.
Divide the dough into four.
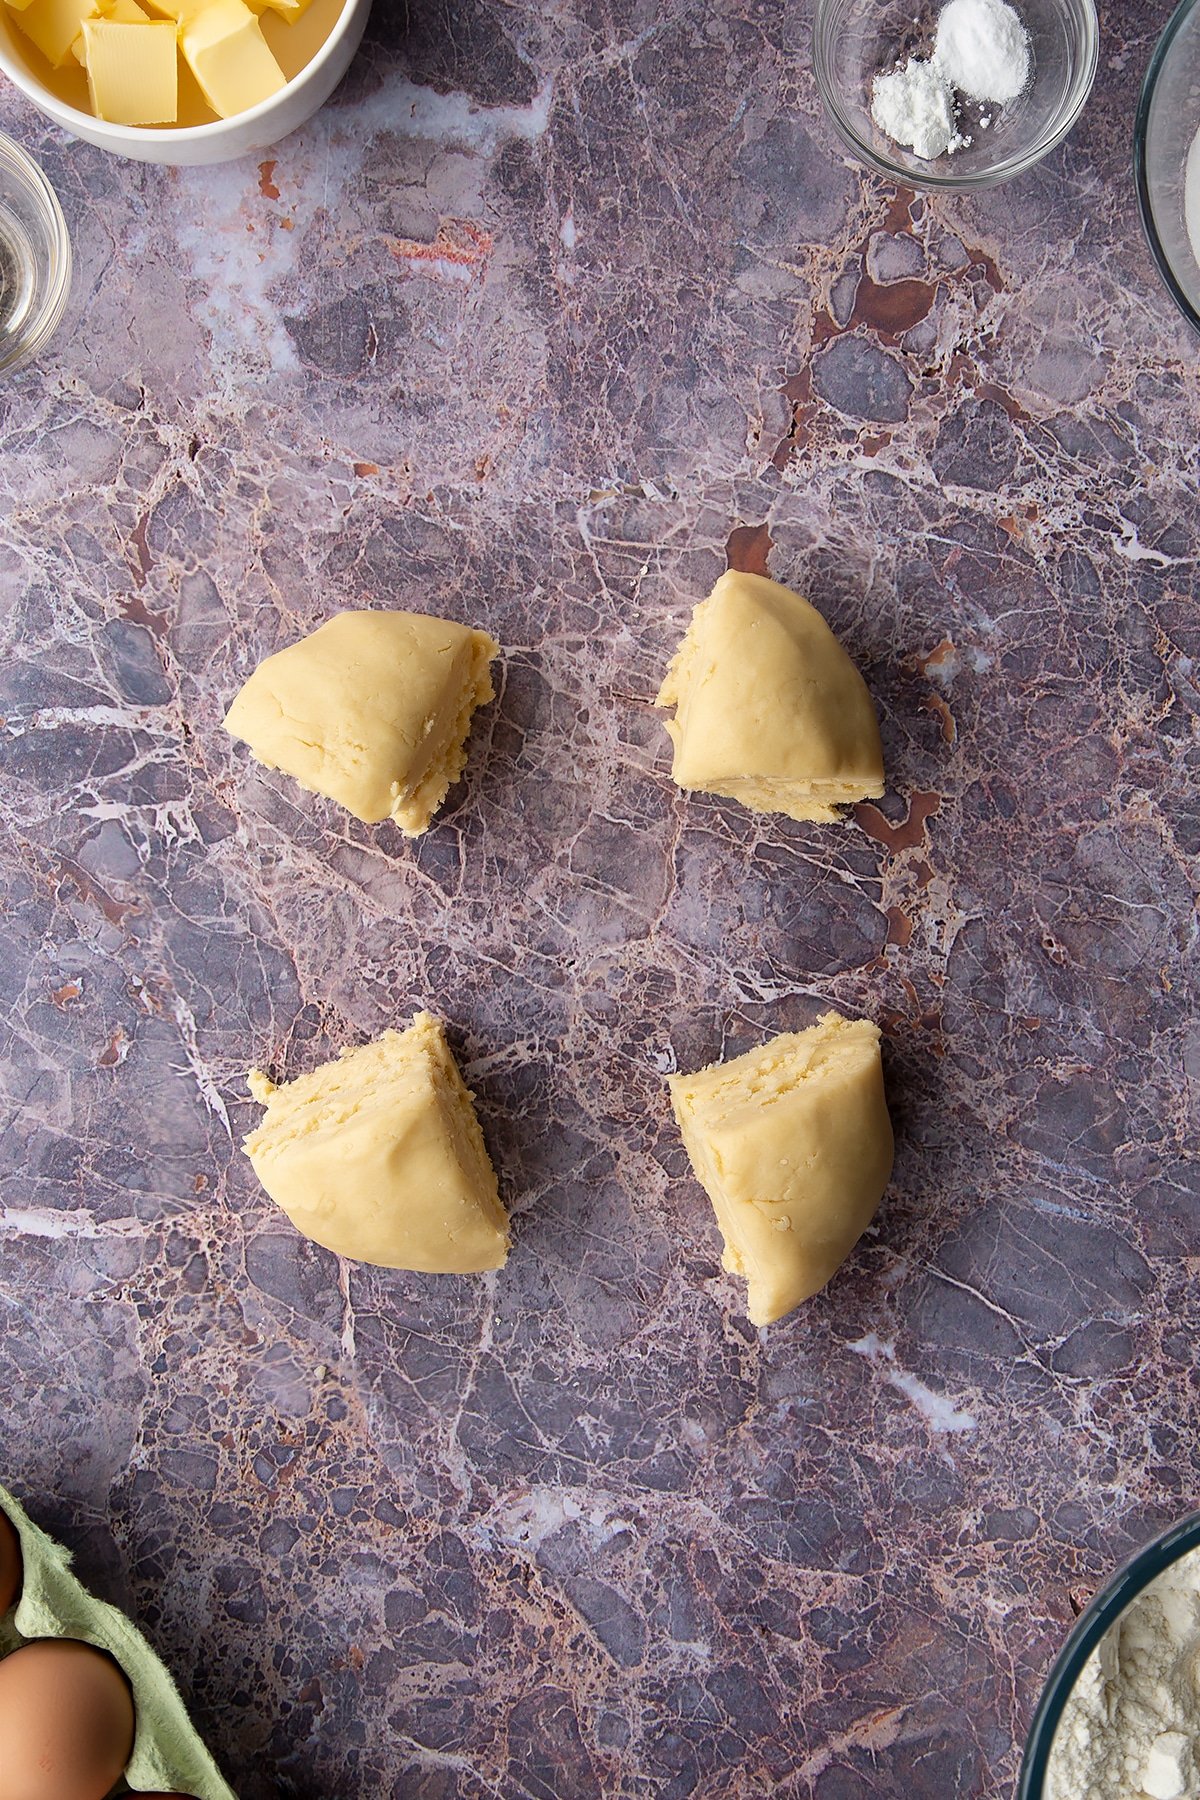
Roll each into flattened discs.
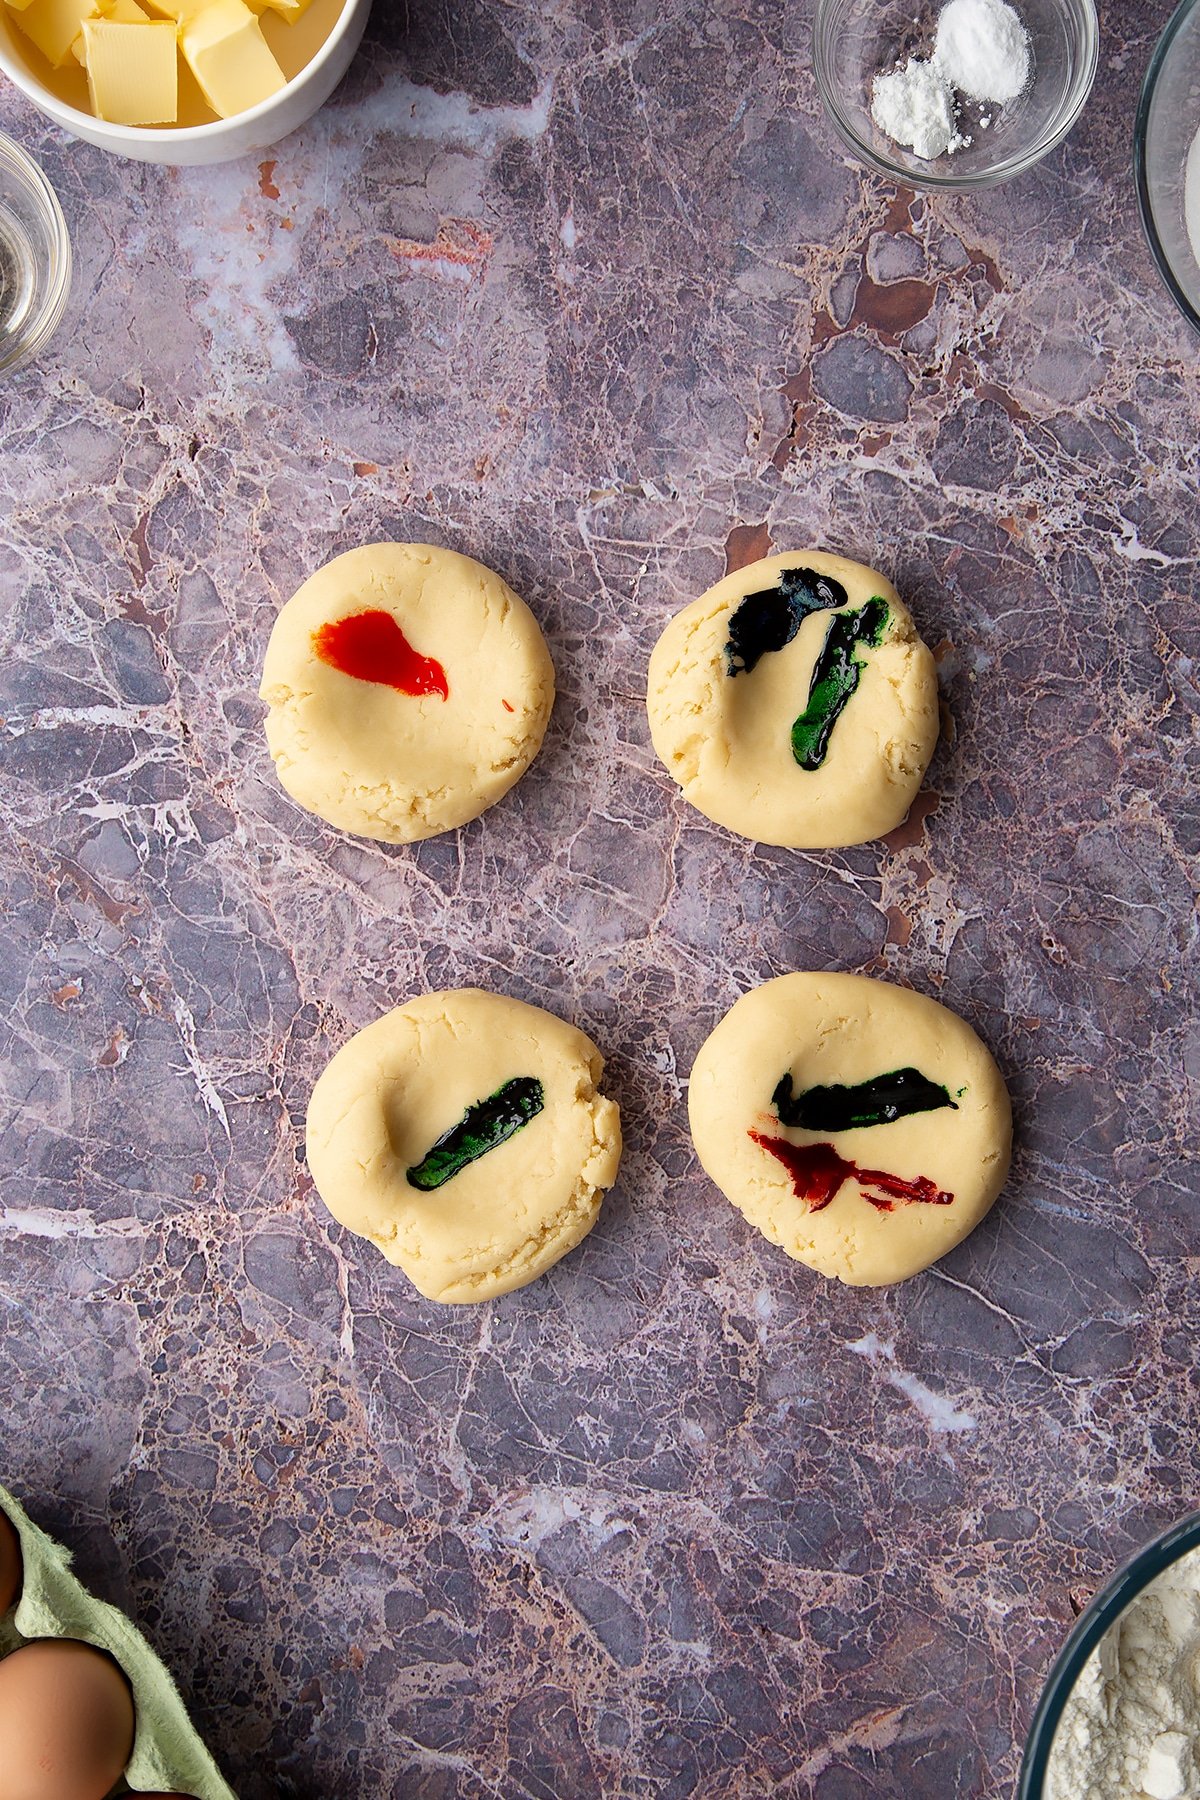
Add food colouring to each to give different shades I used the following for each ball of dough: 1) yellow 2) green 3) green and blue 4) green and red.
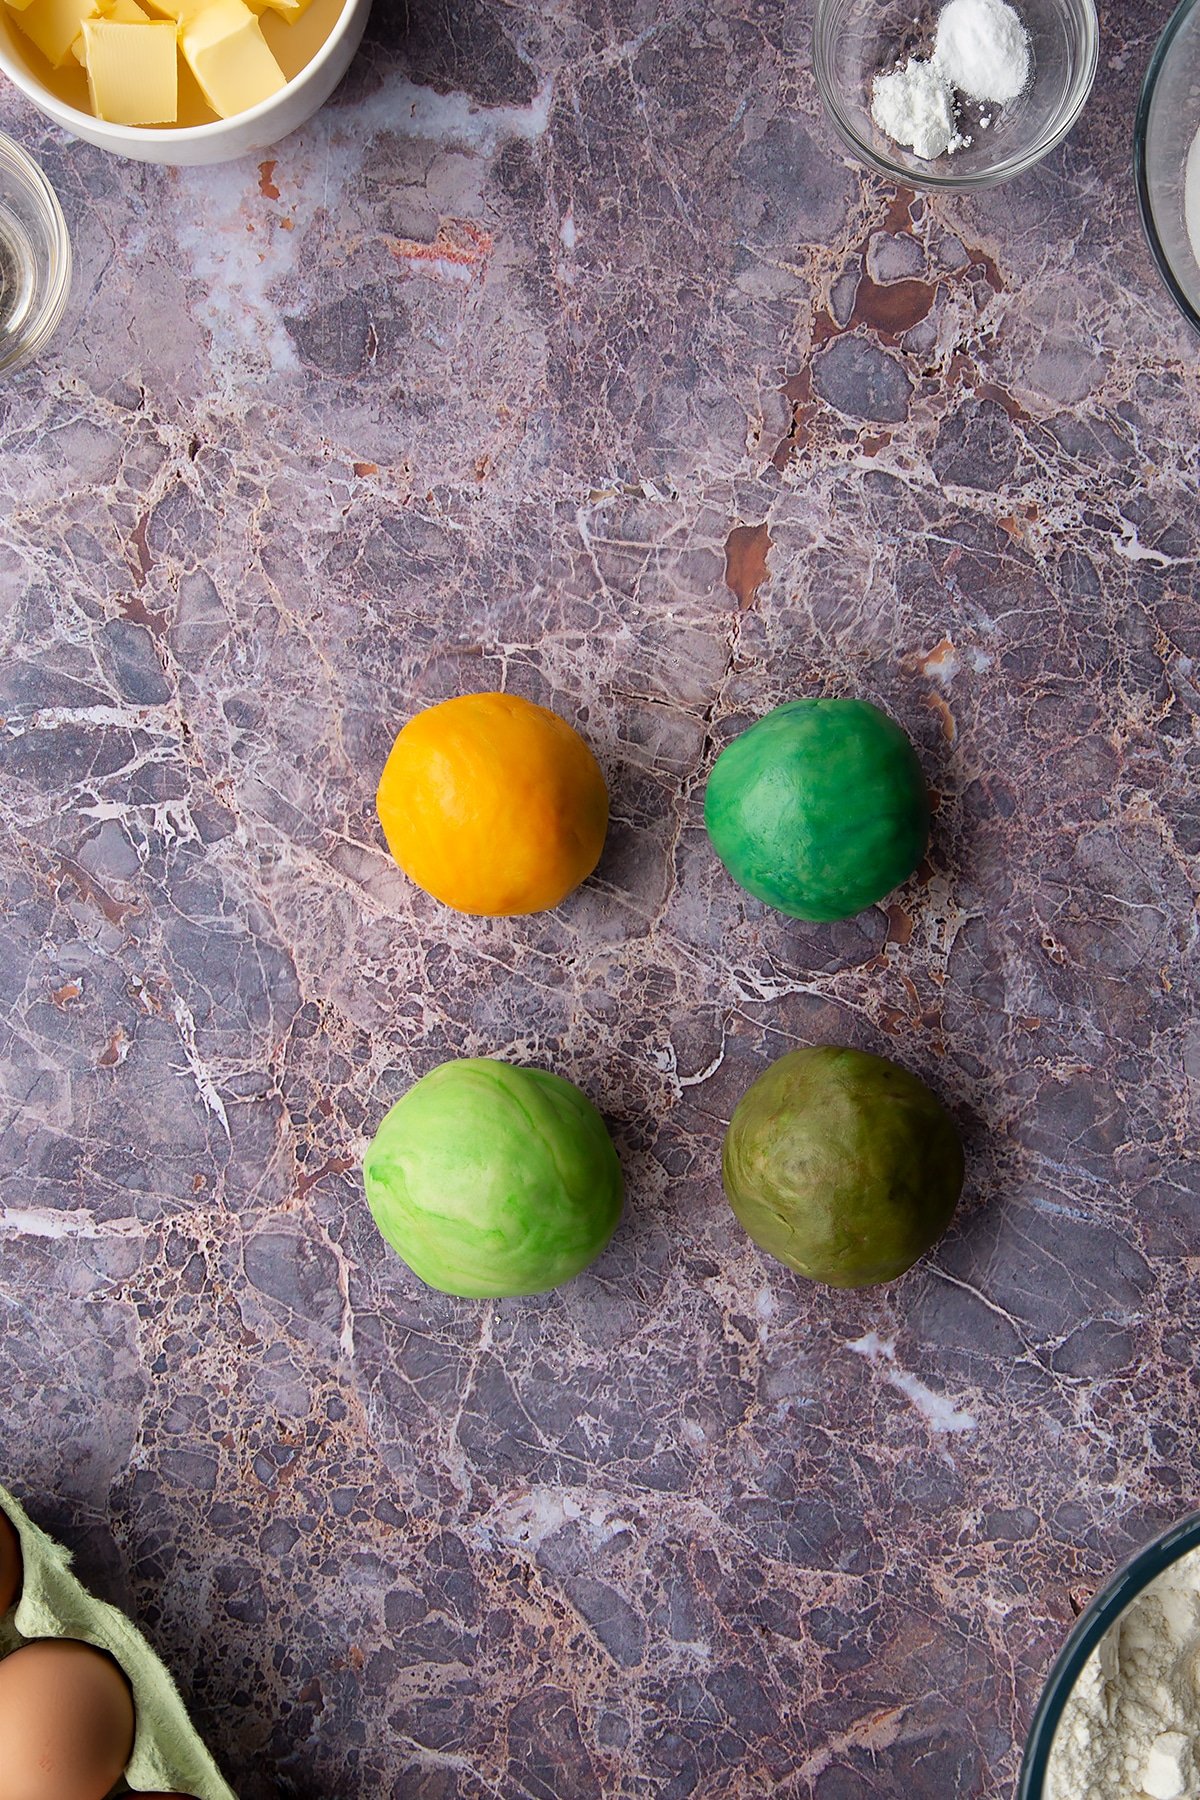
Knead each ball, folding until the colour is distributed - it's fine if it's a little streaky as this will add to the effect.
If the dough balls feels too soft (this can happen if your kitchen is warm) then wrap and pop them the fridge to rest and cool for 15 minutes.
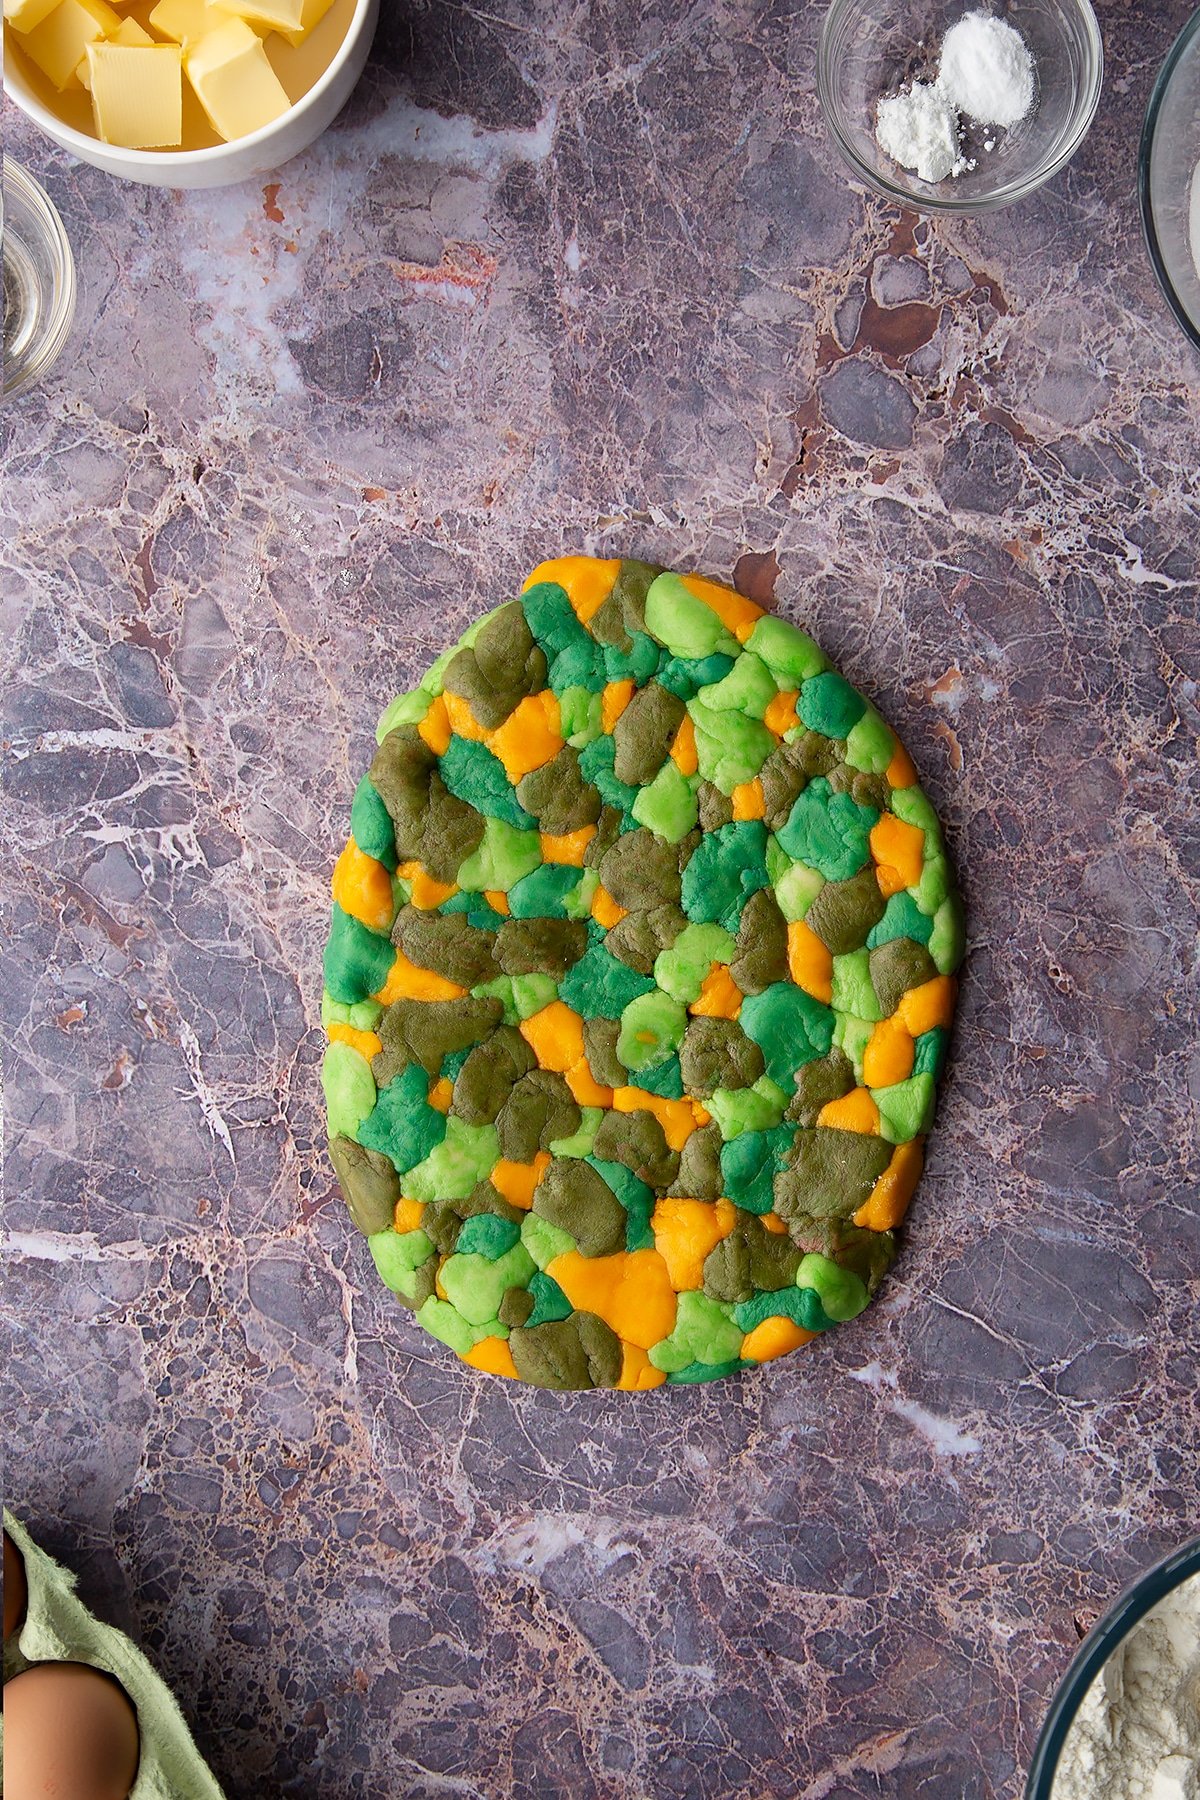
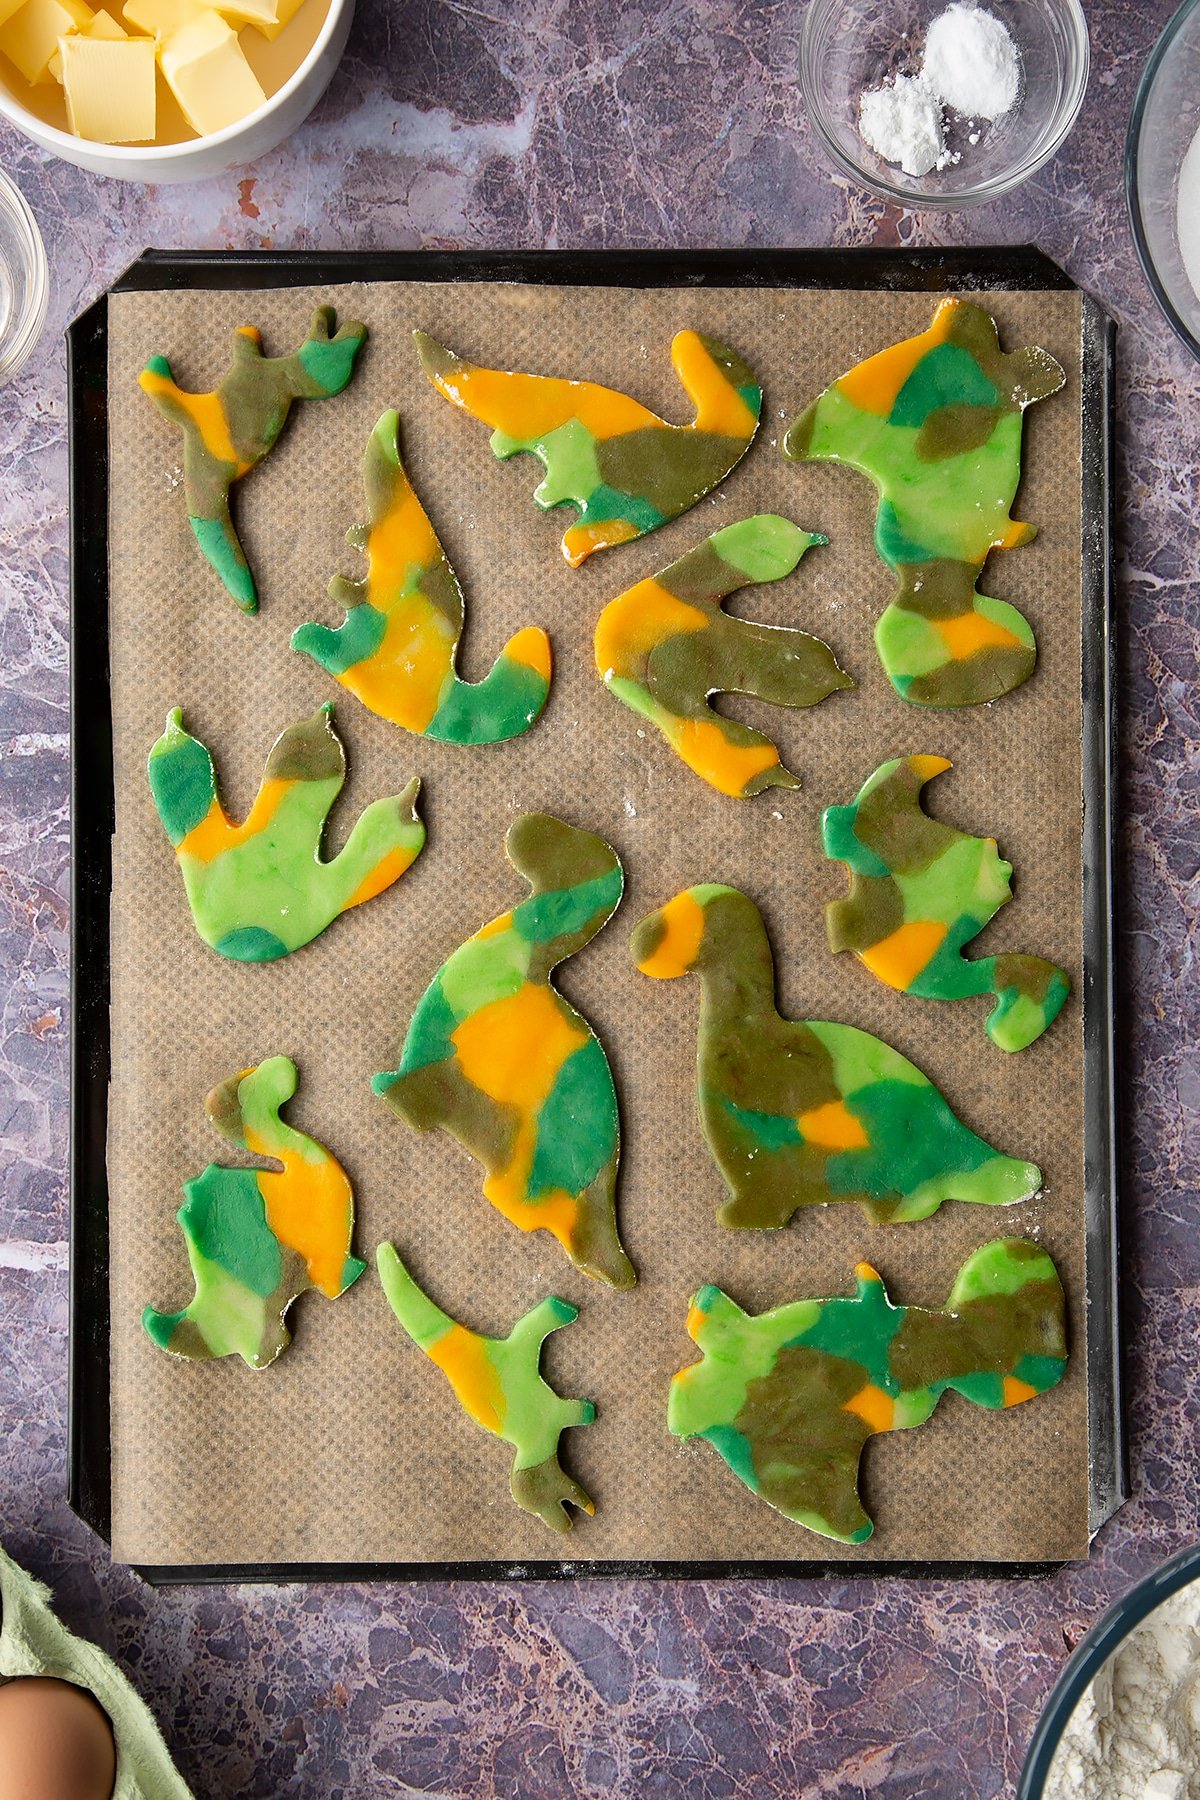
Flour your surface lightly, then start to tear small pieces of dough off each colour and dot them around to create a sort of camouflage pattern.
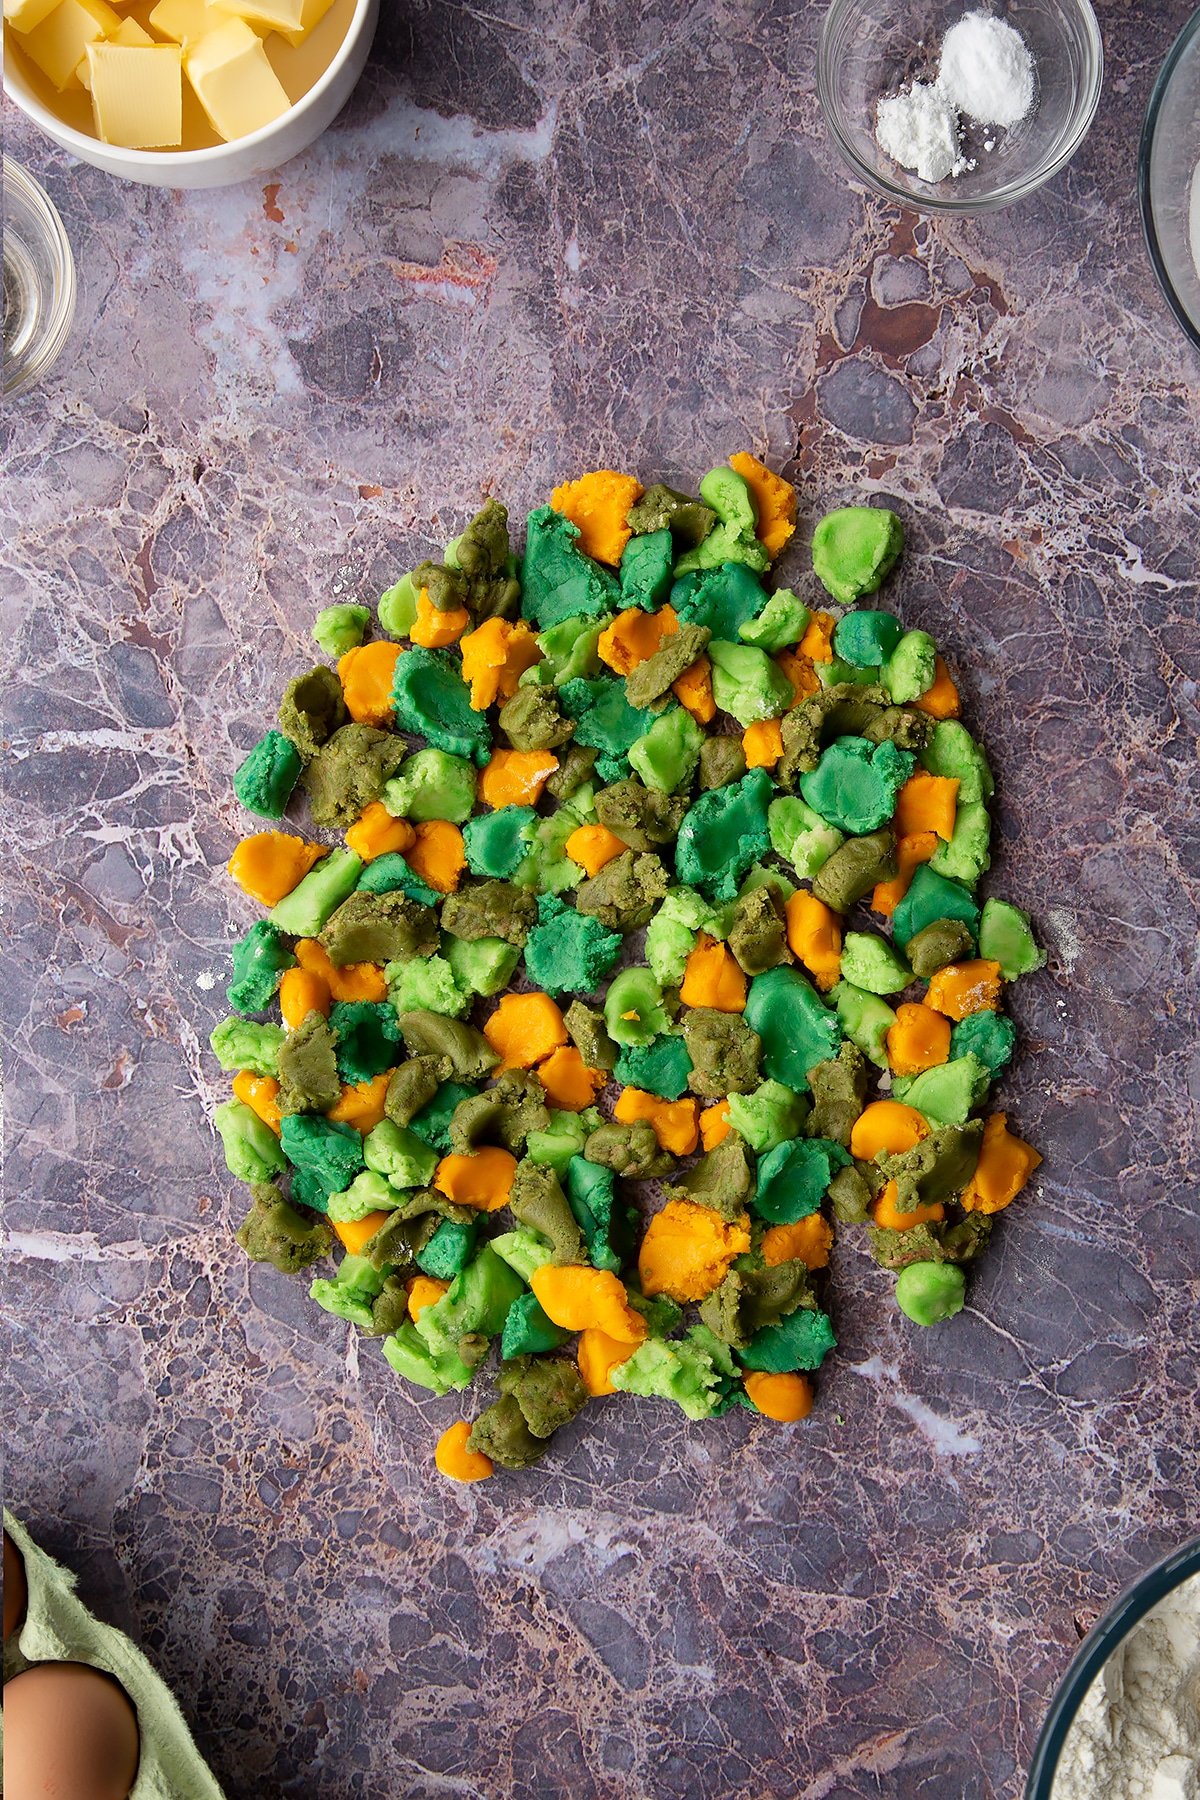
Gather the dough together into a slab.
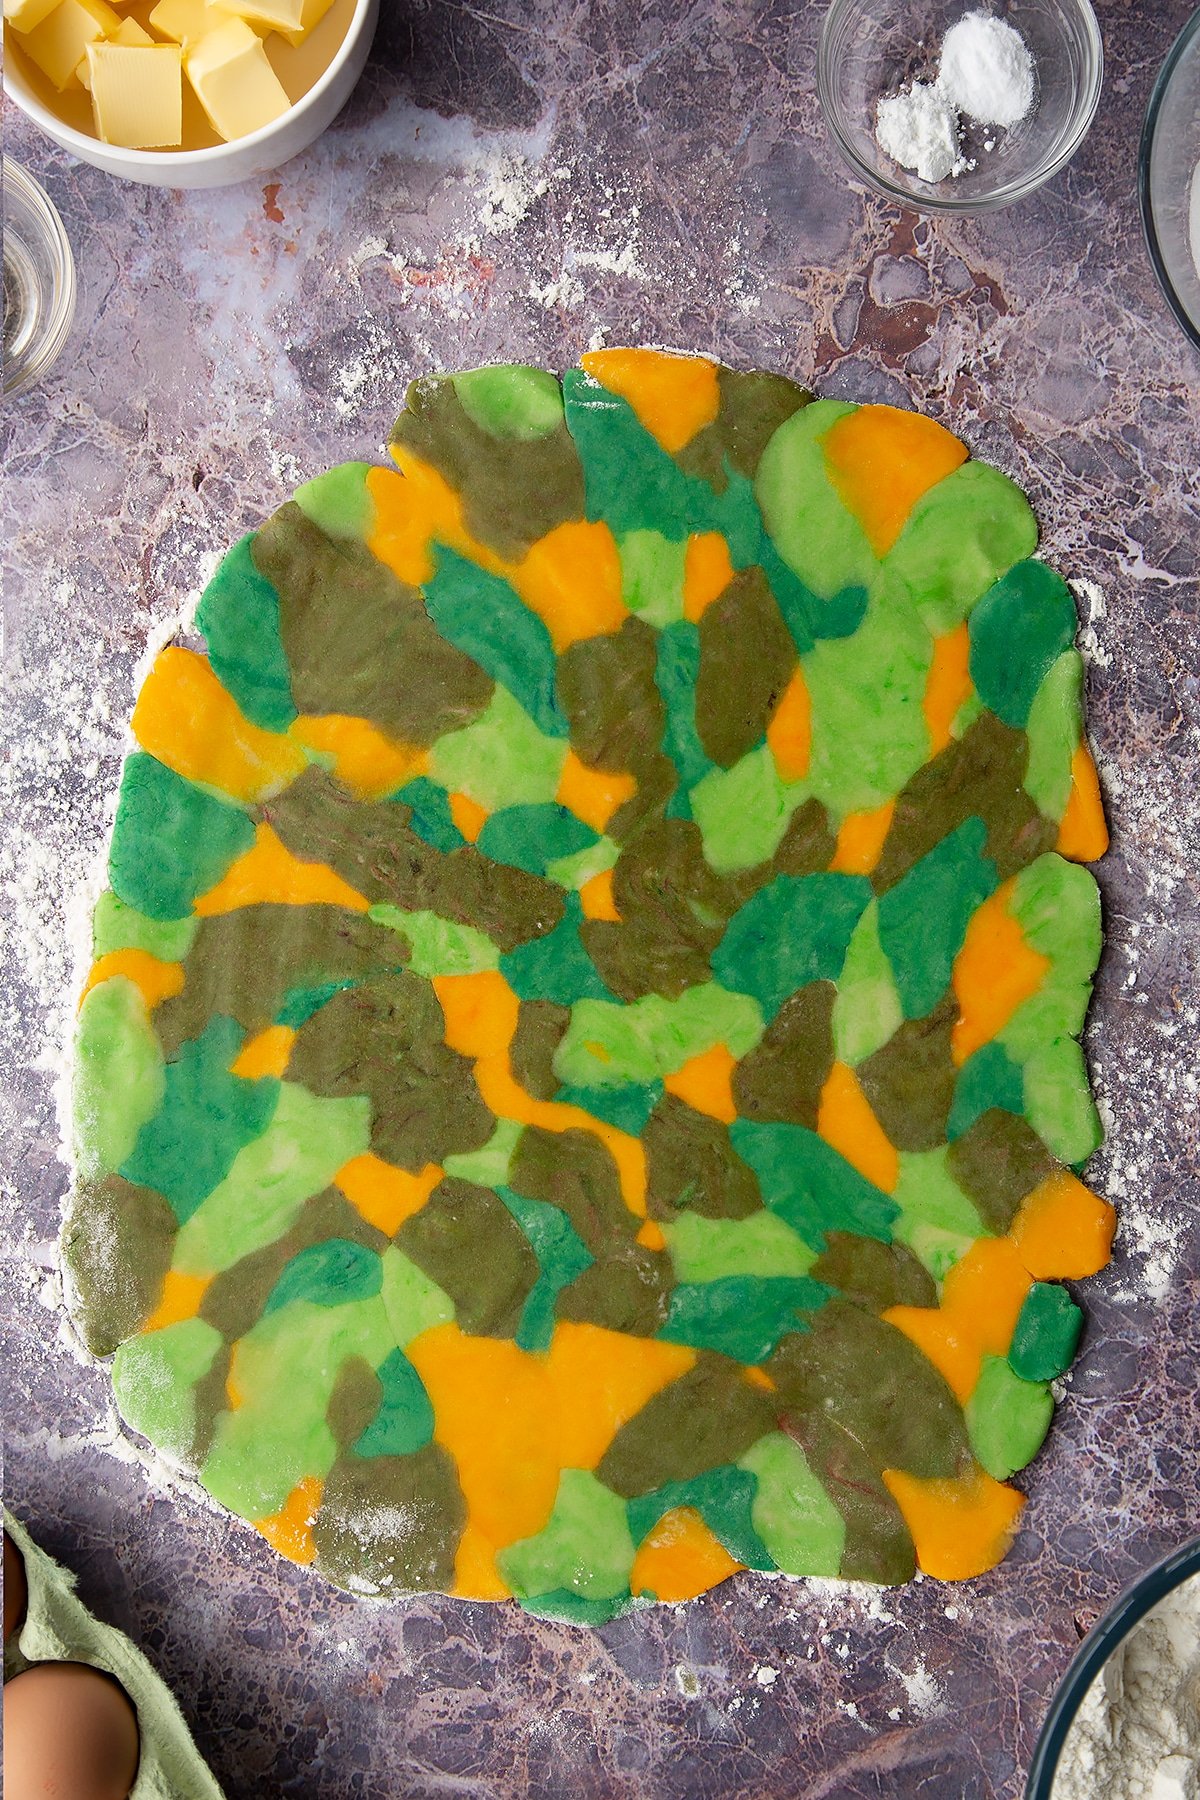
Roll out to approximately 7-8mm thick (approx 1/3 inch).
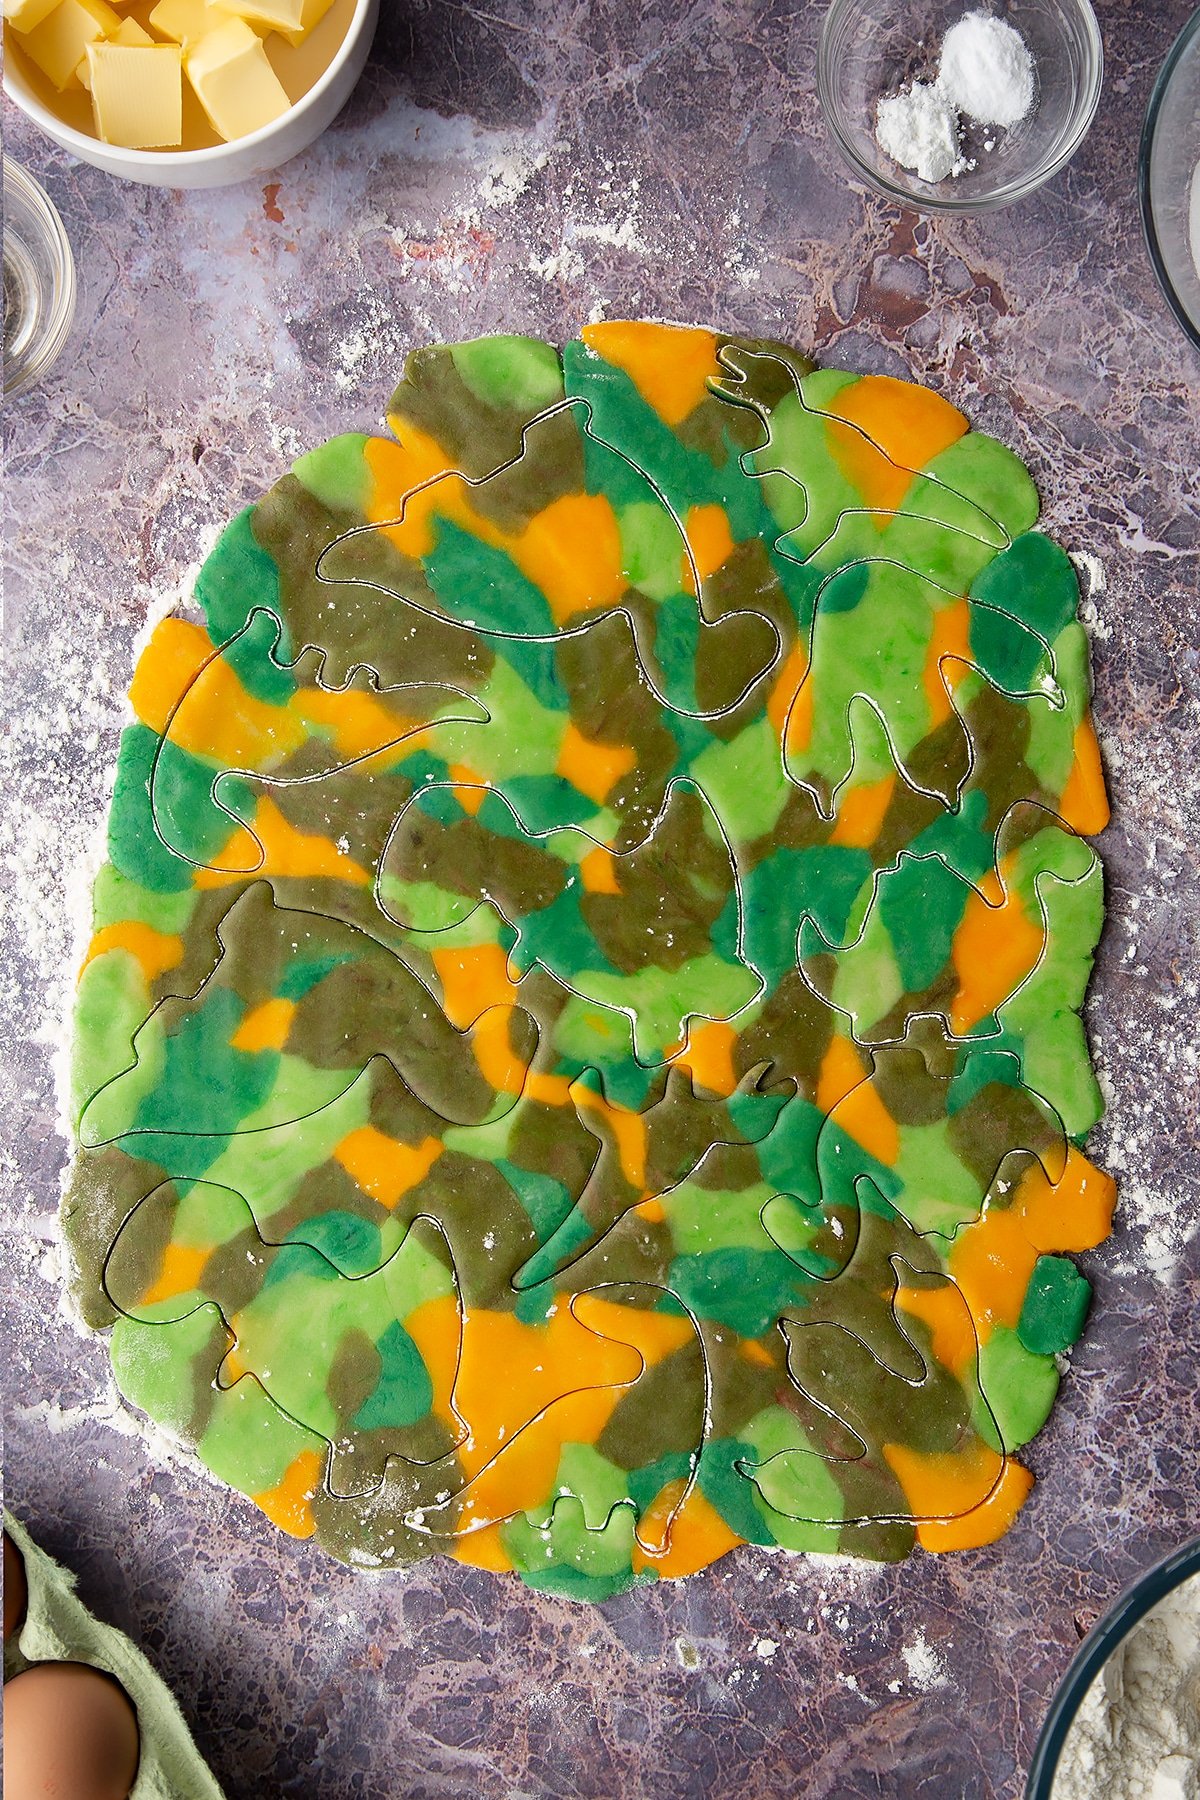
Cut out the dinosaur shapes.

Aim to cut them close together to reduce the need to reroll too many times.
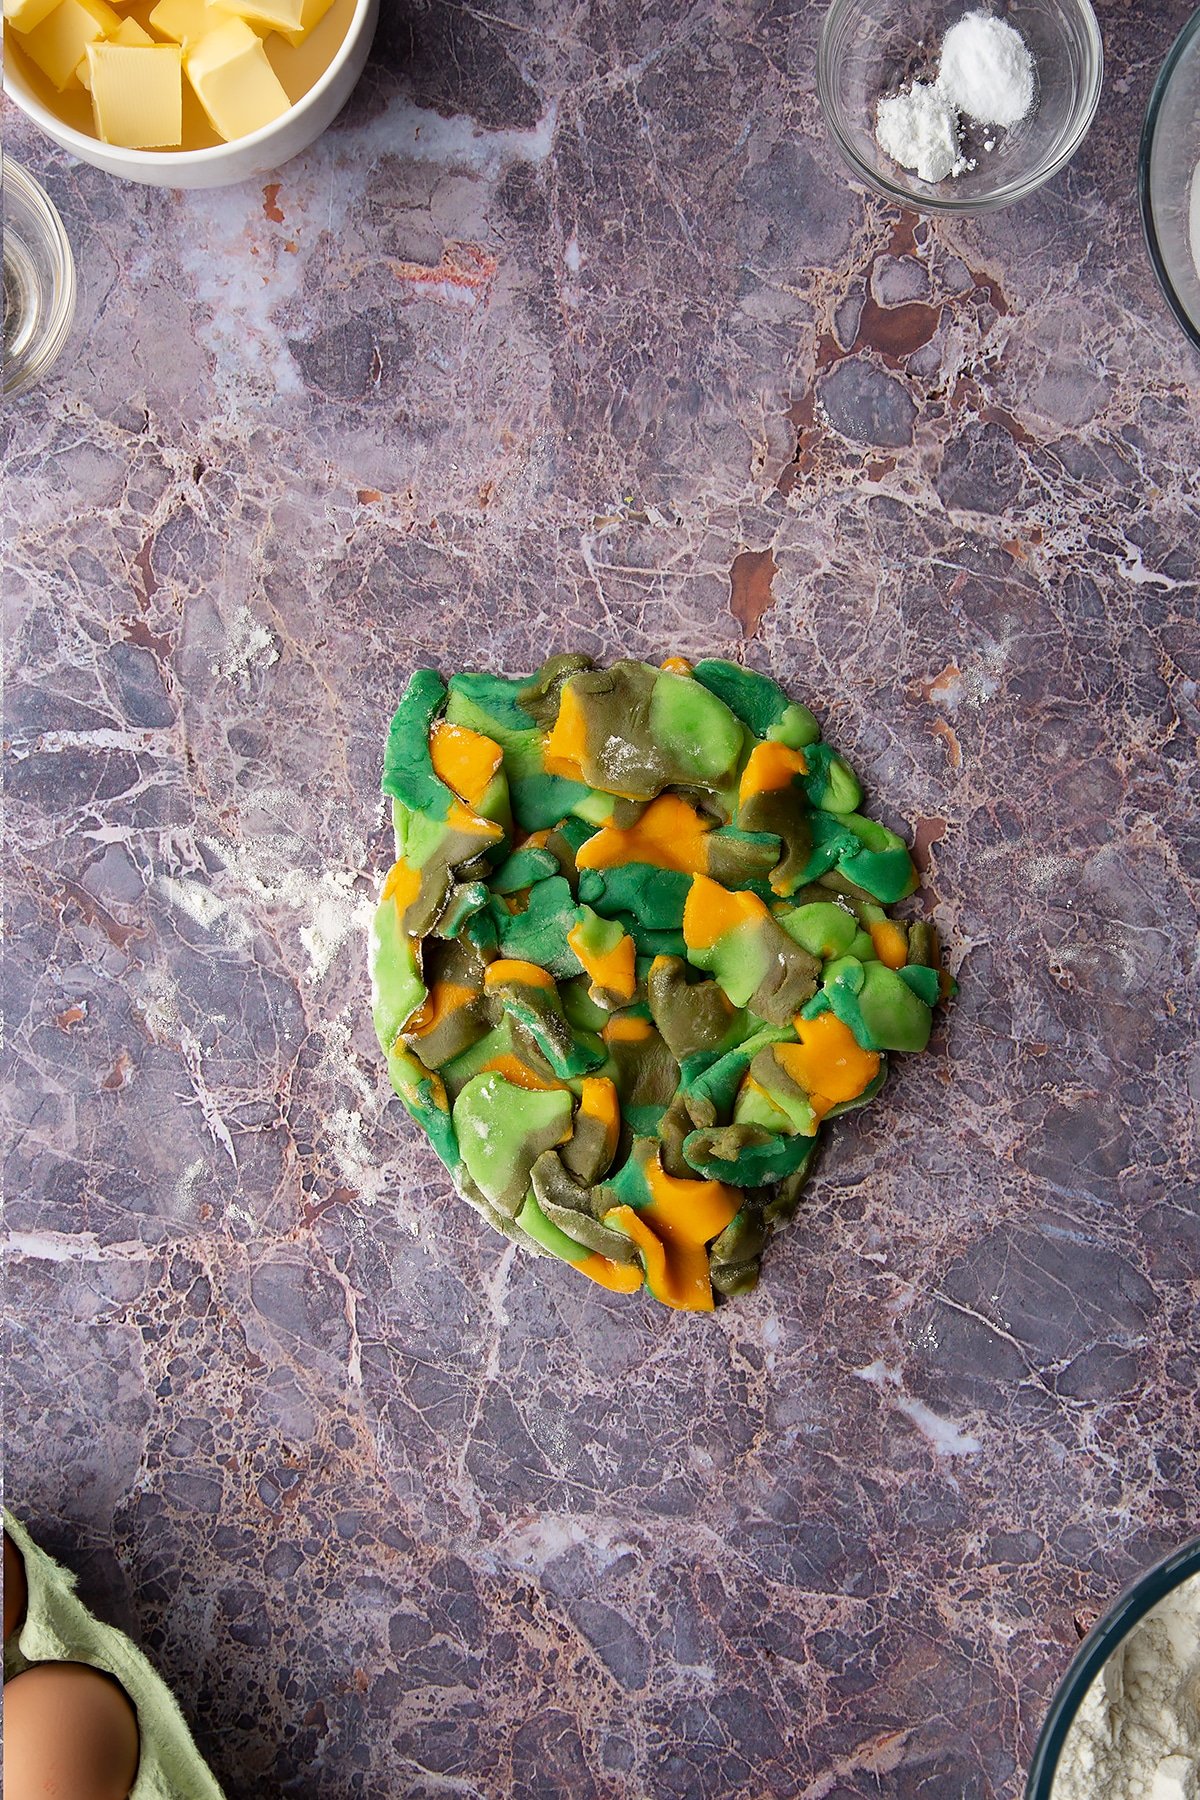
Gather the offcuts and, just as you did before, gather into a slab, which you can then re-roll to cut further dinosaur shapes.
Place the cookies on baking sheets lined with greaseproof paper. They don't spread much at all, so can be place quite close together.
Bake the cookies for 8 minutes.
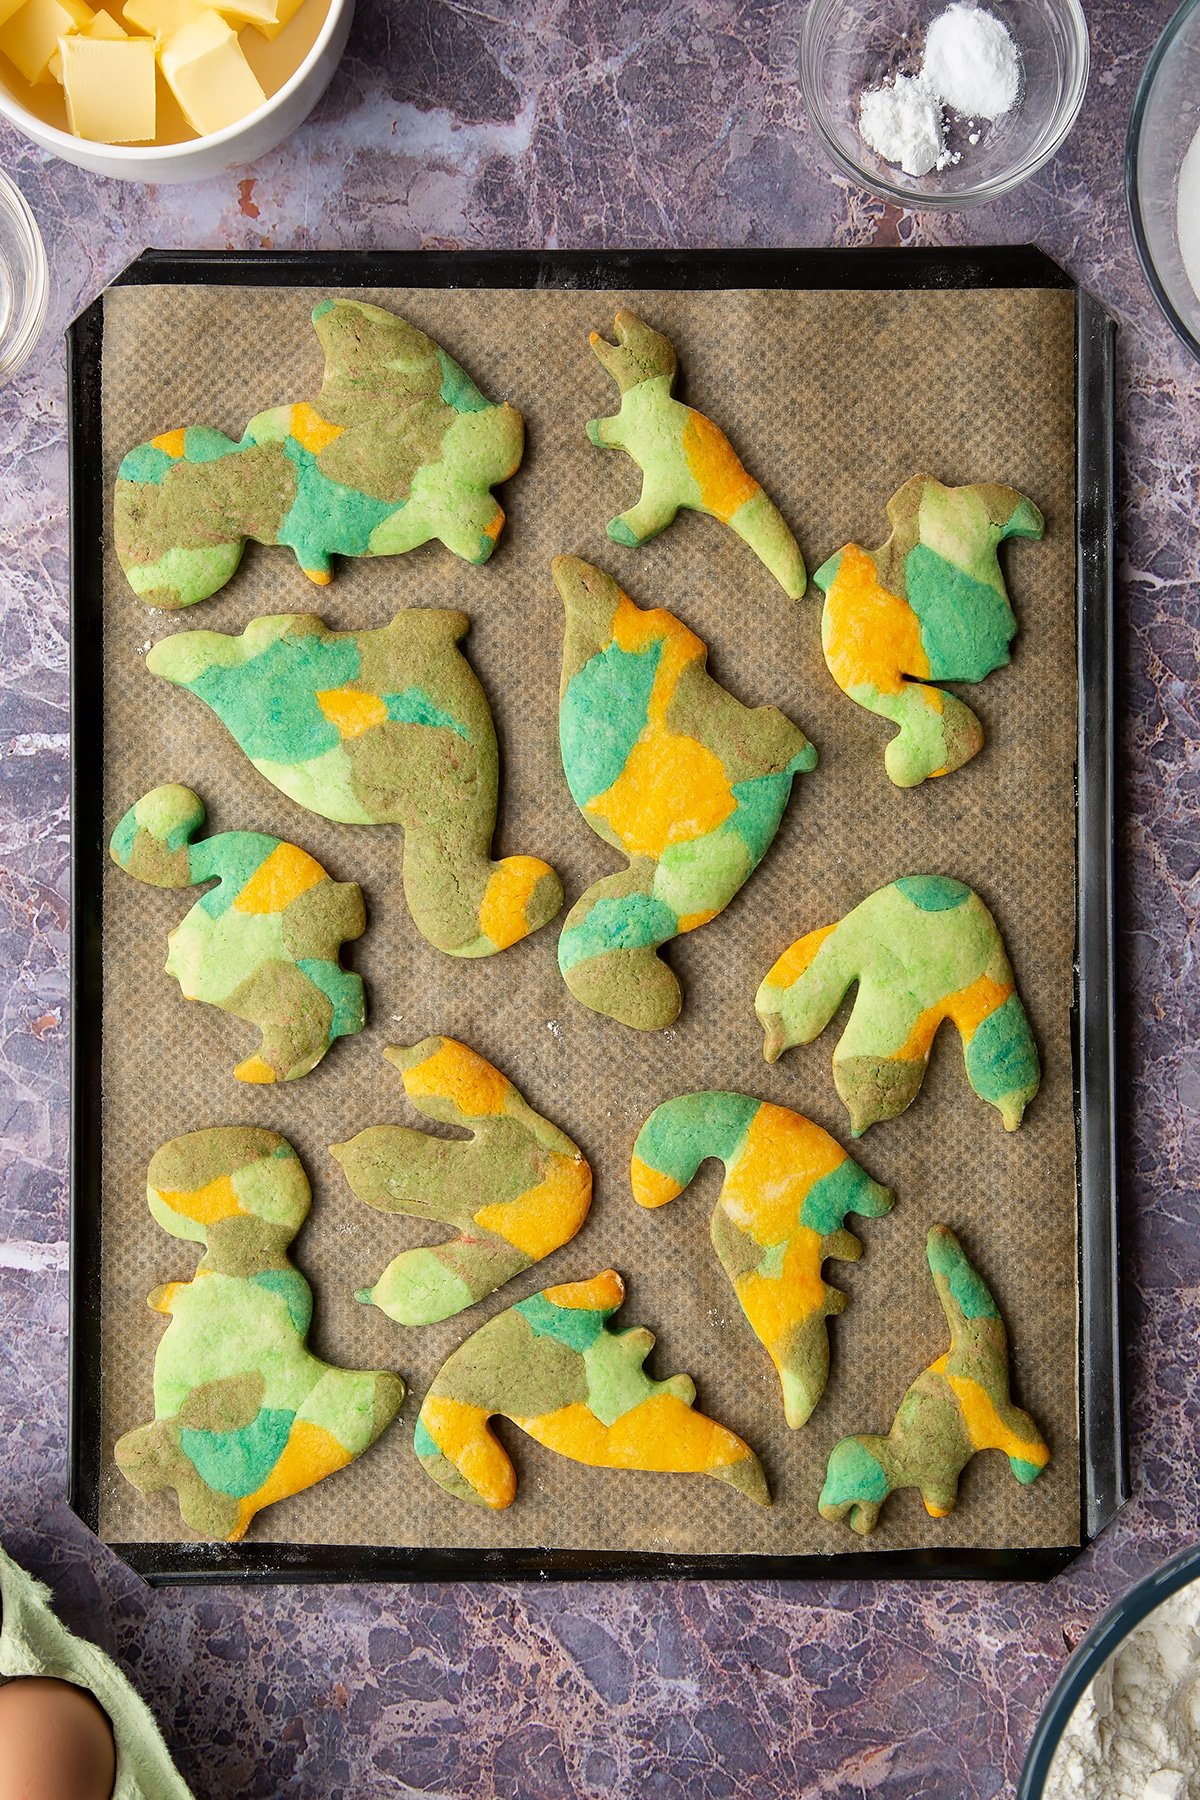
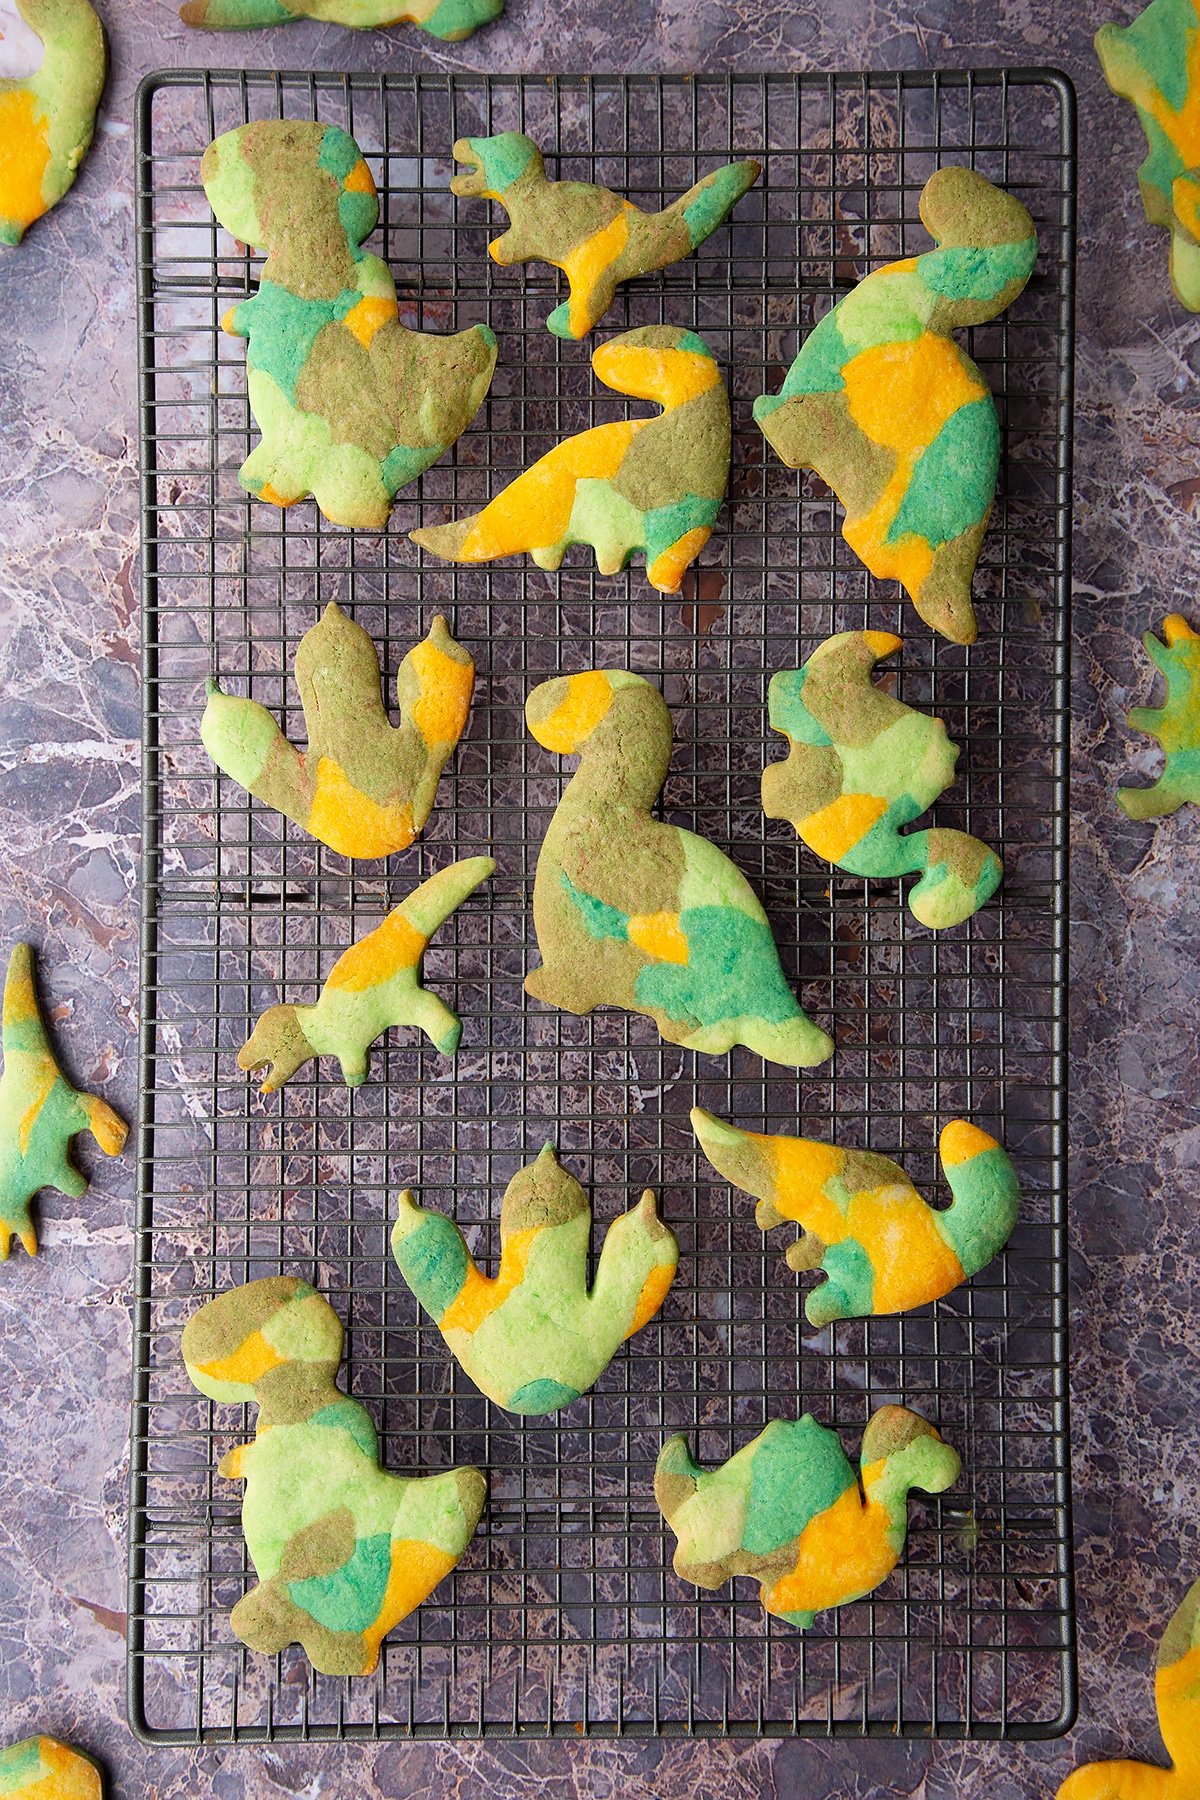
Transfer to a wire rack to cool completely.
To finish, use your writing pens to add eye and mouth details to your dinosaurs. You can make them as cute or as scary as you wish!
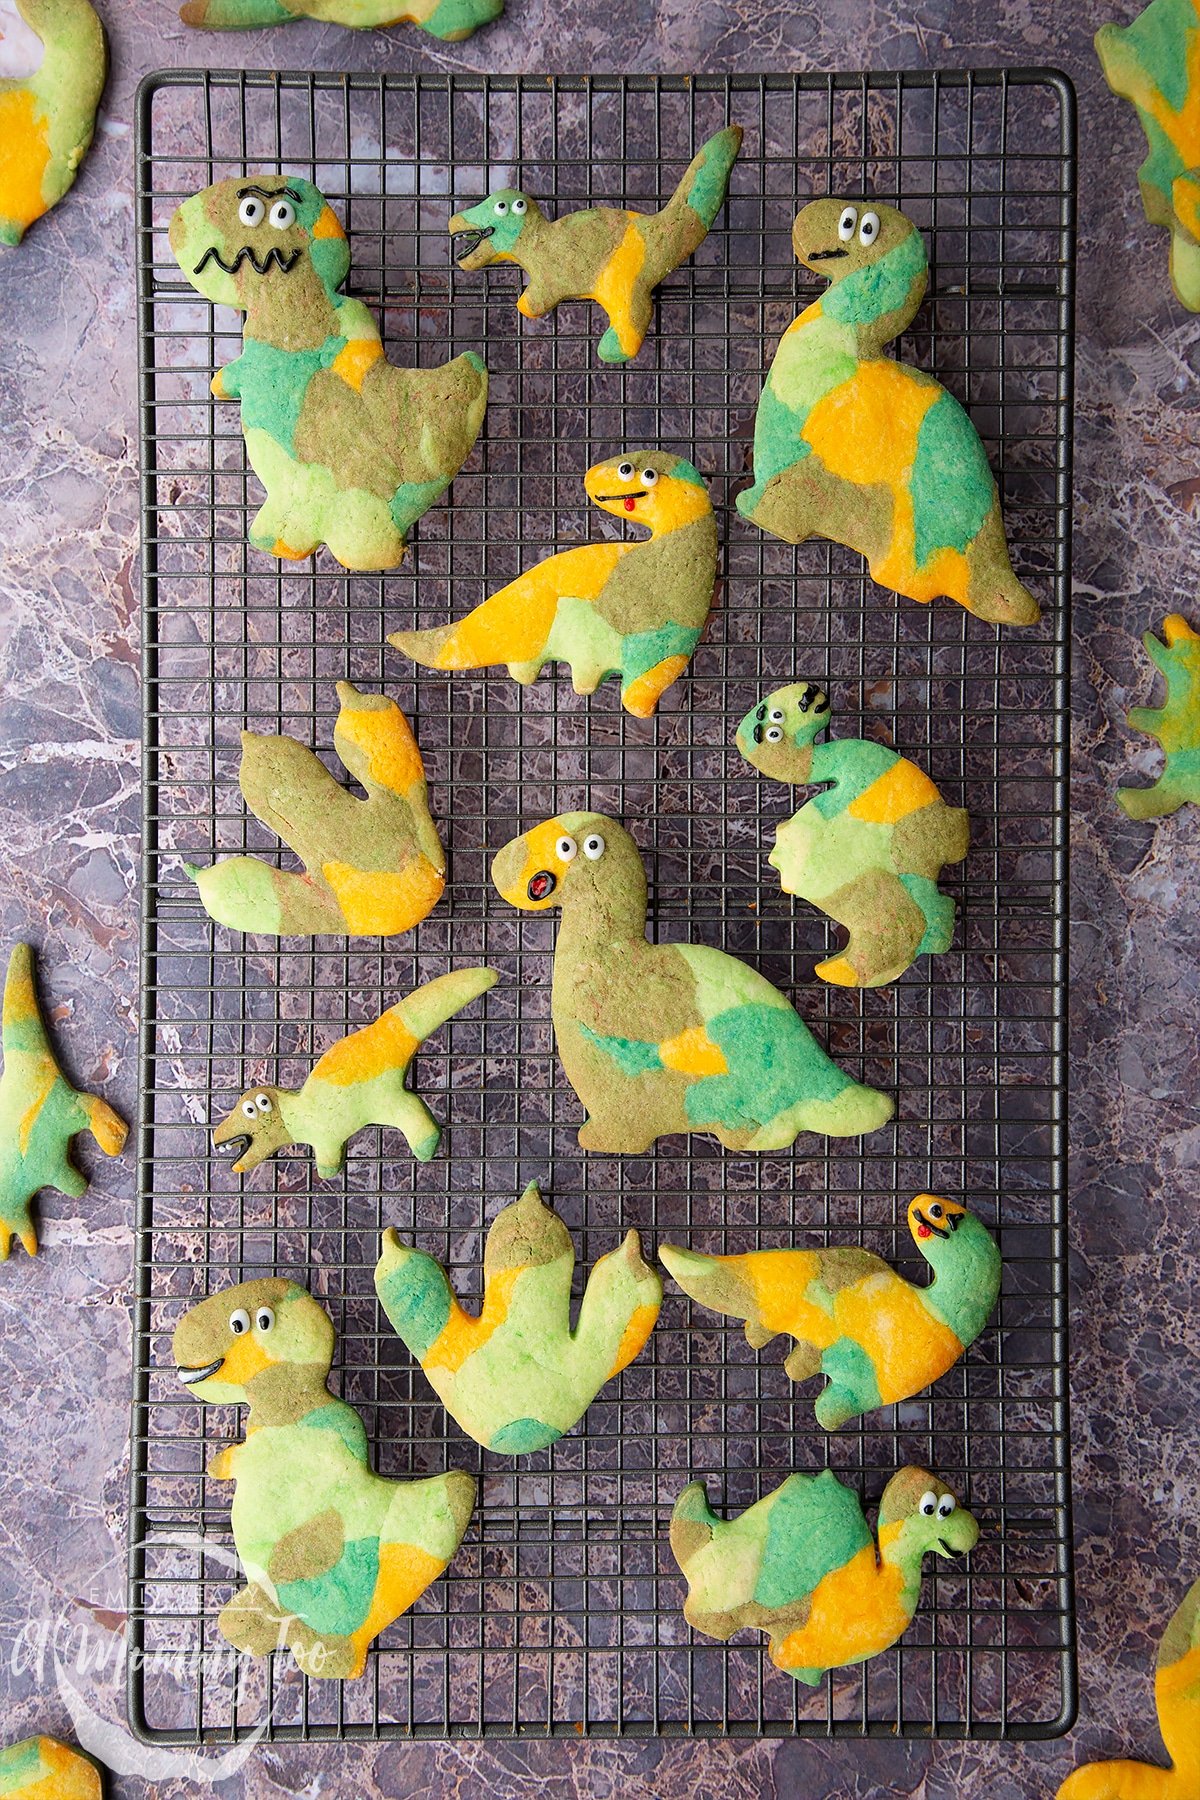
You can add as many different expressions and facial features if you like. Why not have a competition to see who can come up with the most amusing design?
Aren't they fun? I can't wait to see how you decorate yours!
Pointers, tricks and troubleshooting tips for the perfect dinosaur cookies
Is it easy to make dinosaur cookies?
These dinosaur cookies are really fun and easy to make. In fact, it feels a lot more like playtime than serious precision baking!
The cookie dough itself is easy to bring together in a single bowl with ingredients you probably have in the cupboard already.
The fun really starts when you divide the dough into four to add the different colours. I love creating the camo dough, each dinosaur pattern is unique and it's a lot easier than the final result suggests!
My kids also love adding their favourite emoji faces to give each one a bit more character with cheeky expressions, or scary dental work.
Will I need any special equipment to make dinosaur cookies?
Everything you need should be easy to find in the average home baker's kitchen, such as measuring spoons, weighing scales, a mixing bowl, and a rolling pin.
You will, of course, need dinosaur-shaped cutters to achieve ones like ours, but you could also try cutting your shapes our freehand, or creating your own templates.
Head down to the recipe card below for the full list of suggested equipment.
Are dinosaur cookies suitable for vegetarians?
These dinosaur cookies are indeed vegetarian. The main thing to check is the food colourings as they sometimes contain animal-derived products, particularly red tones.
Even though the rest of the ingredients are usually vegetarian by default, it's best to double-check all of your ingredients labels to make sure that they are suitable for vegetarians. Don't forget to also check anything extra you intend to serve with your cookies.
Are dinosaur cookies suitable for vegans?
These dinosaur cookies contain dairy margarine and a chicken egg so they are not vegan. Some food colouring also contains animal derived ingredients.
I haven't tested this recipe using vegan alternatives yet but you could give it a go. You can easily find vegan margarine in most supermarkets now, try and use one with a high-fat content (80%, ideally) if you can as these tend to work better.
For the eggs, you'll need to use an egg replacer. Try one of the following alternatives (each = 1 egg, so multiply as needed for any given recipe).
- 1 tablespoon of crushed chia seeds or flax seeds mixed with 2 tablespoons of water and left for 10 minutes in the fridge.
- 3 tablespoons of aquafaba (the water you get in a tin of chickpeas).
- 3 tablespoons of applesauce (bear in mind this will add sweetness).
Make sure to use vegan-friendly food colourings and icing pens, too.
It's important to double-check all of your ingredients labels to make sure that they are suitable for vegans, particularly if you're new to vegan baking. Don't forget to also check anything extra you intend to serve these dinosaur cookies with.
Is this dinosaur cookie recipe gluten-free?
To make these dinosaur cookies, I have used wheat-based flour which is not gluten-free. Standard baking powder may also contain gluten.
This recipe hasn't been tested with gluten-free flour yet but you could give it a try. I've had great results with similar cookie recipes.
Whenever using gluten-free flour, I would recommend using a good quality brand, that will likely be a blend of gluten-free flours like rice or oat, mixed with a binding agent like xanthan gum which really helps with the texture.
Use a baking powder specifically labeled gluten-free as well. This is because sometimes a small amount of flour is added to regular baking powder, or it make simply be made in a factory environment that also handles wheat flour.
Double-check all of your ingredients labels to make sure that they are gluten-free. Don't forget to also check anything extra you intend to serve your cookies with.
Are dinosaur cookies keto-friendly?
As these dinosaur cookies are made with sugar and flour, they are too high in carbohydrates to be considered keto friendly.
Is this dinosaur cookie recipe healthy?
These dinosaur cookies are a sweet treat and should be enjoyed in a sensible portion. They should be saved for special occasions not eaten as an everyday snack.
On the recipe card below you'll find some more detailed nutritional information. Please note that all figures are estimates based on public available data.
Are these dinosaur cookies safe to eat while pregnant?
There's nothing in these cookies that would usually present an issue if eaten during pregnancy.
The advice regarding egg safety can differ in different countries so check information local to you. Read the NHS's advice on foods to avoid in pregnancy here.
Make sure all the ingredients are in good condition and these cookies are prepared safely and hygienically.
A Mummy Too does not offer medical advice. Please seek help from a medical professional if you need further information or have any concerns.
What goes well with dinosaur cookies?
These dinosaur cookies are perfect with a glass of milk. For an extra special treat, you could make chocolate milk to dunk your dinosaurs into for a swampy drink.
Dinosaur cookies are also great for party bags!
Can I make this recipe without egg?
Though seemingly simple, eggs are complex ingredients that bring a few different elements to any recipe. They contain proteins, fats, and water that all work in a unique way when combined with flour, sugar, and butter. They help create a well-shaped biscuit, kept held together with a good crumb and nice snap, and can also be an important factor in how some recipes rise. This is why it can be a little tricky to replace them as they are doing so many different jobs!
I haven't tested this particular dinosaur recipe egg-free yet, but if you need to avoid eggs then give one of these options a try (each = 1 egg, so multiply as needed for any given recipe).
- 1 tablespoon of crushed chia seeds or flax seeds mixed with 2 tablespoons of water and left for 10 minutes in the fridge.
- 3 tablespoons of aquafaba (the water you get in a tin of chickpeas).
- 3 tablespoons of applesauce (bear in mind this will add sweetness).
For other egg-free cookie recipes, I've had the most success with the chia seed option, but keep in mind you might be able to see them in the dough.
I haven’t got margarine can I use butter?
Yes, this recipe works fine with butter. Make sure it's softened a little so that it blends well with the sugar and egg.
Can I add chocolate to this recipe?
You could add a little bit of cocoa to the dough, but this would need to be done sparingly as it could make the dough too dry to work with.
You could use melted chocolate to decorate the cookies instead of icing pens. To get the same fine detail, you would need to use to transfer the chocolate to a piping bag and snip off the very end.
I wouldn't recommend adding chocolate chips as they'll make the dough difficult to work with, but you could try popping chocolate drops onto the dinosaurs just after they come out of the oven - perhaps to look like scales or horns. The residual heat will help the drops stick to the cookies - just don't overdo it or you might distract from the amazing colourful you've created with the dough.
How should I store these dinosaur cookies?
If you ask a palaeontologist where to find a dinosaur, they might say buried deep underground or in display cases at the Natural History Museum. Our dinosaur cookies, however, will fare much better in an airtight container in the kitchen cupboard!
Once your dinosaurs have cooled and their decorative features have set completely, you can pop them into an airtight container. Bury them somewhere cool and out of direct sunlight, such as in the cupboard or pantry, ready to be unearthed later with a cup of tea.
How long do dinosaur cookies keep?
These cookies won't quite last for 250 million years like their full-size, fossilised friends. When stored correctly they will keep for up to five days and are best enjoyed within three days of making.
Can I leave these dinosaur cookies out on the counter?
No, they might run away. It's fine to leave these dinosaur cookies out for serving or at a party but they shouldn't just be left out on the counter for long periods of time as they'll go stale.
Leaving any type of food out uncovered for an extended period can also mean an increased risk of foodborne illnesses spreading on them.
Keep your dinosaurs safely in an airtight container away from budding palaeontologists.
Can I make my dinosaur cookies ahead?
As with most baked treats, these dinosaur cookies are best enjoyed fresh on the day of making but they do keep very well in an airtight container, so you could make them the day or two before serving.
If it's going to be longer until you eat them, I'd recommend you freeze them or the dough. There are further notes below on how best to preserve your dinosaurs in the freezer.
Should I keep these dinosaur cookies in the refrigerator?
The natural habitat of these dinosaur cookies is somewhere cool and dark, but there's no need to keep them in the fridge. They are best stored in an airtight container in the cupboard or pantry.
Can I freeze any my dinosaur cookie dough?
Yes! You can freeze the cookie dough, ready to be discovered at a later date.
If you're freezing the dough, I recommend freezing it before you've divided it up to add the food colouring. This gives you flexibility if you decide to make different biscuits with it later on. Pop the dough ball into a reusable freezer bag or wrap well with food wrap, getting out as much air as you can. Label with the date and flavour dough. It will keep for up to 3 months.
What is the best way to defrost frozen dinosaur cookie dough?
To defrost the dough, leave it wrapped up and put it into the fridge to thaw out overnight.
The next day, it will be ready to add the food colourings and create your dinosaurs. Once baked, it will still be safe to freeze any leftover baked cookies if you like (see below).

Can I free leftover dinosaur cookies?
To freeze fully decorated dinosaur cookies, make sure they are completely cool and the icing has set. These cookies should be frozen on the day of baking to keep them at their best. Put them onto a baking sheet to freeze overnight in a single layer.
Once frozen, transfer your dinosaurs into a reusable freezer bag or container so that they are protected and take up less space in the freezer. Label the bag with the date and what's inside.
These dinosaur cookies will keep for up to 2 months in the freezer.
What is the best way to defrost frozen dinosaur cookies?
When defrosting complete dinosaur cookies, you can simply get out what you need and put them onto a plate to thaw out on the side. They don't take long to defrost - as little as 30 minutes, depending on the temperature in your kitchen.
Once thawed, make sure to put your cookies into a sealed container and consume them within 48 hours. Do not refreeze.
Having frozen cookies in the freezer is handy as you can add them to lunchboxes as a treat. Pop them in frozen in the morning and they will have thawed out by lunchtime.
Can I make these dinosaur cookies in a different quantity?
Yes, if you want to make more or fewer of these cookies then go right ahead. The number you make will depend on the size and shape of your cookie cutters so you might end up with a slightly different number from the versions shown here.
To make more or less dough, look for the recipe card below. You'll see the servings near the top left. To change this, just hover or click over the number and a little slider will pop up. You can move the slider up or down to get the amount you want to make.
All the ingredient quantities will update automatically for you so that everything is in the right ratios.
Can I make this recipe into a giant dinosaur cookie?
I haven't tried making this into a giant dinosaur but you could give it a go!
Make a template with a piece of paper so that you can cut your dinosaur shape out more easily. Be careful when transferring your big cookie onto the baking tray as it will be delicate.
You could trying cutting on directly on a piece of baking paper and then lifting that onto the tray.
Alternatively, you could try using a silicone cutting. Roll the dough out on the mat and cut your dinosaur out. Then flip onto a lined baking tray and carefully peel the mat away
The baking time might be a little tricky with this giant cookie as it will bake quite quickly around the edges but might take longer to cook all the way to the middle. Be sure not to roll your cookie out too thick and keep an eye on it in the oven.
Remember that your cookie will firm up further when it's out of the over and cooling, so as long as it looks cooked and sandy all the way across, it should be fine.
Can I make dinosaur cookies in a stand mixer such as a KitchenAid or Kenwood Mixer?
Yes, you can use a free-standing mixer to make the dough for your dinosaurs. Start with the balloon whisk attachment to whisk the butter and sugar, and then the egg and vanilla together. Once these are well whisked scrape any mixture off the whisk and change to the paddle attachment to mix the rest of the ingredients.
Add the flour, baking powder, bicarbonate of soda, and salt into the bowl and mix at a low speed, pulsing briefly until everything is evenly combined and the dough is just starting to clump.
You don't want to overwork the dough as this can make it tough. This is particularly important with this recipe as you'll need to handle it to add the colours and creating the pattern.
How can I make sure these dinosaur cookies are perfectly cooked?
Perfectly baked dinosaurs start with a perfect dough. I find it helpful to weigh out all the ingredients before I start. That way, everything is on hand when it's needed. This is also a good idea if you have small hands helping as it's easier to make the correct amounts are added.
Once the dough is mixed, divide it into four (you don't have to be super accurate) and add the different colours into each one. Knead gently to mix the food colouring into each one - it's ok if it's a little streaky as it will just add to the final effect. Once your dough is coloured, it's a good idea to wrap it and let it rest and cool in the fridge for 15 minutes, particularly if your kitchen is warm as otherwise the dough might be too soft to roll out.
Lightly dust the worktop with flour where you're rolling out the dough. Without flour, your dough may stick, but too much flour will dry your dough out, so aim for a fine, even sprinkling.
Tear up the dough into small pieces and dot them around to create a sort of camouflage pattern. Roughly gather them together by cupping your palms around the edges and sweeping them inwards so that there are no big gaps. You can now roll them out to 7-8 mm (1/3inch) thick.
Cut the dinosaur shapes out as close together as you can to get the most out of the dough. Gather any excess dough using the same cupping motion - don't knead as you'll just end up with brown dough! Roll out again so you can cut more dinosaurs. Each time the dough is rerolled, the colours will blend into each other a bit more.
Place the cookies onto lined baking sheets. They don't spread much so can be quite close together, but you do need to leave room for warm air to circulate.
These cookies cook really quickly in the oven, so they should be done in about 8 minutes. It's key to preheat the oven so that when the cookies go in they can bake to perfection.
Once baked, let the cookies firm up on the tray for a couple of minutes, then transfer to wire racks to cool. Make sure they're completely cool before adding the icing features.
Why did my dinosaurs turn out dry and burnt?
Make sure you used the correct quantities of ingredients - too little liquid could make your cookies seem dry.
These cookies only take about 8 minutes to bake so make sure to set a timer as this will fly by and you could easily end up with burnt biscuits, especially if you're distracted cutting out the next batch.
Check the oven is set to the correct temperature. If you've had the oven on for a while it might actually be hotter than the dial suggests. Using an oven thermometer can help if you find your oven runs hot.
Try to position the shelves into the middle of the oven as this is where the temperature is usually most even.
Not storing the cookies correctly may also make them dry out. Once cooled, make sure to keep them in a sealed airtight container.
Why did my dinosaurs turn out pale and less colourful?
If you've used liquid food colouring, your dinosaurs might turn out a bit pale and disappointing. This is because, despite what their labels might suggest, liquid food colouring is rarely "bake stable", meaning it can't withstand heat and seems to disappear from cakes and batters during baking. I always recommend food colouring gels or pastes as they tend to be much better at holding on to their shades in the oven.
When you roll the dough out, if the surface is really floury this might also mute the colours. Just use a light dusting next time, you only need a little bit to stop the dough from sticking, no more. If your dough is too soft and sticky to handle at any point during making, rather than using extra flour, pop your dough back in the fridge to cool and rest for 15 minutes before carrying on.
How can I add/change the flavours in these dinosaur cookies?
You can have so much fun with these dinosaur cookies. Why not use different flavour extracts with different colours? You could use strawberry extract with red, yellow, and orange coloured dough!
There are so many different shaped cookie cutters available you could create a real menagerie of birds and animals too.
How to Make Dinosaur Cookies Recipe
Ingredients
- 110 g (1 stick) margarine
- 100 g (½ cup + 1 tbsp) white caster sugar (superfine sugar)
- 1 medium free range eggs
- ½ tsp vanilla extract
- 250 g (1¾ cups) plain white flour (all purpose flour) plus extra for dusting
- ¼ tsp bicarbonate of soda (baking soda)
- ¼ tsp baking powder
- ¼ tsp salt leave out if using salted butter
- writing icing pens black, white and red
- food colouring green, blue, red and yellow
Instructions
- Preheat the oven to 200C (180C fan assisted, 400F).
- Put the butter and sugar in a bowl. Whisk together until fluffy.
- Add the egg and vanilla. Whisk together.
- Add the flour, baking powder, bicarbonate of soda and salt (if using). Mix until evenly combined and starting to clump.
- Turn out onto an un-floured board and knead only as much as it takes to get a smooth ball of dough.
- Divide the dough into four and roll each into flattened discs.
- Add food colouring to each to give different shades I used the following for each ball of dough: 1) yellow 2) green 3) green and blue 4) green and red.
- Knead each ball, folding until the colour is distributed - it's fine if it's a little streaky as this will add to the effect.
- If the dough balls feels too soft (this can happen if your kitchen is warm) then wrap and pop them the fridge to rest and cool for 15 minutes.
- Flour your surface lightly, then start to tear small pieces of dough off each colour and dot them around to create a sort of camouflage pattern. Gather the dough together into a slab.
- Roll out to approximately 7-8mm thick (approx 1/3 inch).
- Cut out the dinosaur shapes. Aim to cut them close together to reduce the need to reroll too many times.
- Gather the offcuts and, just as you did before, gather into a slab, which you can then re-roll to cut further dinosaur shapes.
- Place the cookies on baking sheets lined with greaseproof paper. They don't spread much at all, so can be place quite close together.
- Bake the cookies for 8 minutes.
- Transfer to a wire rack to cool completely.
- To finish, use your writing pens to add eye and mouth details to your dinosaurs. You can make them as cute or as scary as you wish!
Video
Notes
Nutrition
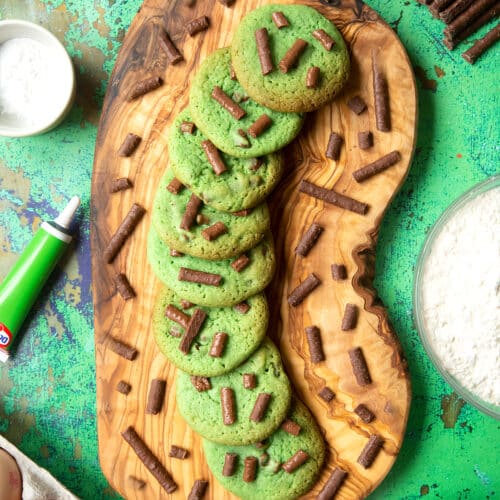
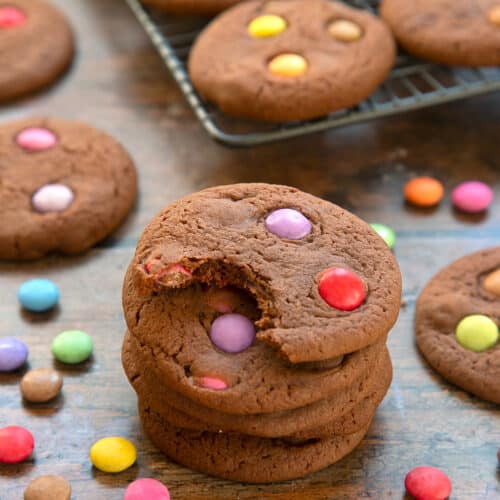
If you enjoyed this recipe why not also try Nutella sandwich cookies or even my Vegan Easter biscuits recipe (gluten free).

More cookie recipes to try
Have you got my book?

'This is a great kids cookery book. Emily is a star' - Simon Rimmer
'The book I'd like to force into any mother's kitchen' - Prue Leith
"A fab book with a plan." - Jane Devonshire, 2016 Masterchef UK winner
'Emily has managed to combine her mummy knowledge and passion for food to make a truly helpful and brilliant cookbook' - Priya Tew, RD, BSc (Hons), Msc
Get Your Kids to Eat Anything is an achievable 'how to' for parents in the battle to overcome picky eating and 'make new the norm'. Emily Leary's unique 5-phase programme looks at the issue of 'fussy eating' in a holistic way that links imagination with food, and which situates parents alongside - not in opposition to - their children.
Nic | Nic's Adventures & Bakes says
Thanks for sharing, this dinosaur cookies look amazing perfect for a children's party :)
Emily Leary says
Thank you!