
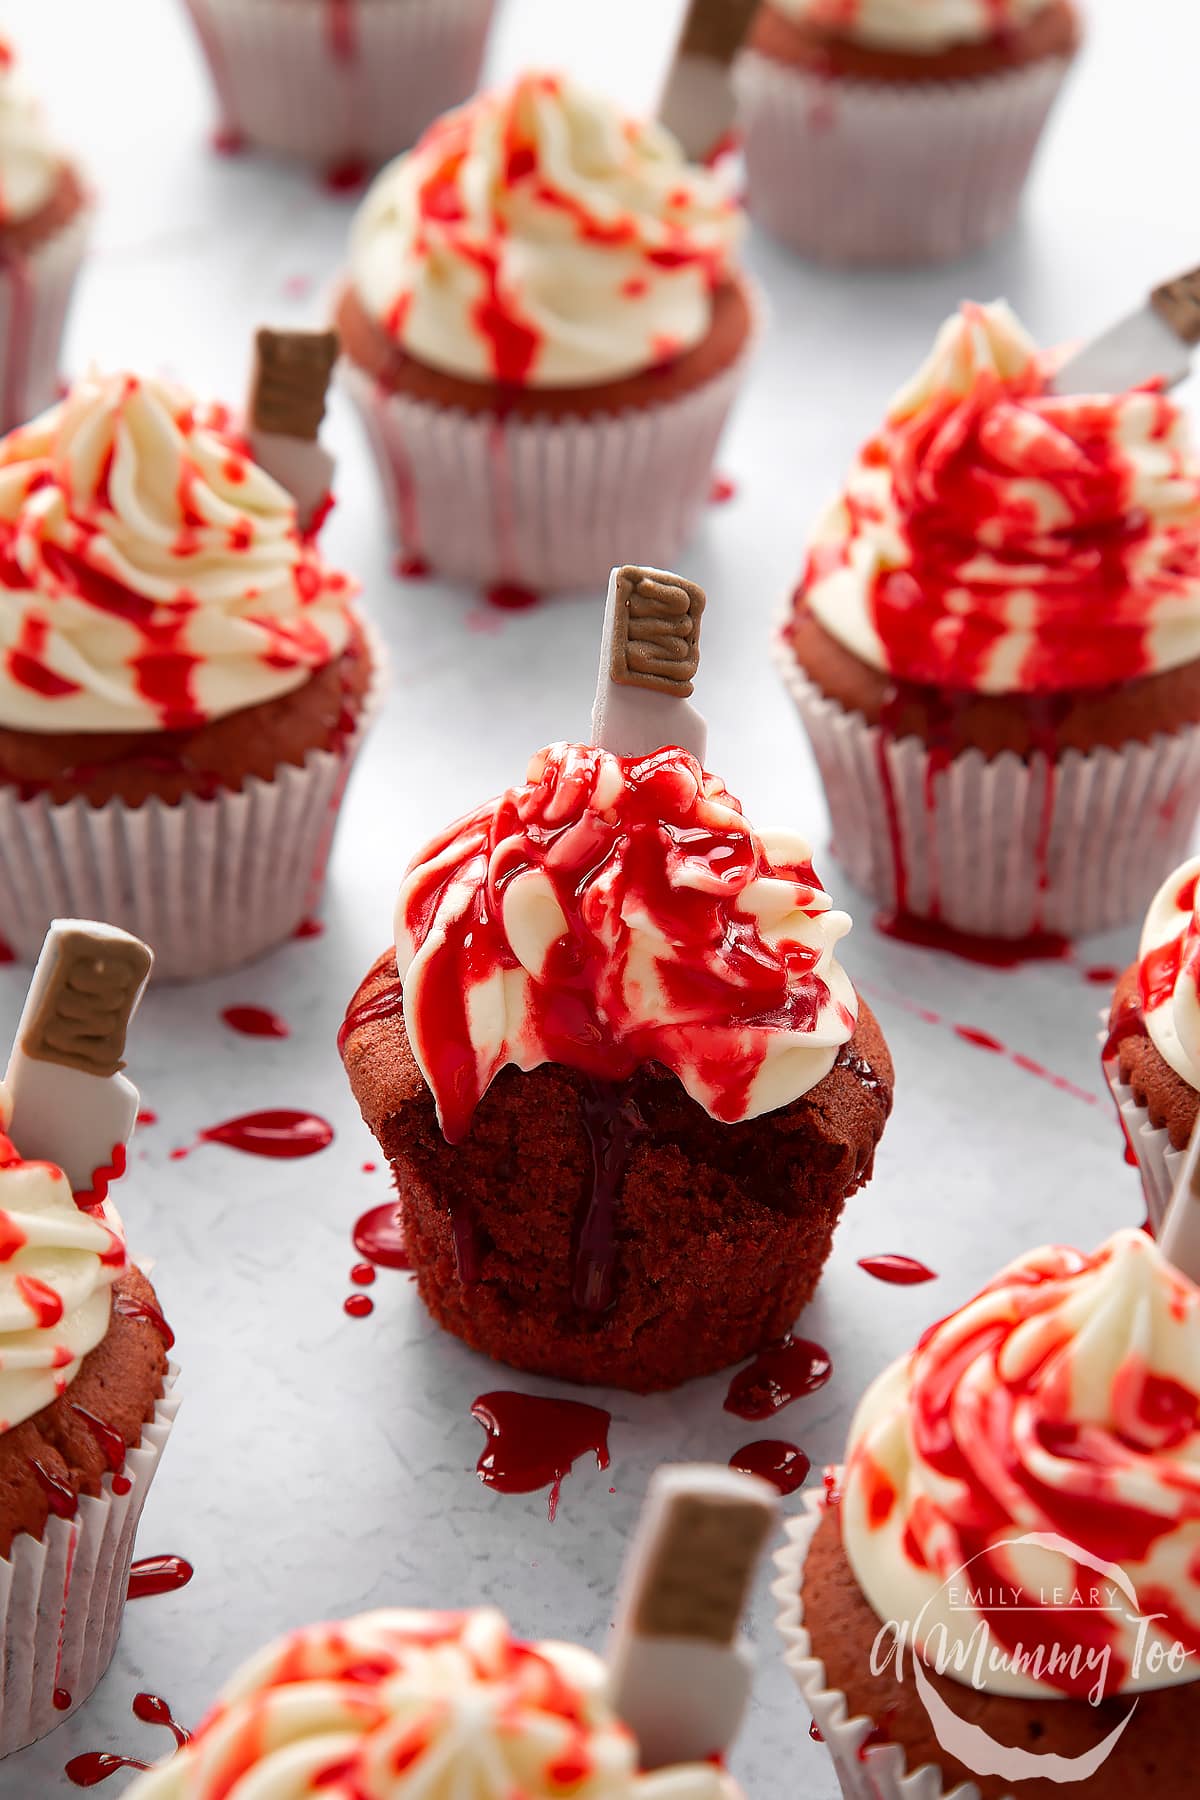
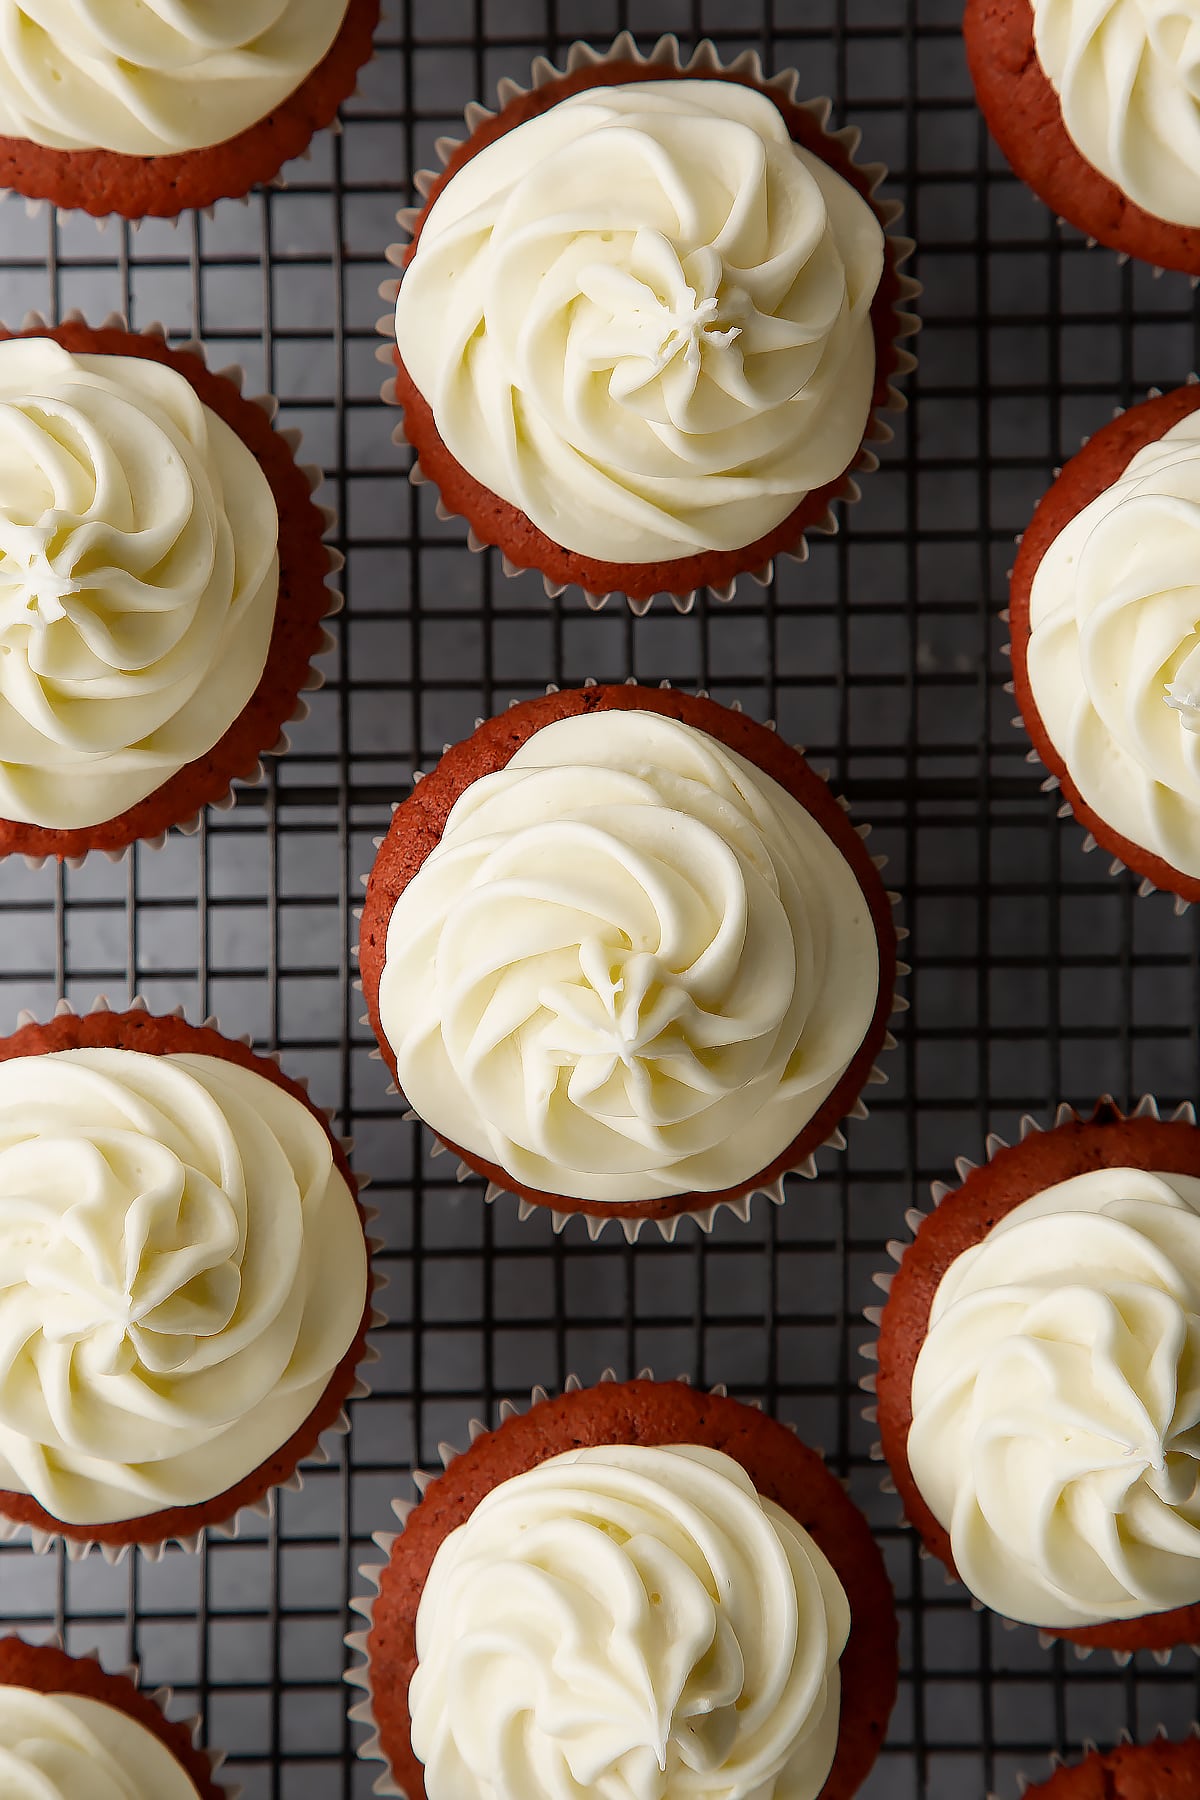
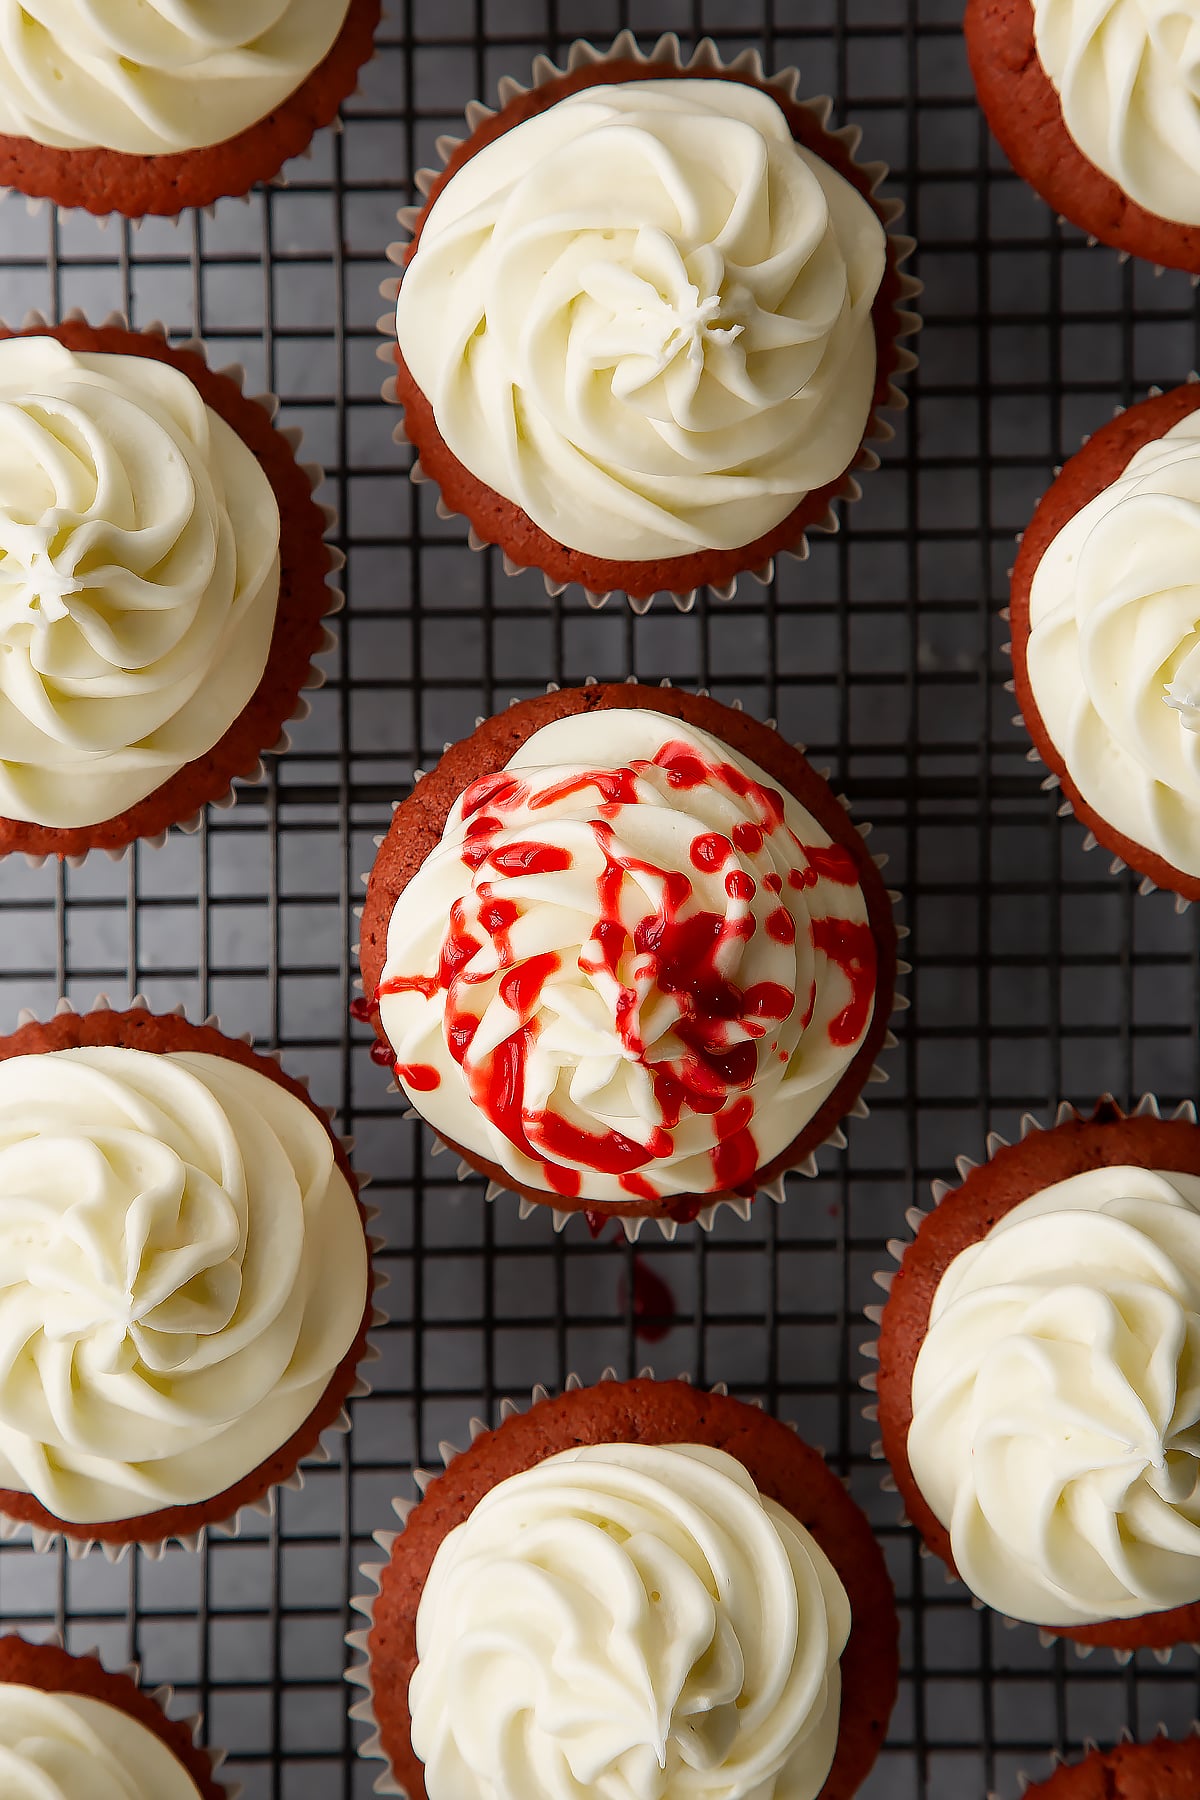
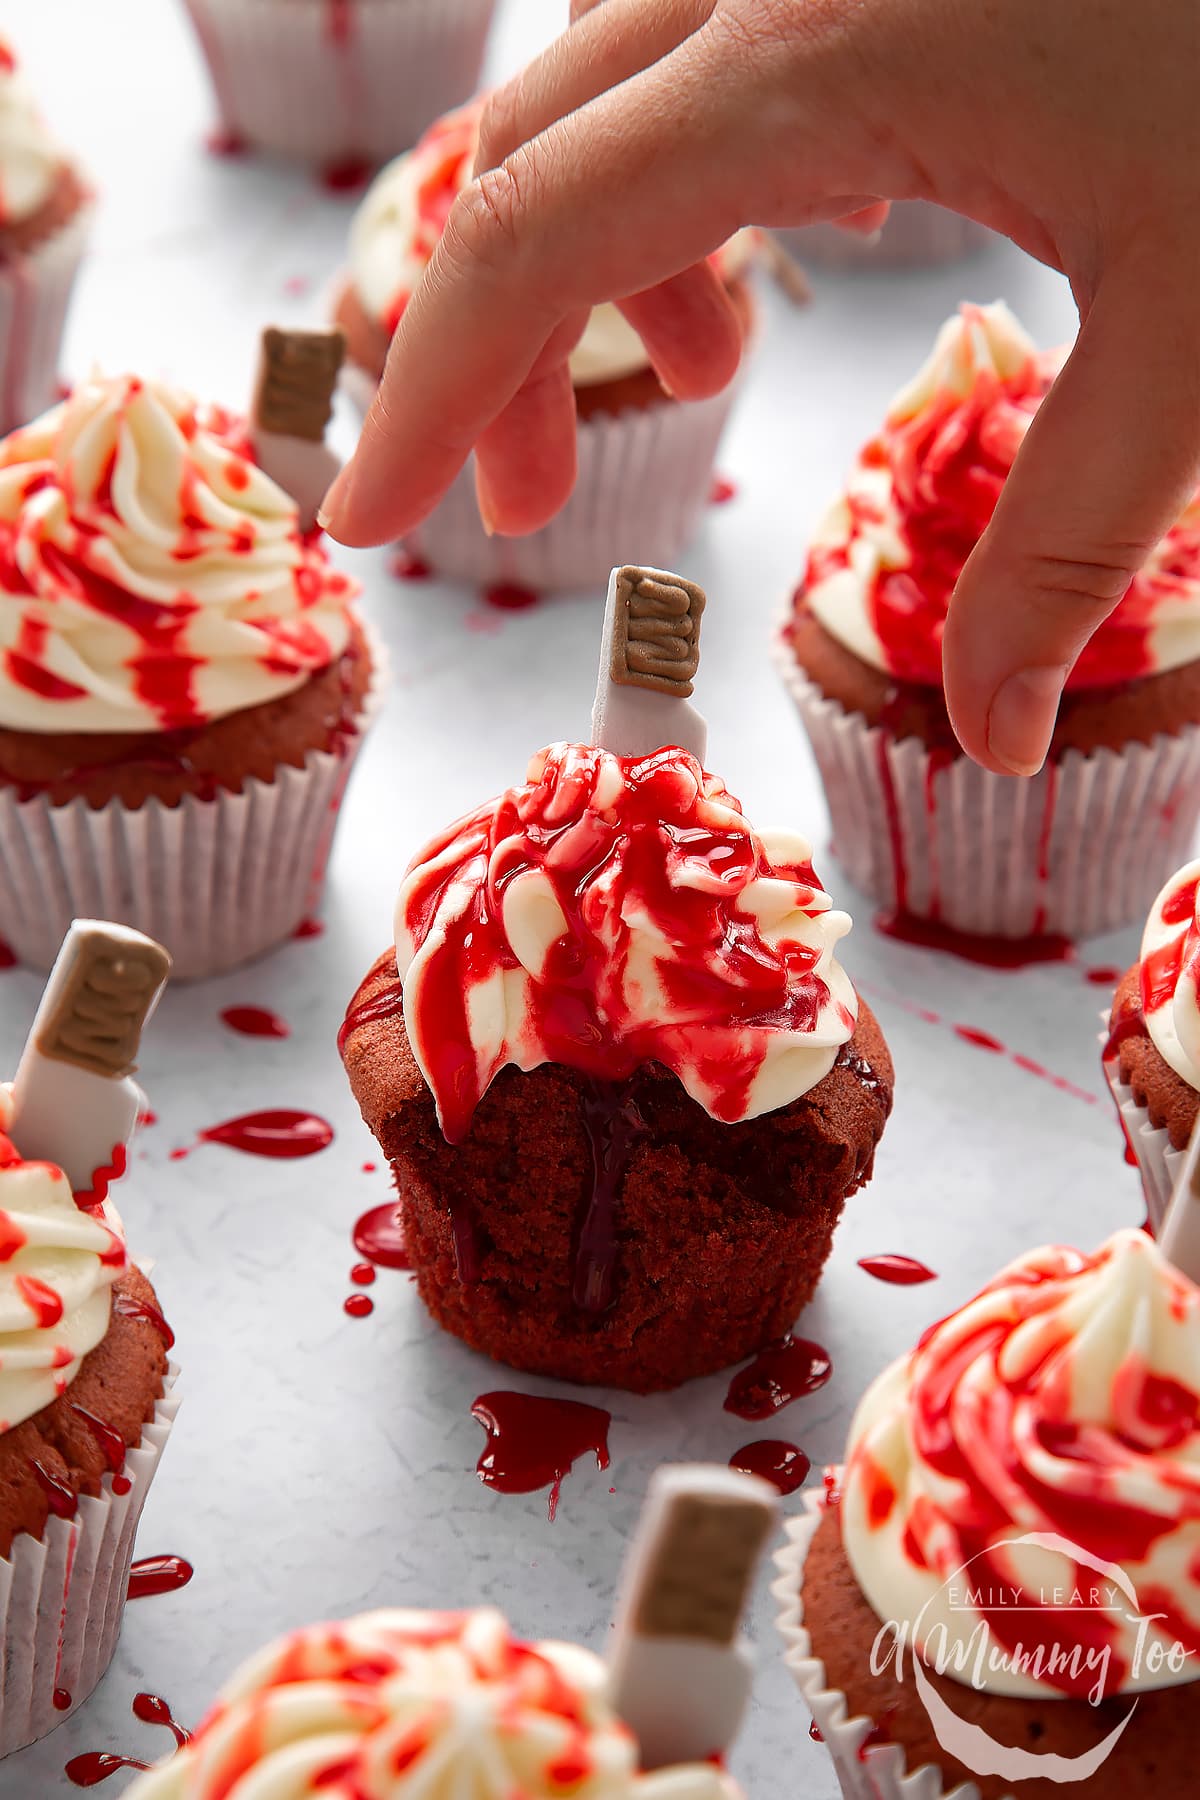
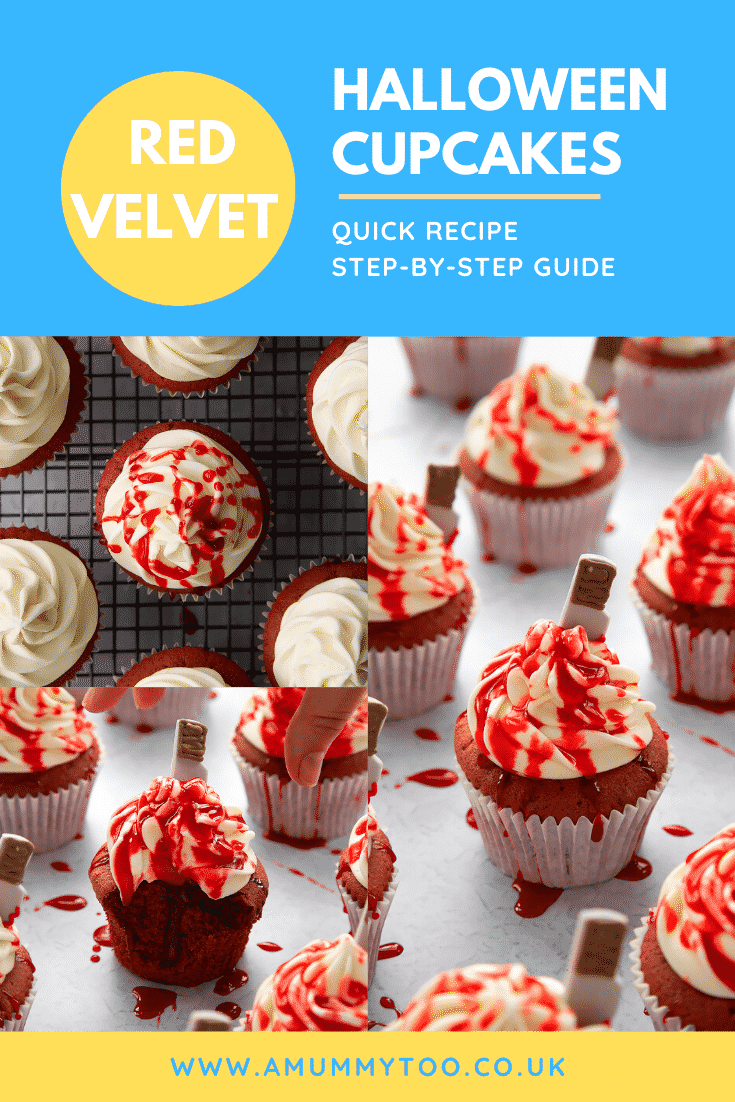
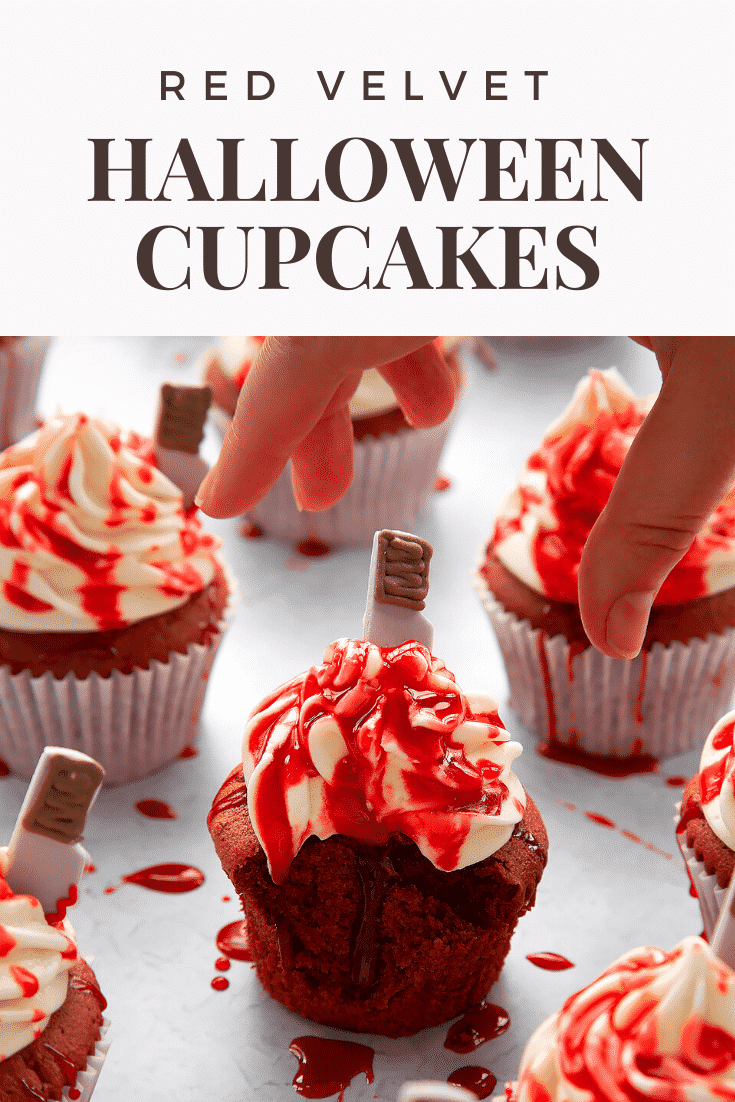
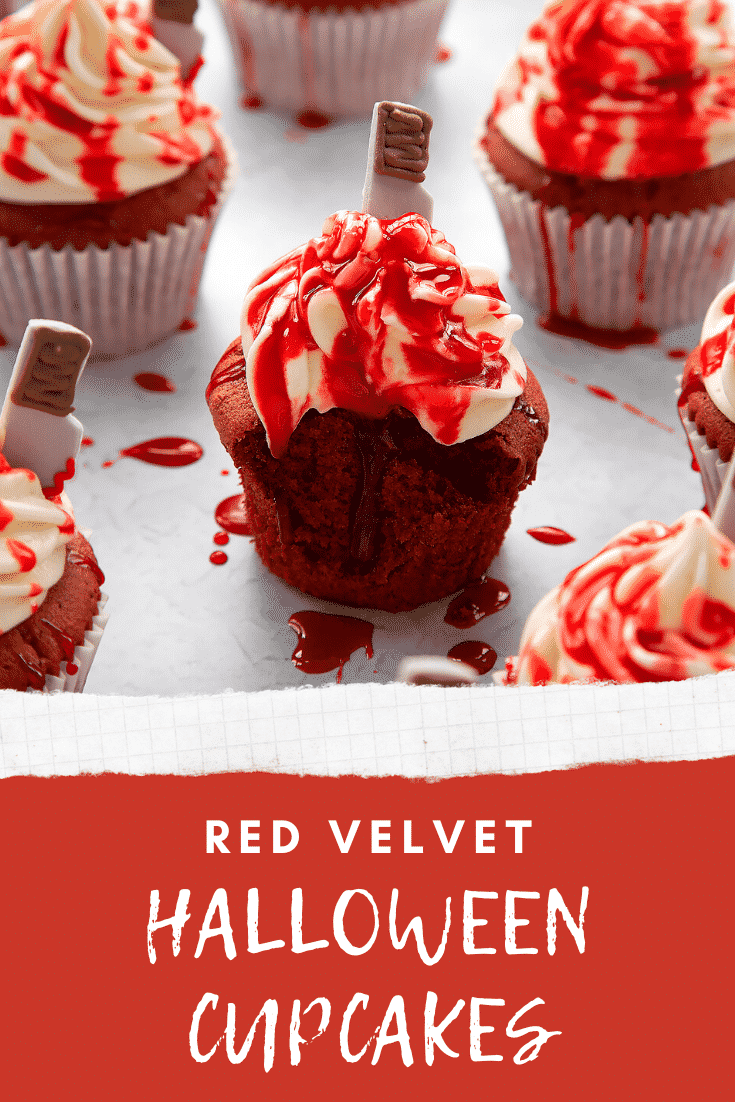
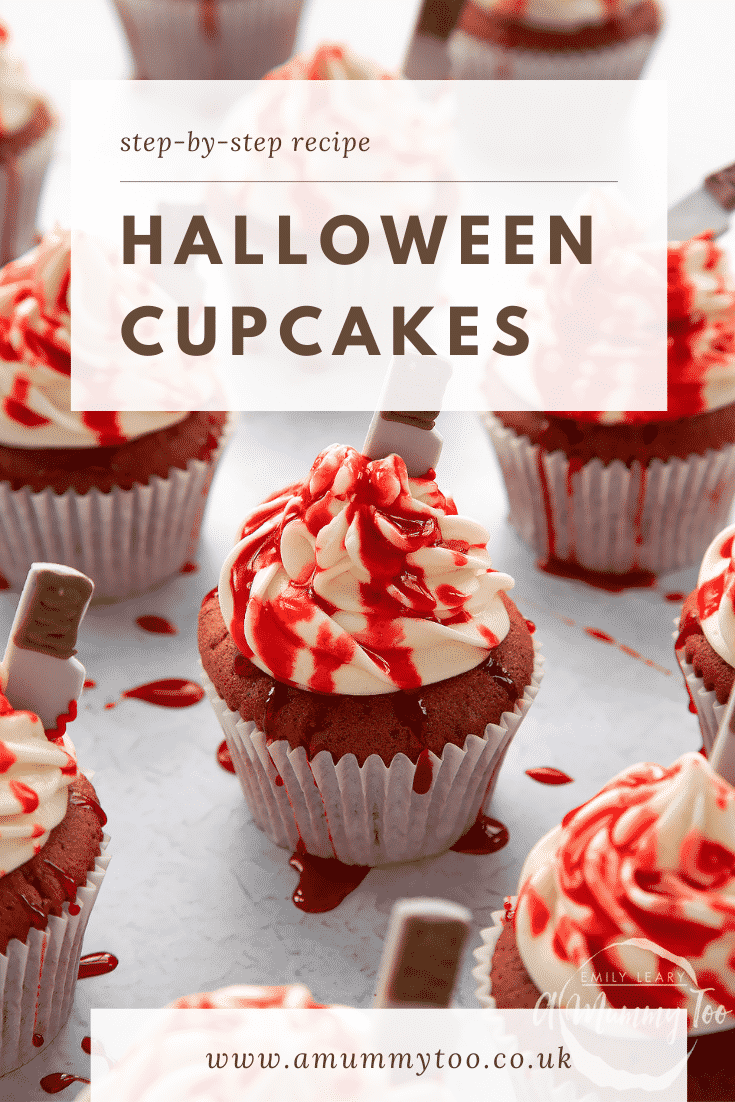
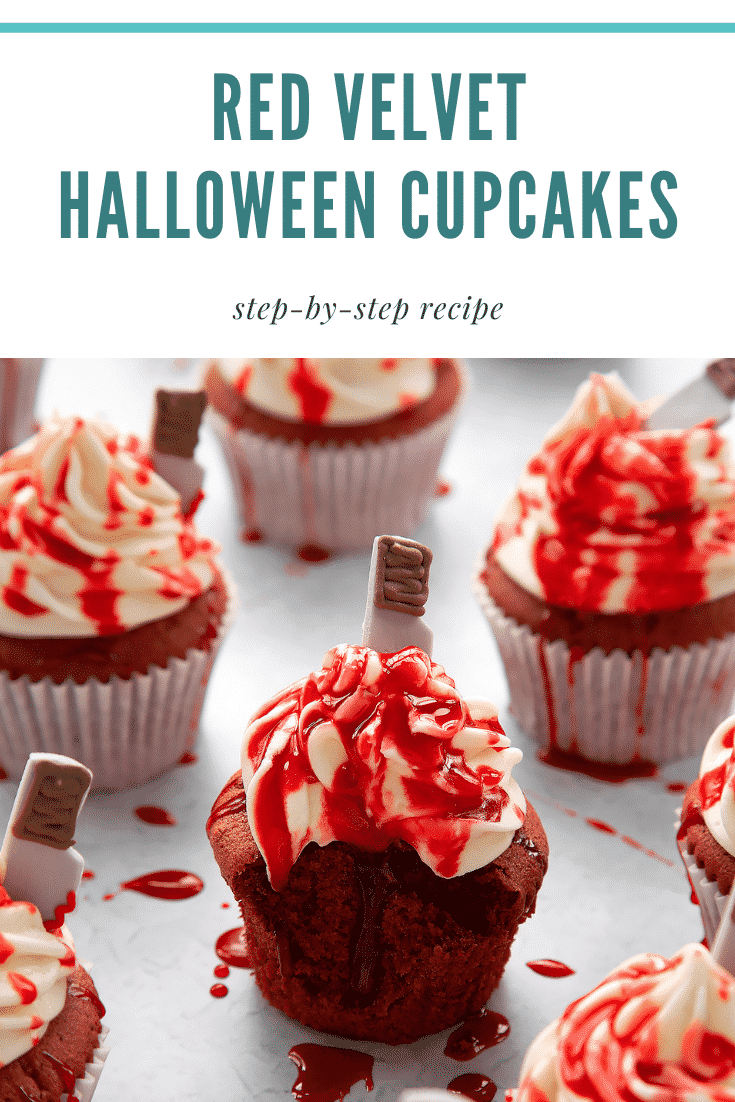
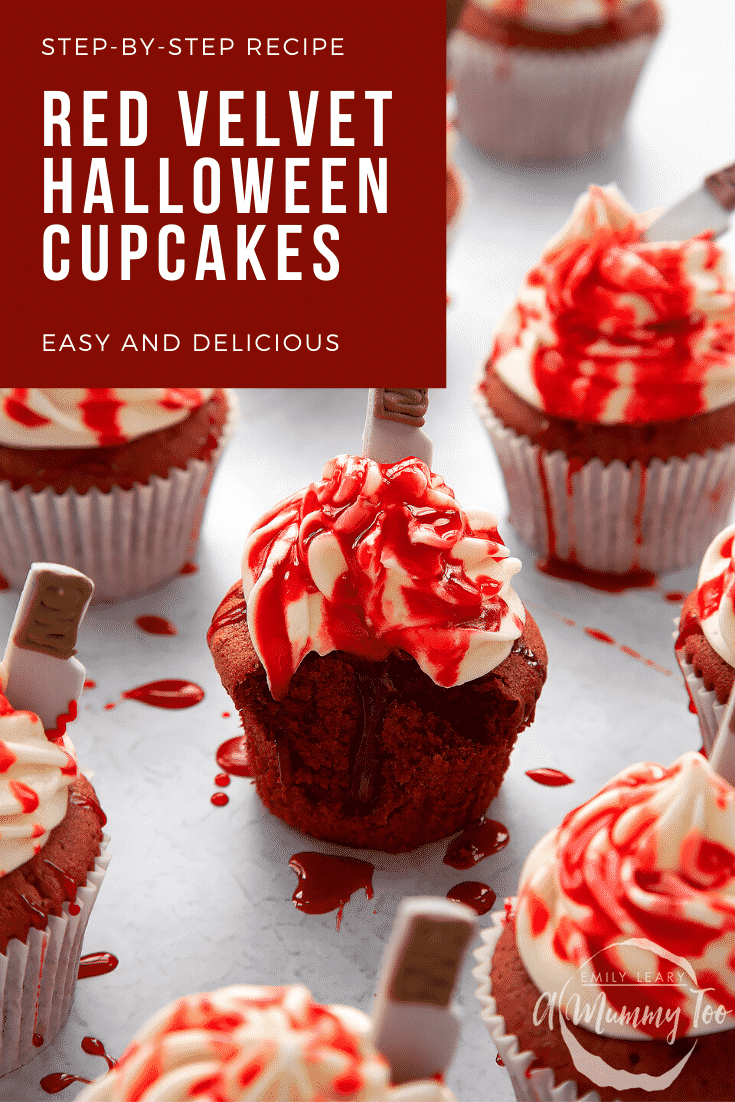
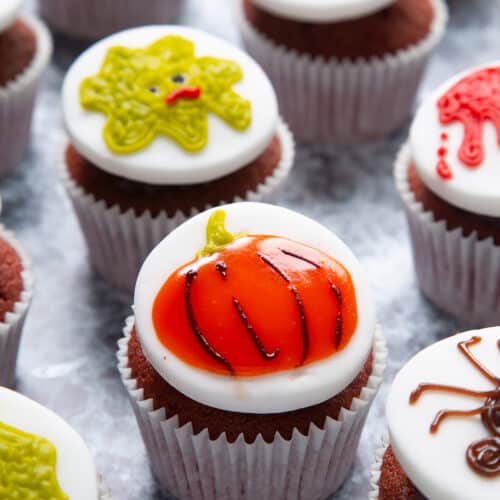
These red velvet Halloween cupcakes boast a flavourful, tender sponge, a smooth and delicious cream cheese frosting and a gorily good blood red syrup.
They're sure to amaze your friends and family this Halloween, but they're actually really easy to make. In fact, making the cupcake batter is a two step process! One: measure margarine, milk, sugar, flour, cocoa, eggs and food colouring into a bowl. Two: whisk! And that's it - your batter will be ready to spoon into cupcake cases and bake to produce gorgeously velvety cupcakes.
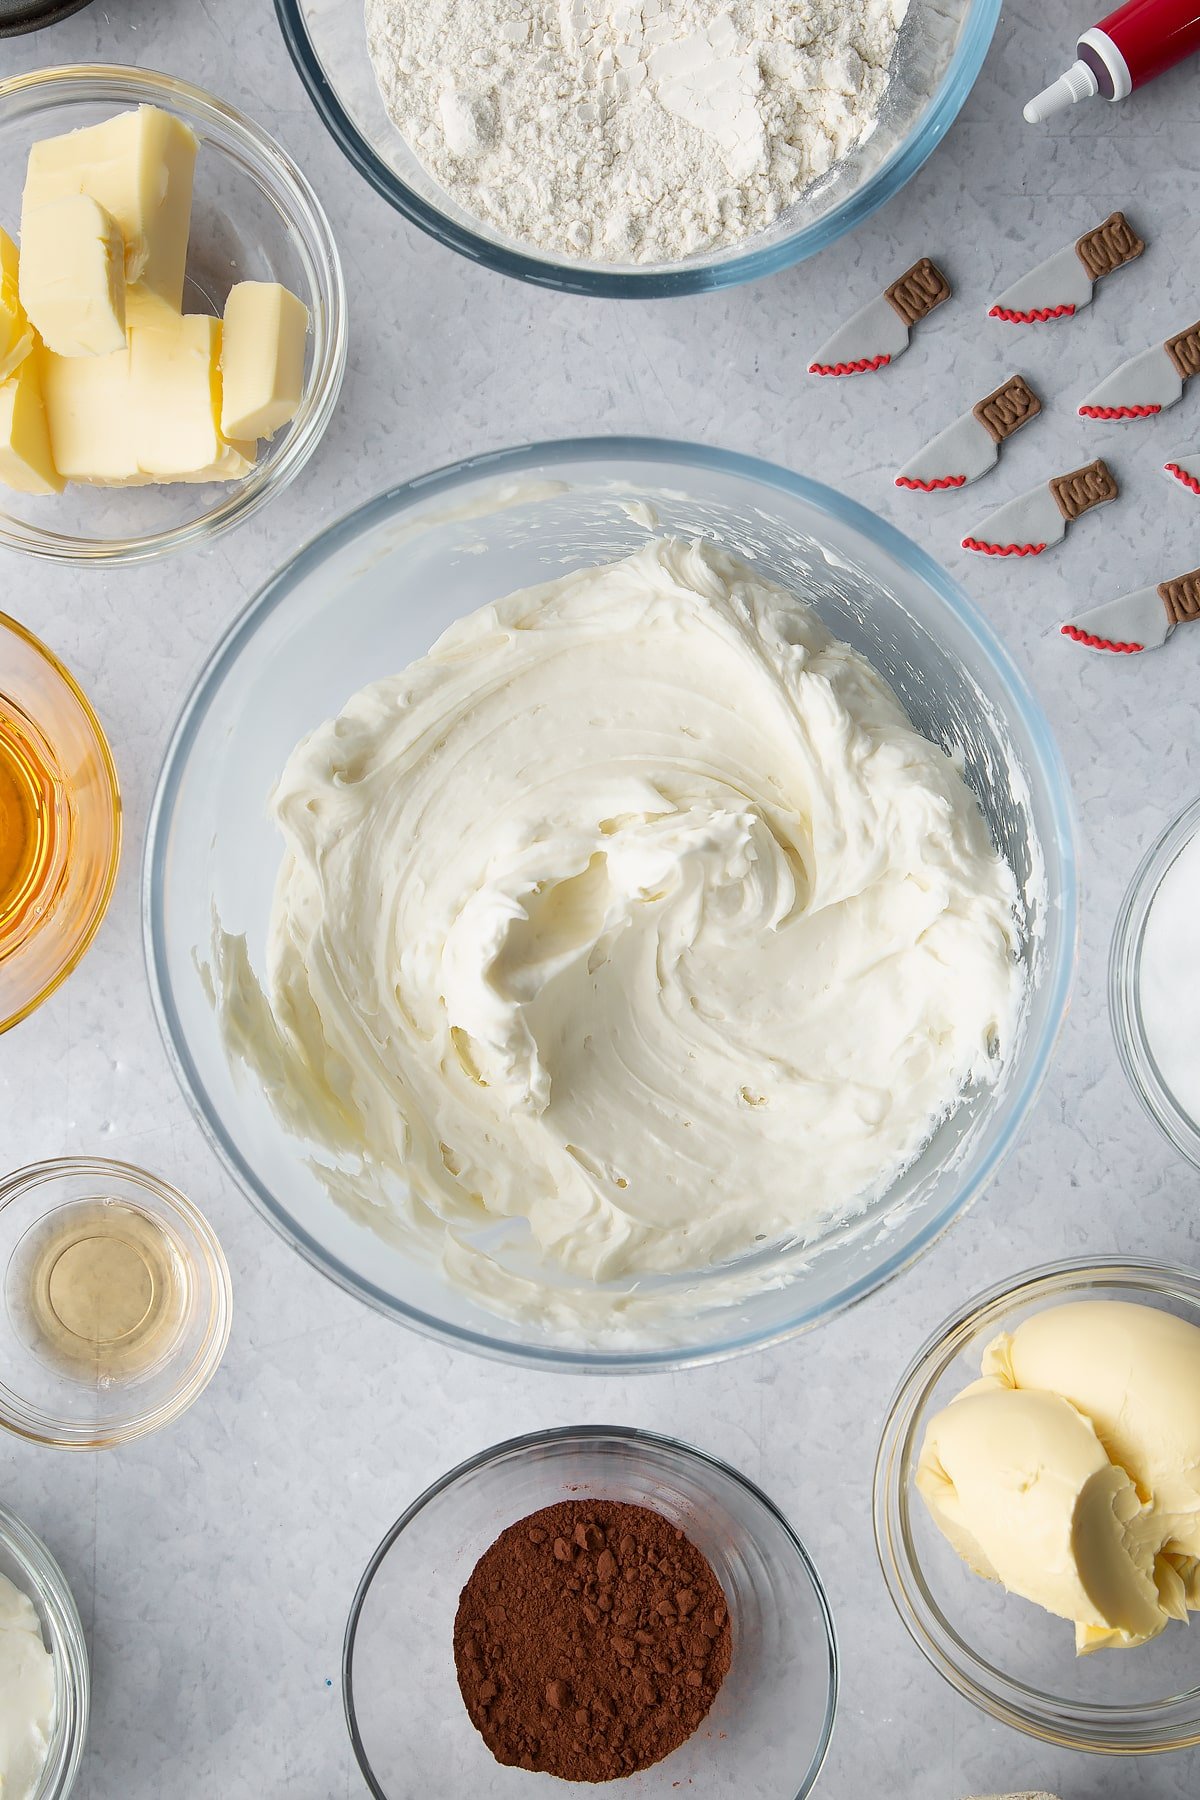
Making the cream cheese frosting is really easy too. If you're ever used cream cheese in frosting, you'll know that it can easily go slack and turn your buttercream to liquid. The great news is, using the method detailed below (learned while training with Leiths School of Food and Wine), that won't be an issue and you'll beautiful, pipeable buttercream.

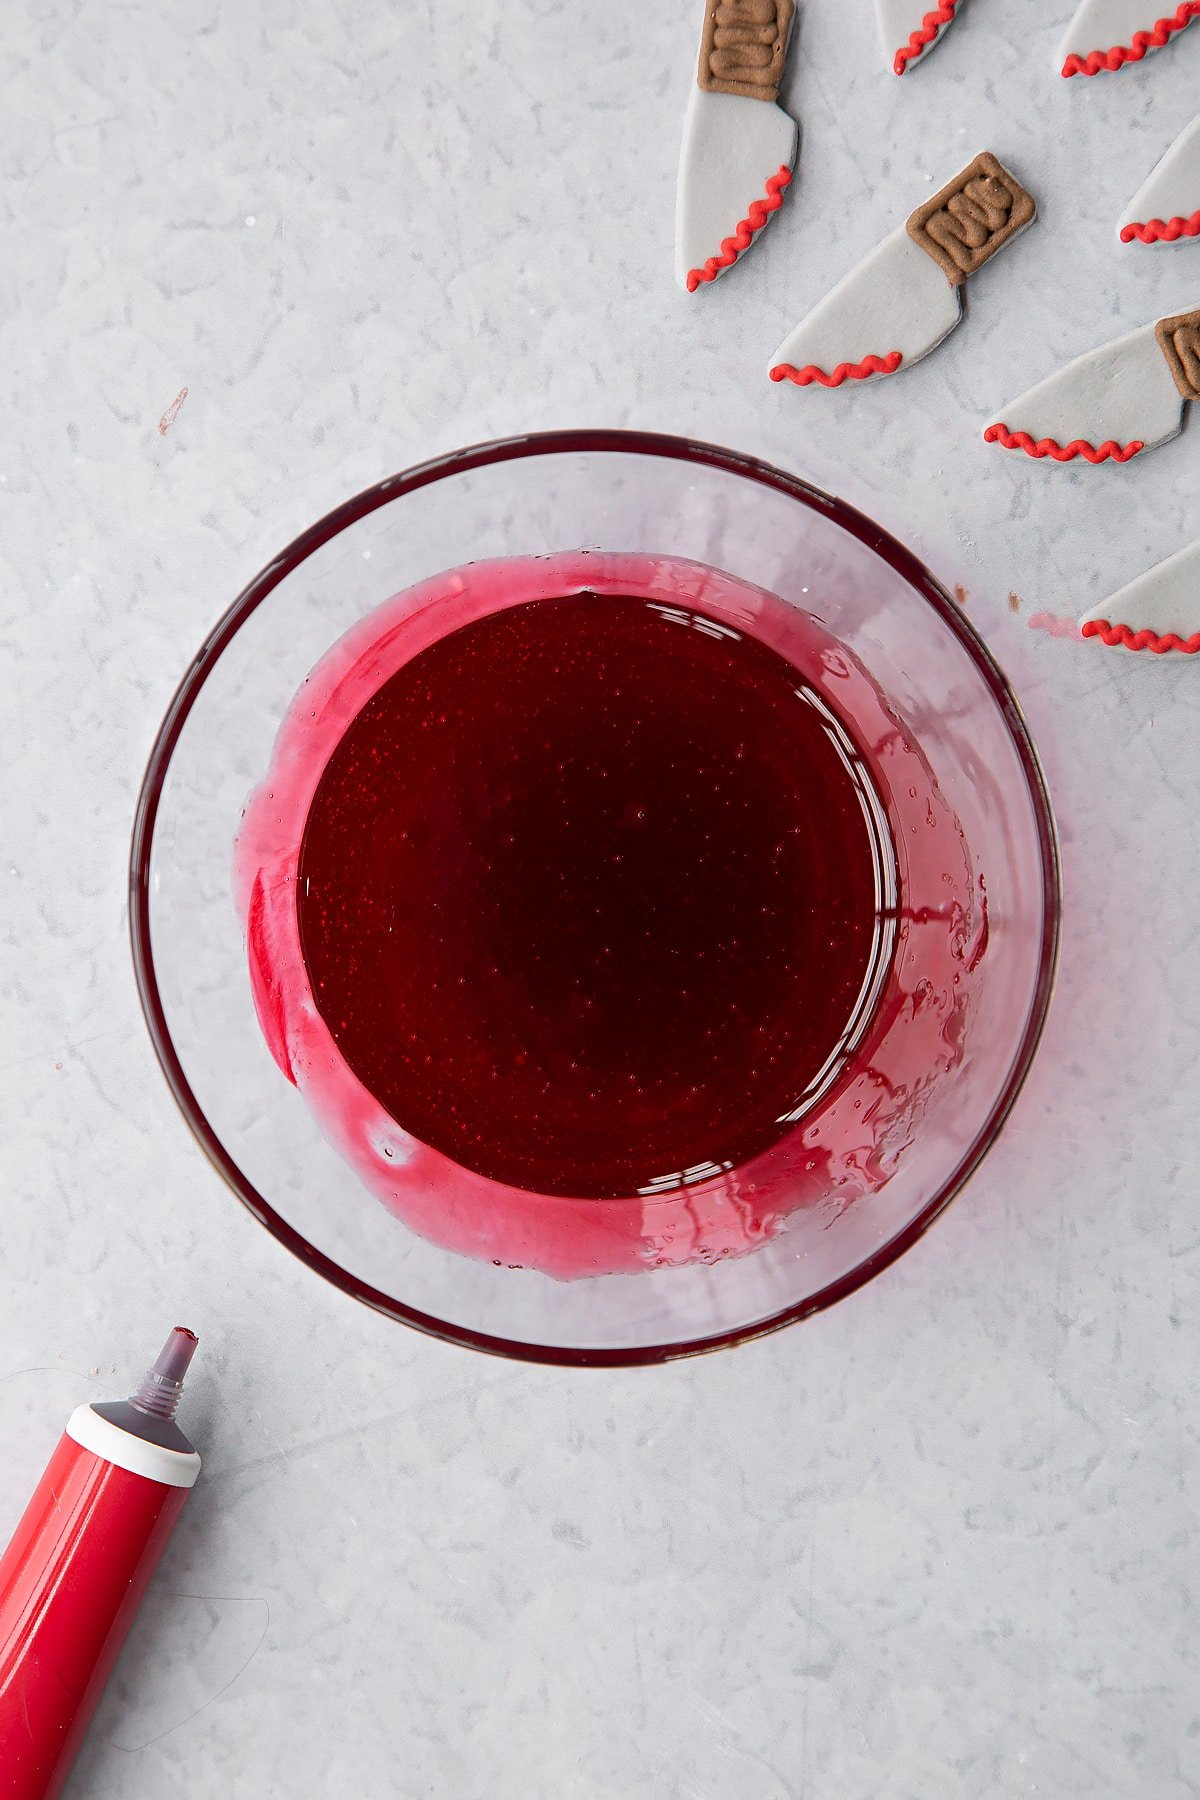
And for the blood red syrup? Well, that's just golden syrup dyed blood red with a little natural colouring and, as you can see, it's very effective!
Here's how to make my gruesome red velvet Halloween cupcakes. I've also popped a link below for the little edible knife toppers if you want to pick them up to complete the look.
Ingredients
For the sponges
- 4 medium free-range eggs
- 200 g (7.1 oz) self-raising white flour (self rising flour)
- 200 g (7.1 oz) white caster sugar (superfine sugar)
- 200 g (7.1 oz) margarine
- 4 tbsp whole milk
- 2 tbsp cocoa powder (dutch processed)
- 2 tsp red gel food colouring vegetarian if required
For the cream cheese frosting
- 400 g (14.1 oz) icing sugar (powdered sugar)
- 200 g (7.1 oz) salted butter softened
- 220 g (7.8 oz) full fat cream cheese chilled
- 2 tsp vanilla extract
For the “blood” syrup
- 50 g (1.8 oz) golden syrup
- ½-1 tsp (0.5 tsp) red food colouring
Equipment
Instructions
Make the sponges
Preheat the oven to 180C (160C fan).
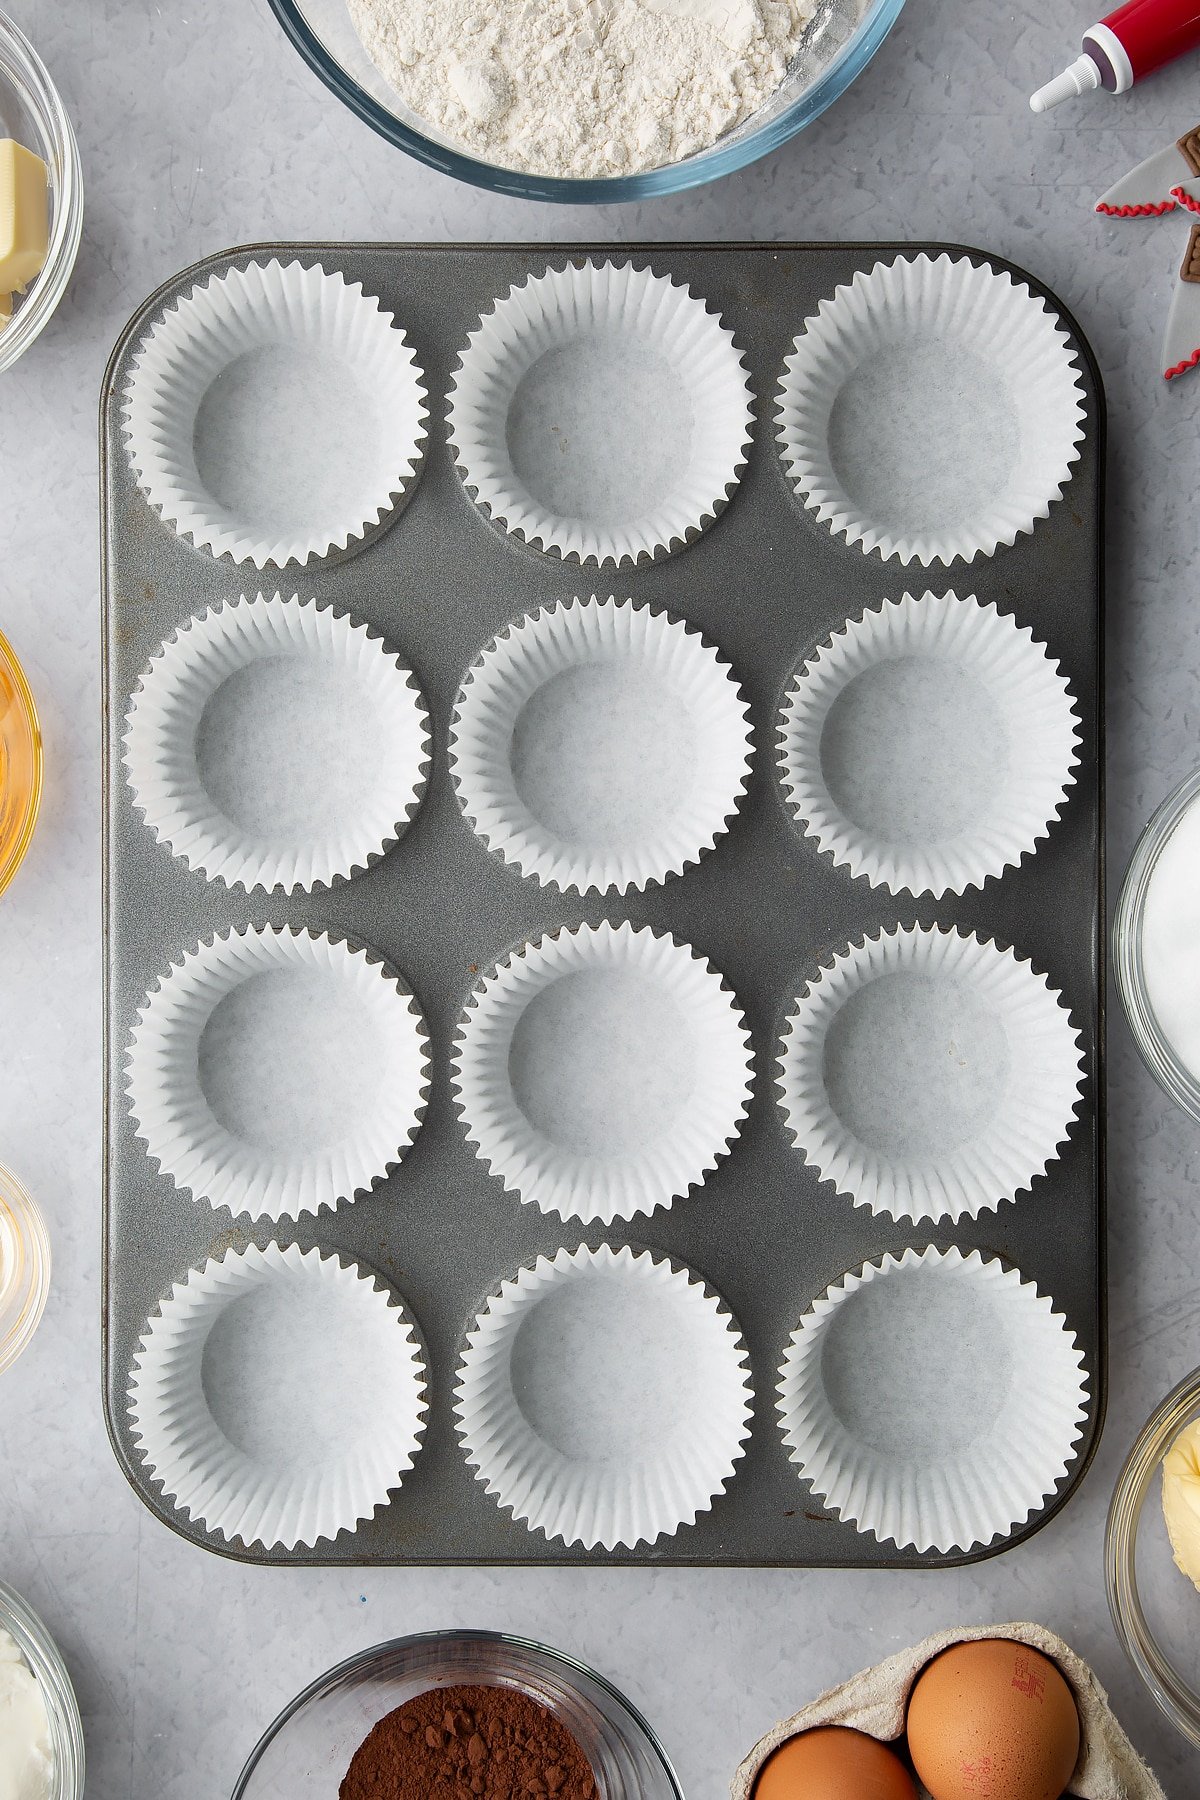
Line a muffin tray with cupcake cases.
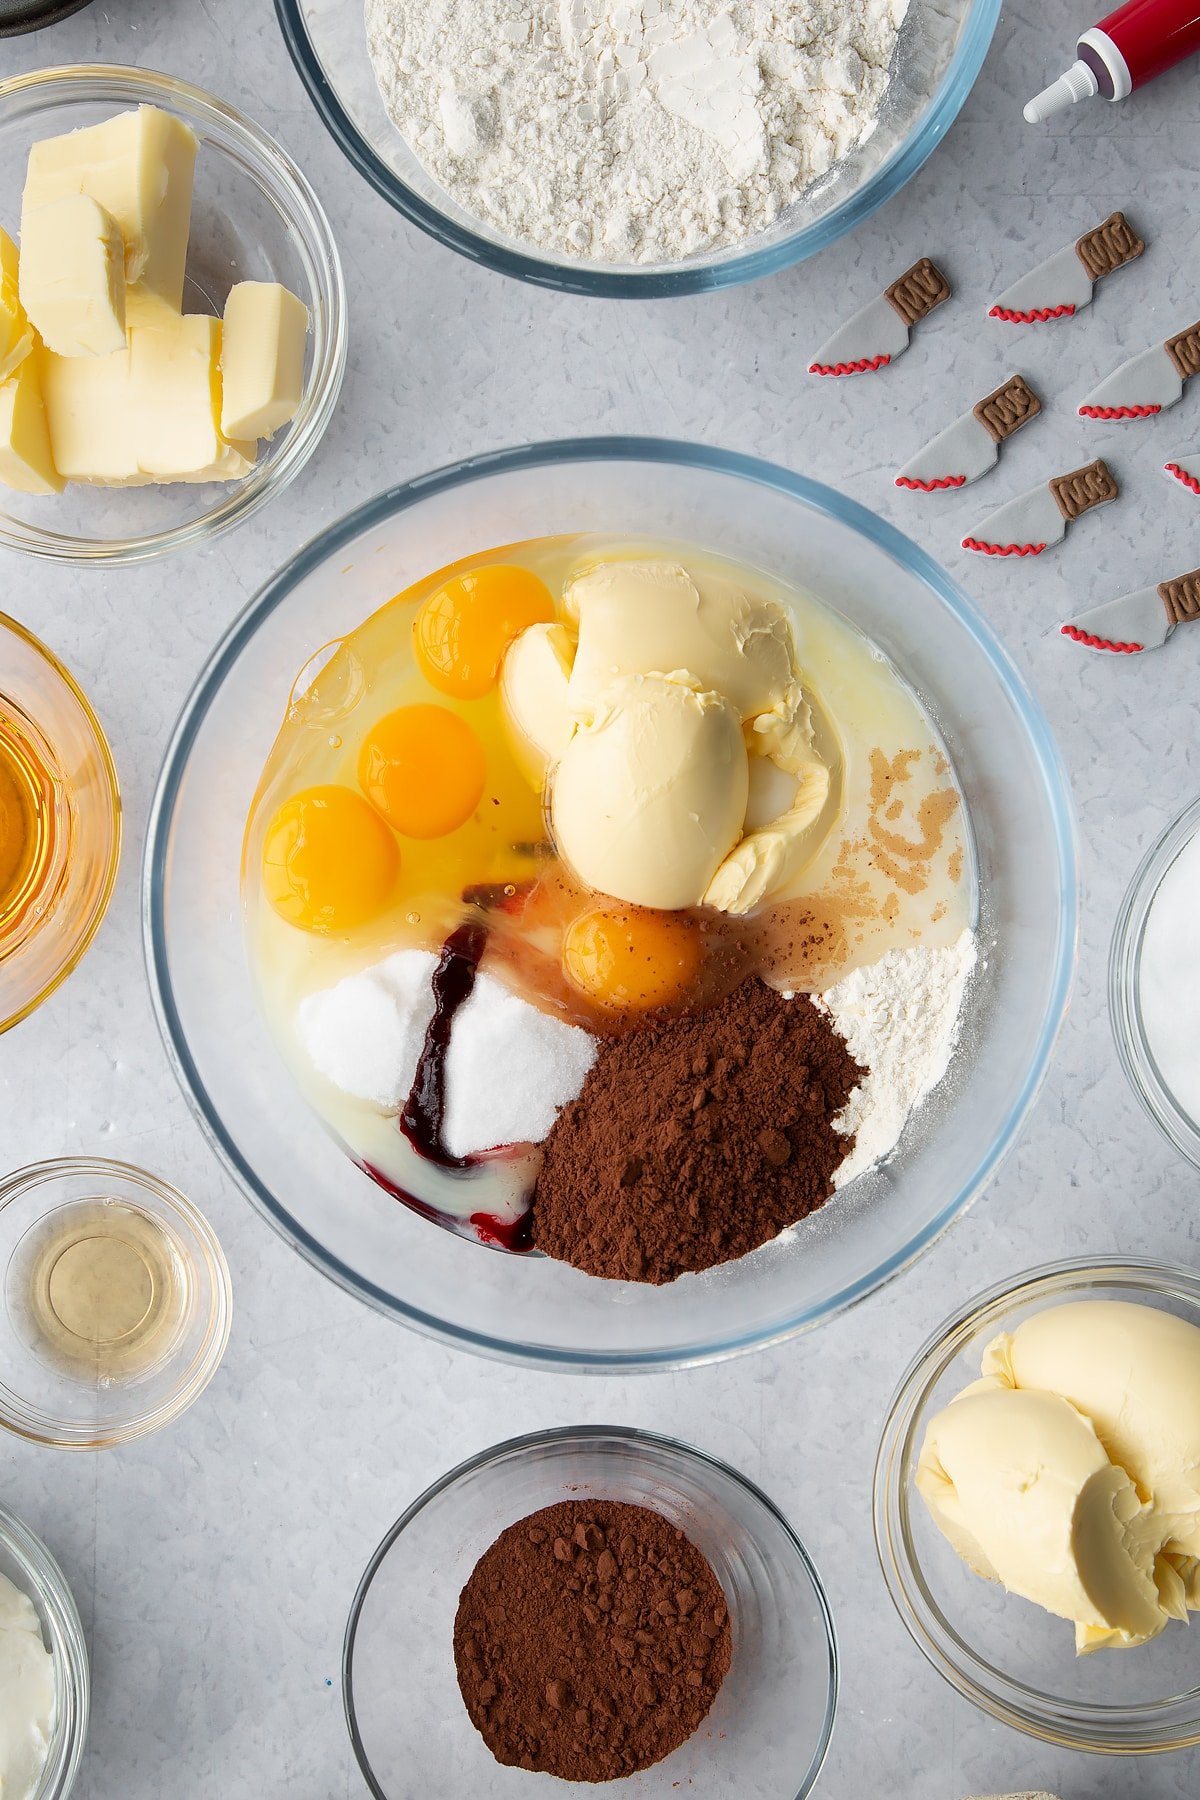
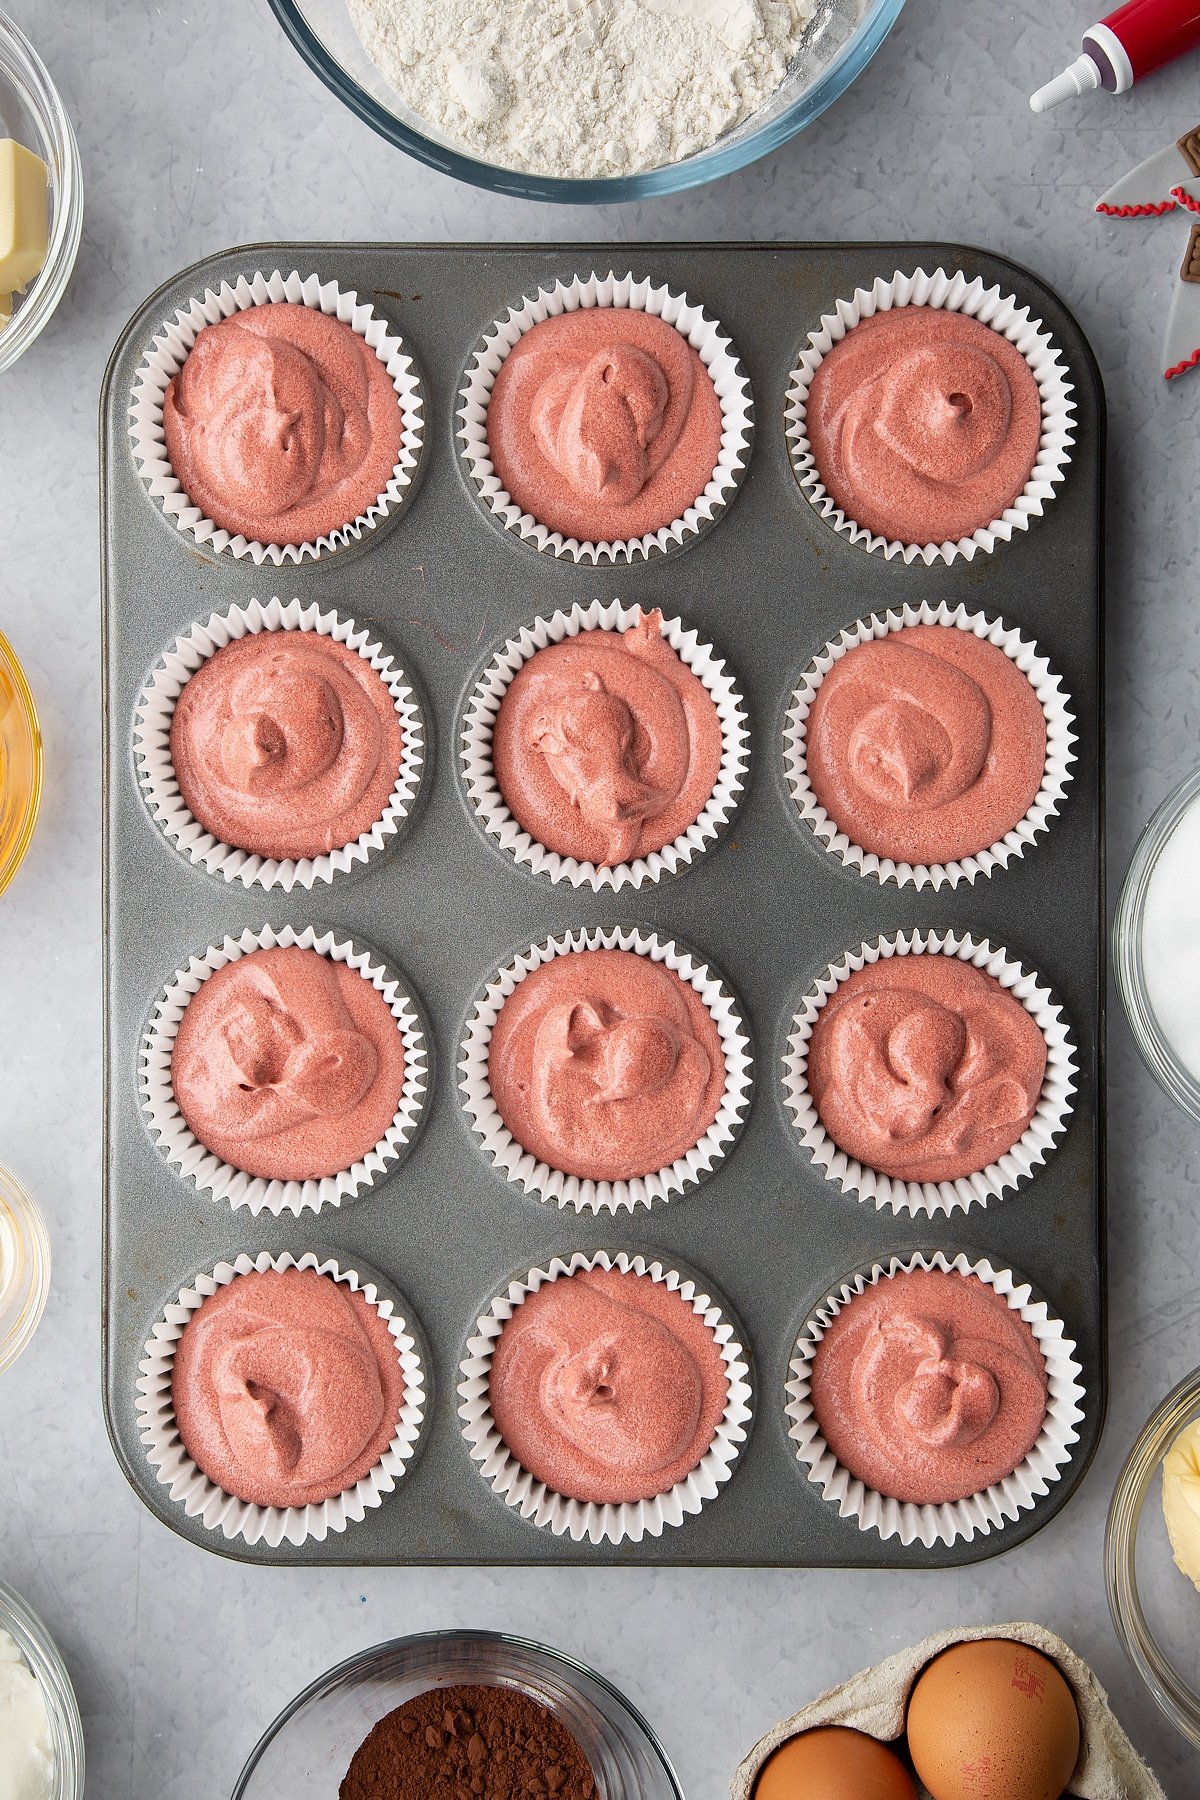
Put the margarine, milk, sugar, flour, cocoa, eggs and food colouring in a large mixing bowl.
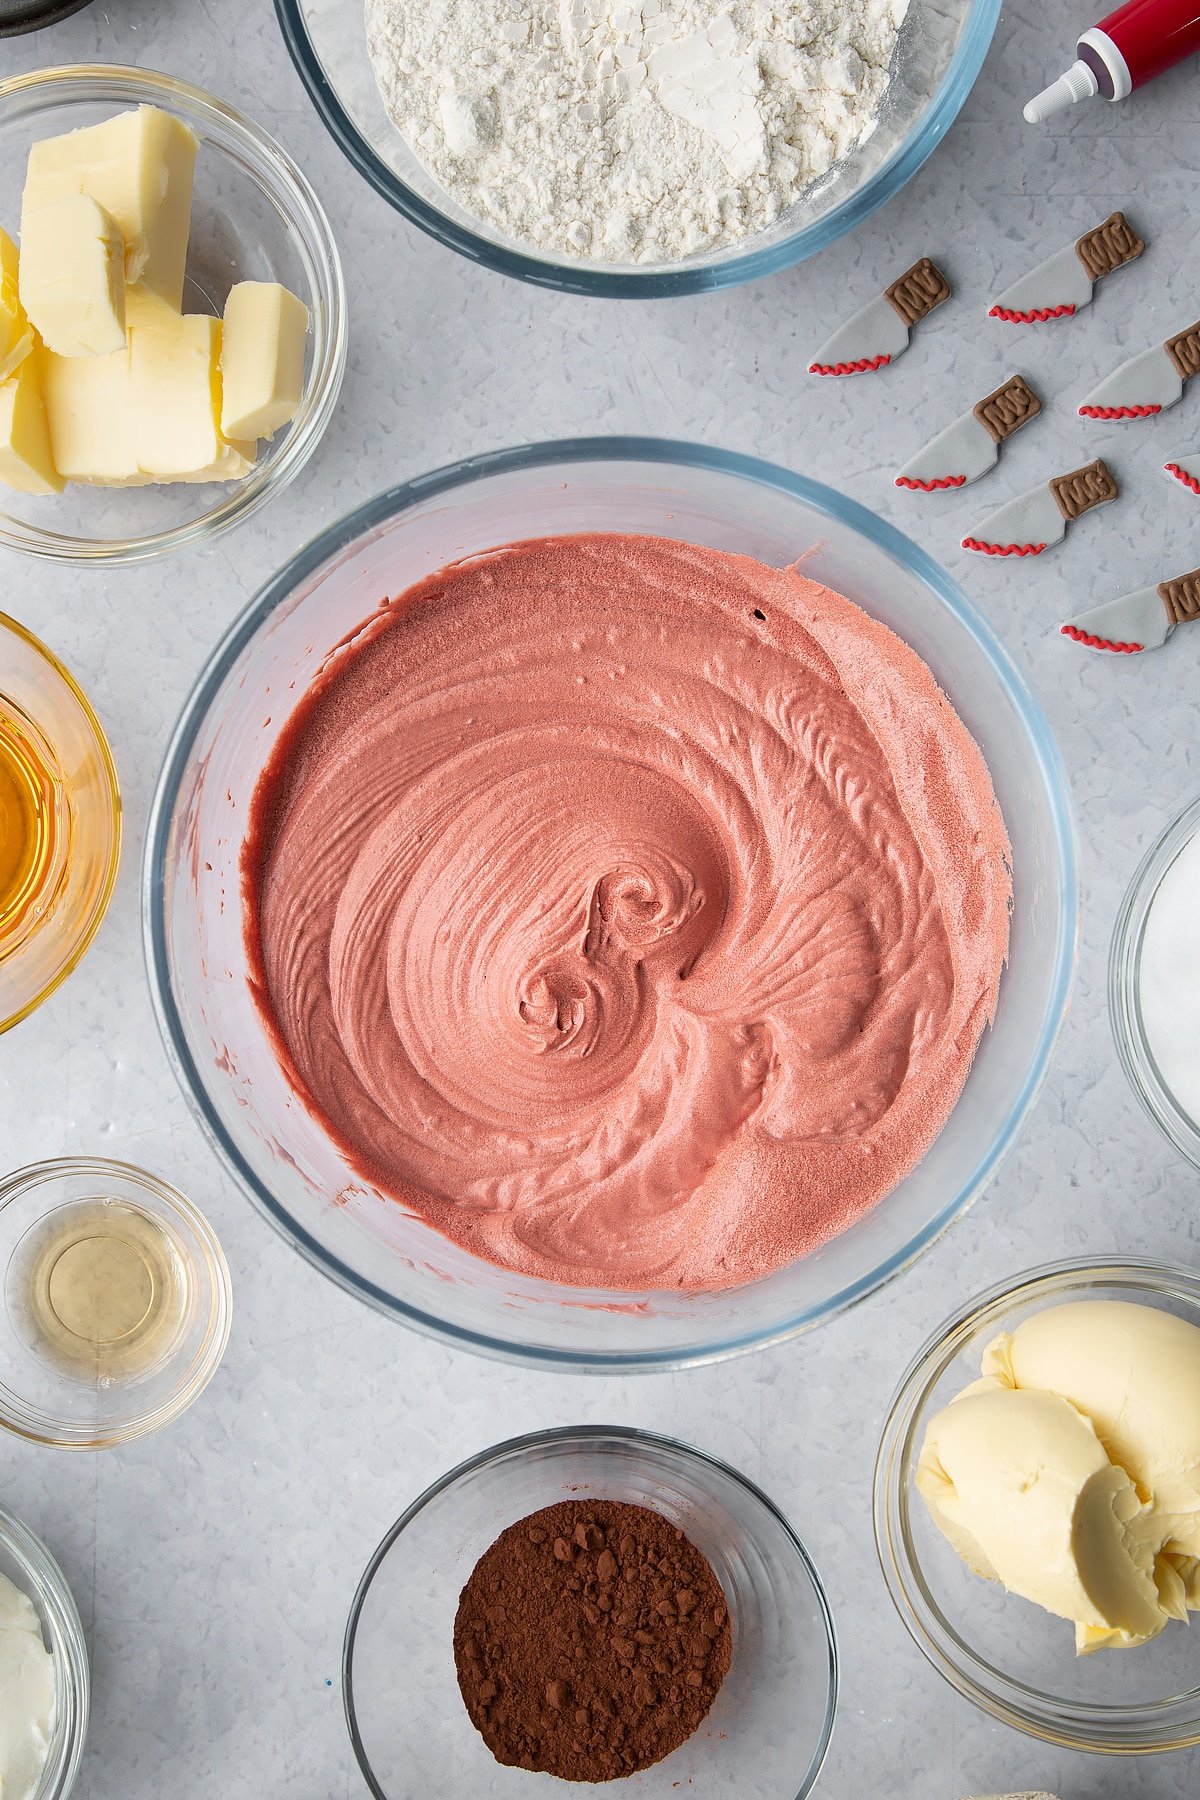
Beat together until smooth and pale.
Spoon the batter into the cases, sharing evenly between them, and level off.
Bake for approximately 25 minutes until risen and springy on top.
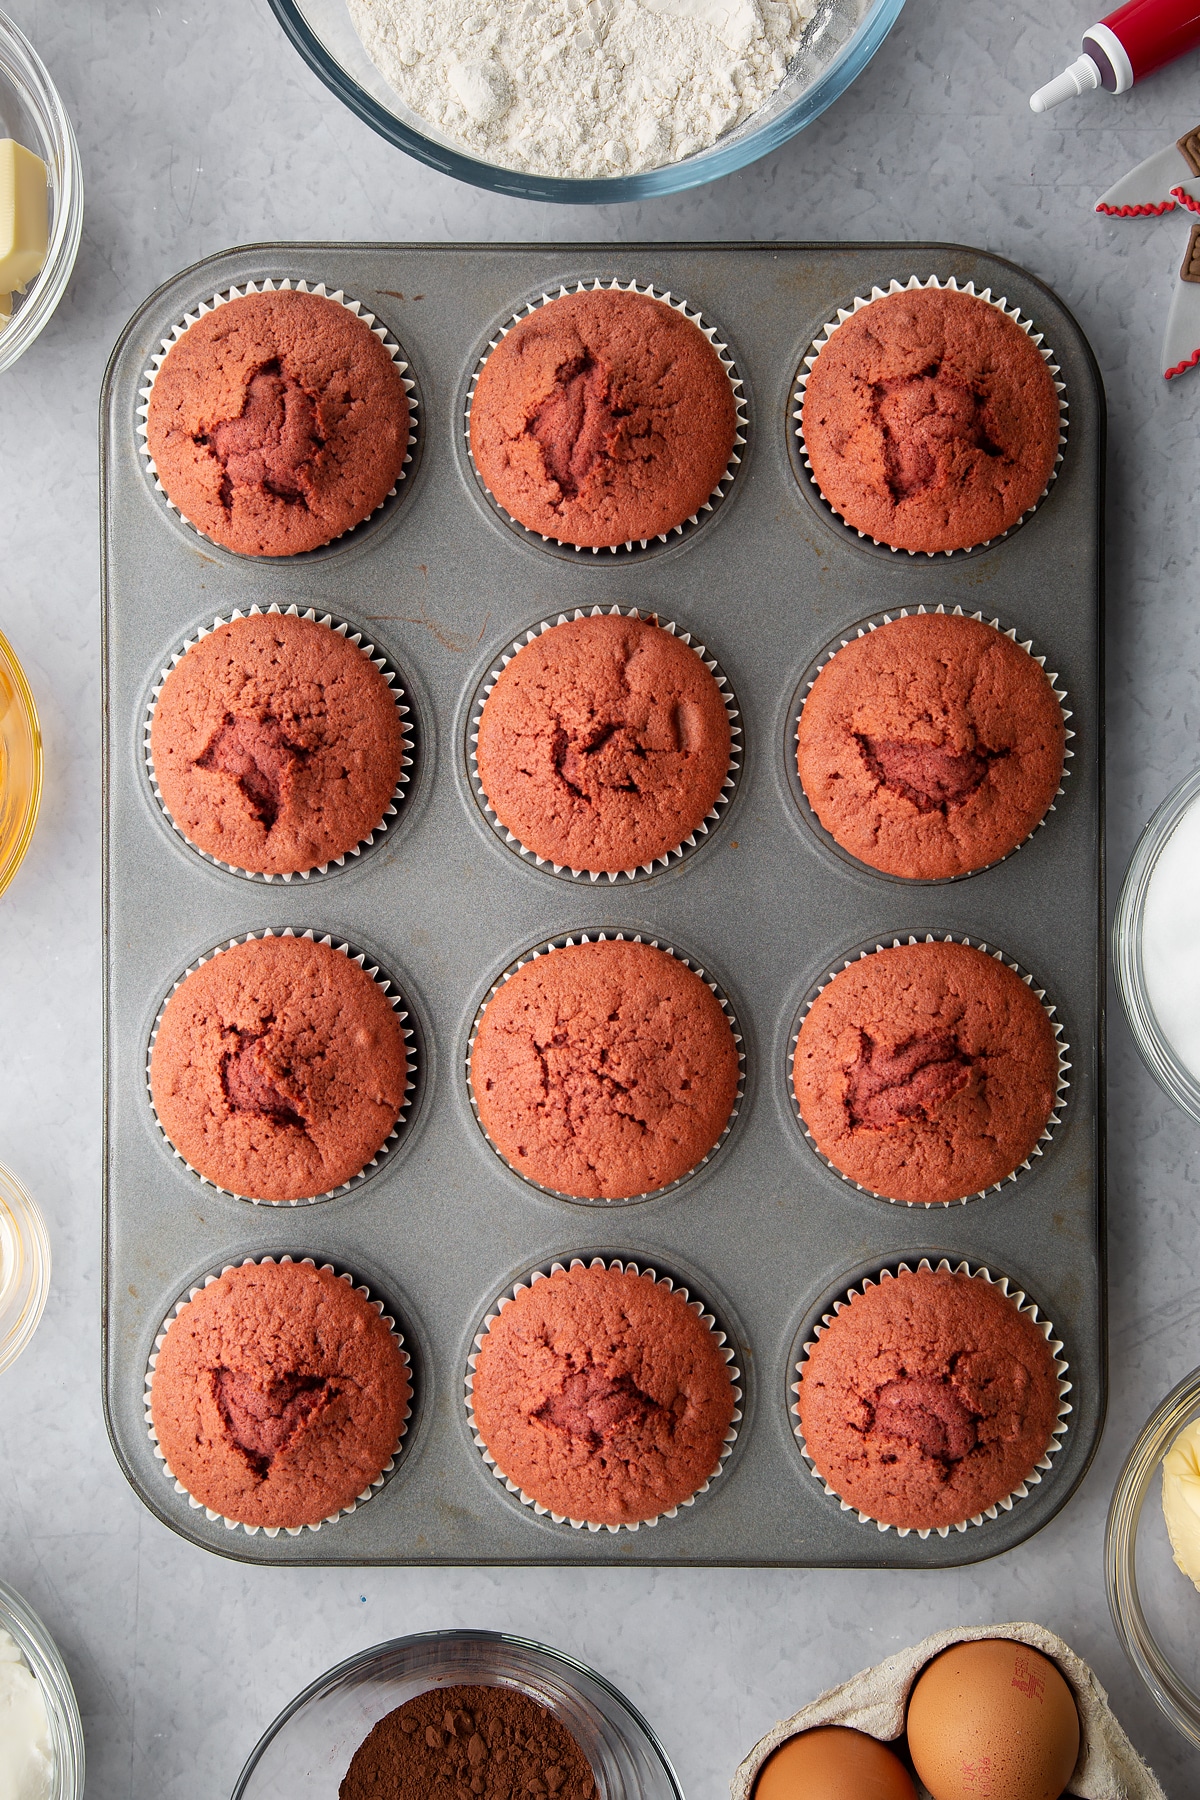
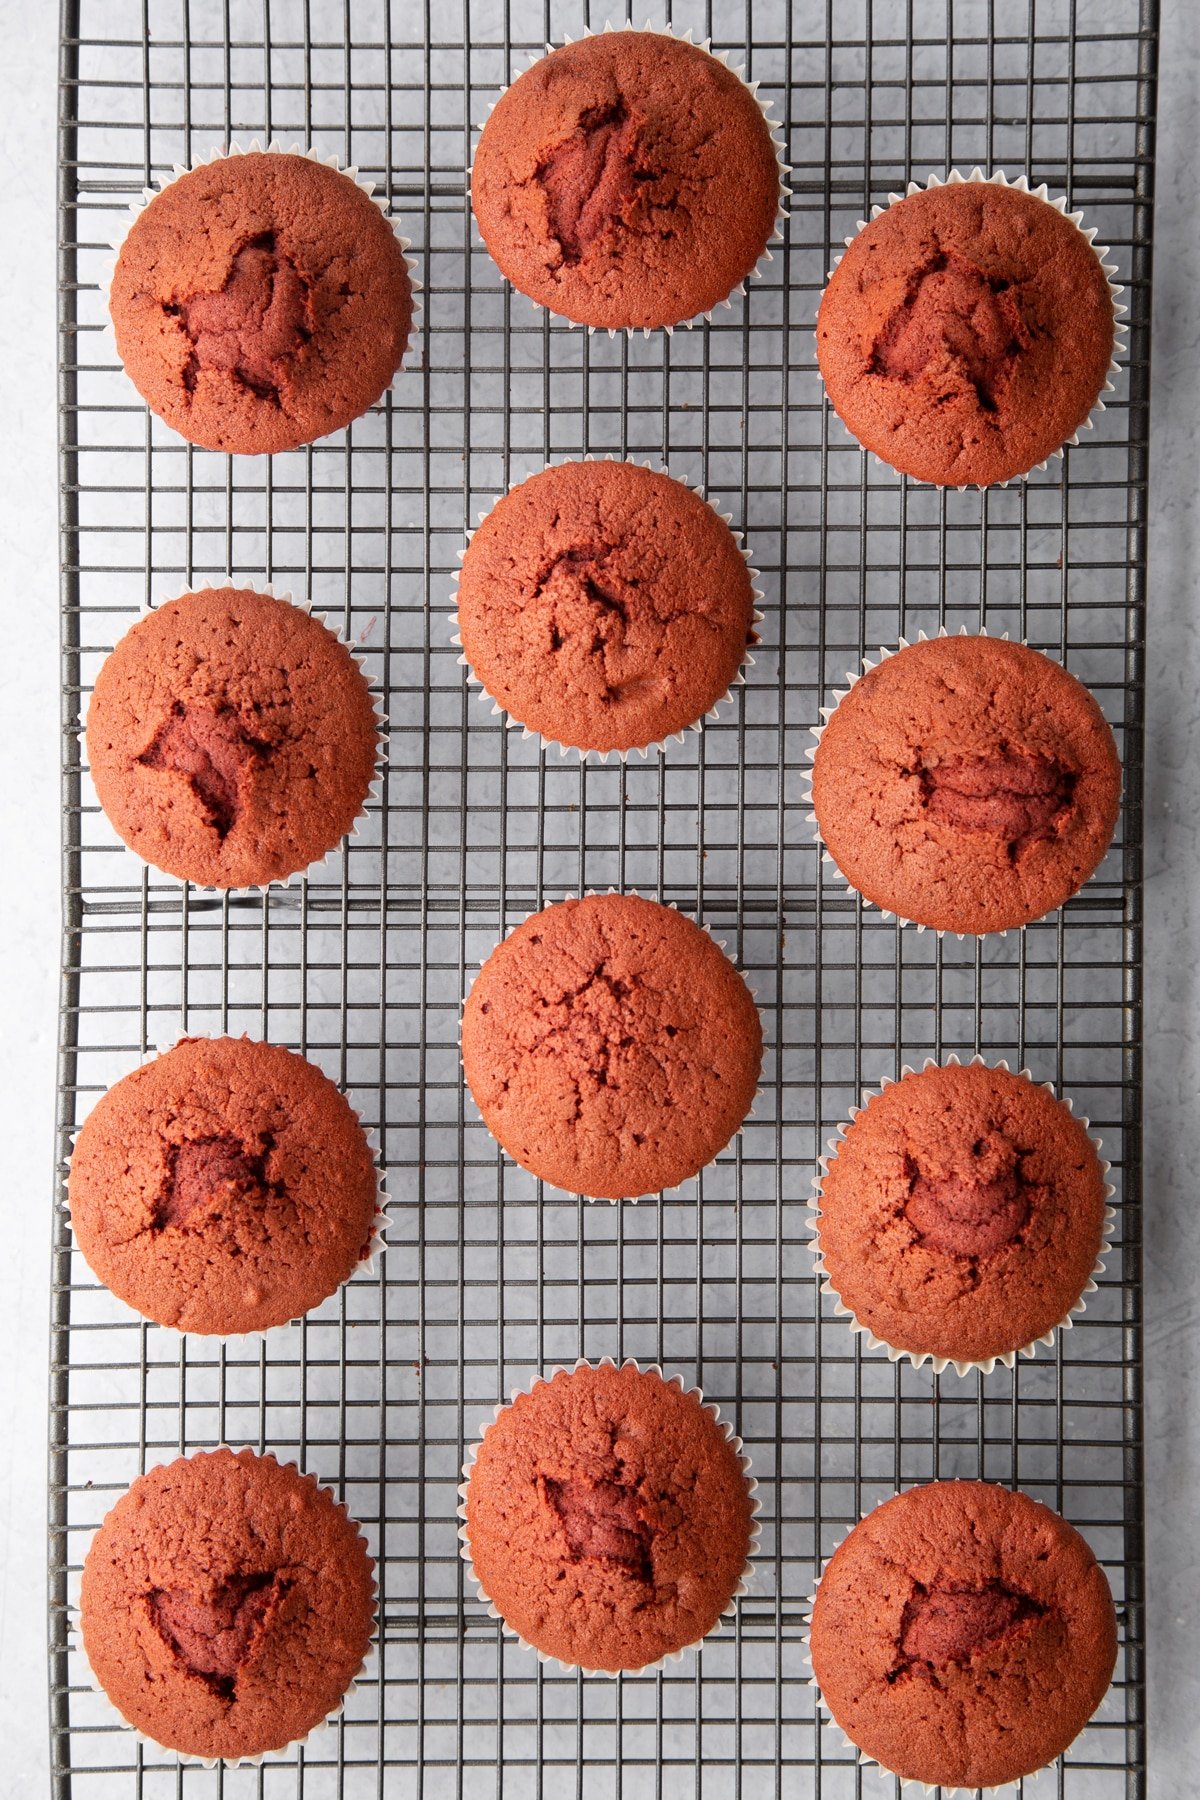
Transfer to a wire rack to cool completely.
Make the cream cheese frosting
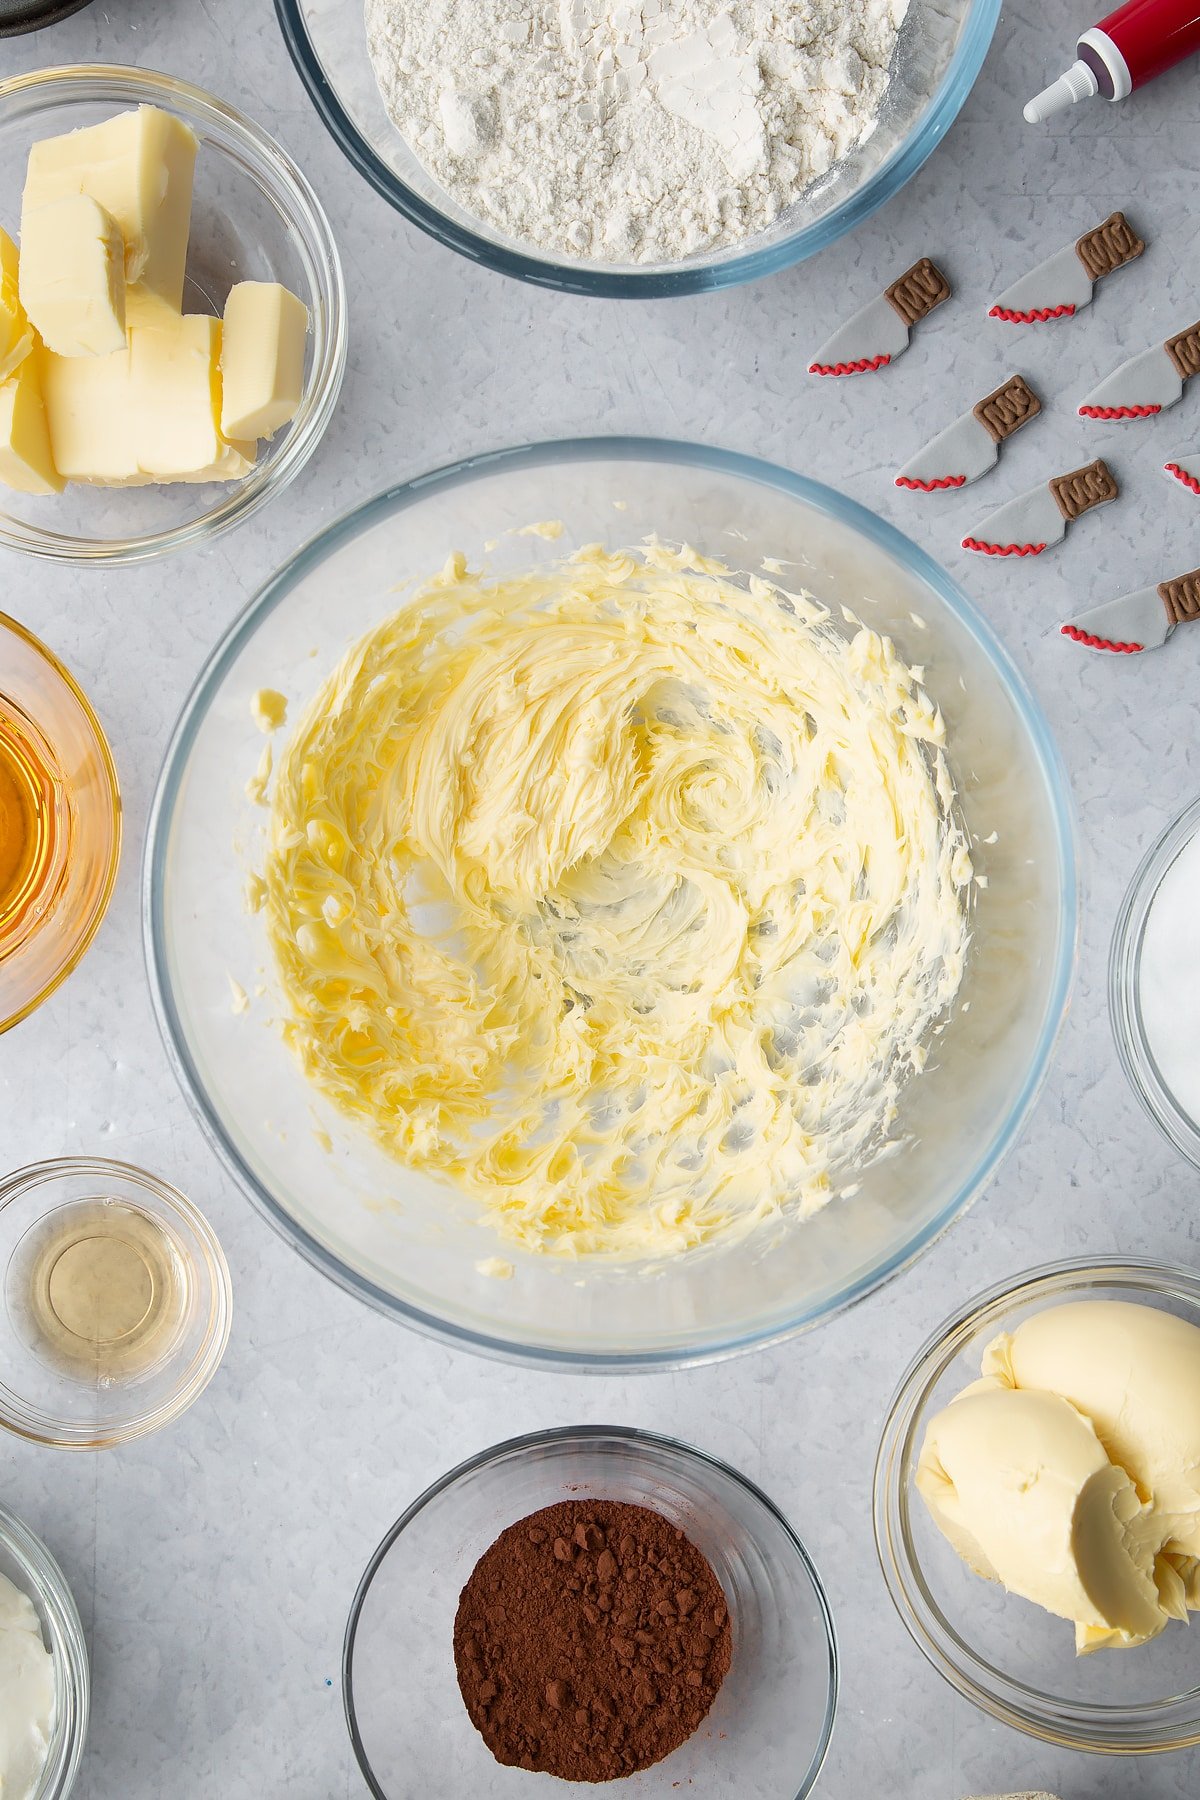
Put the softened butter in a bowl.
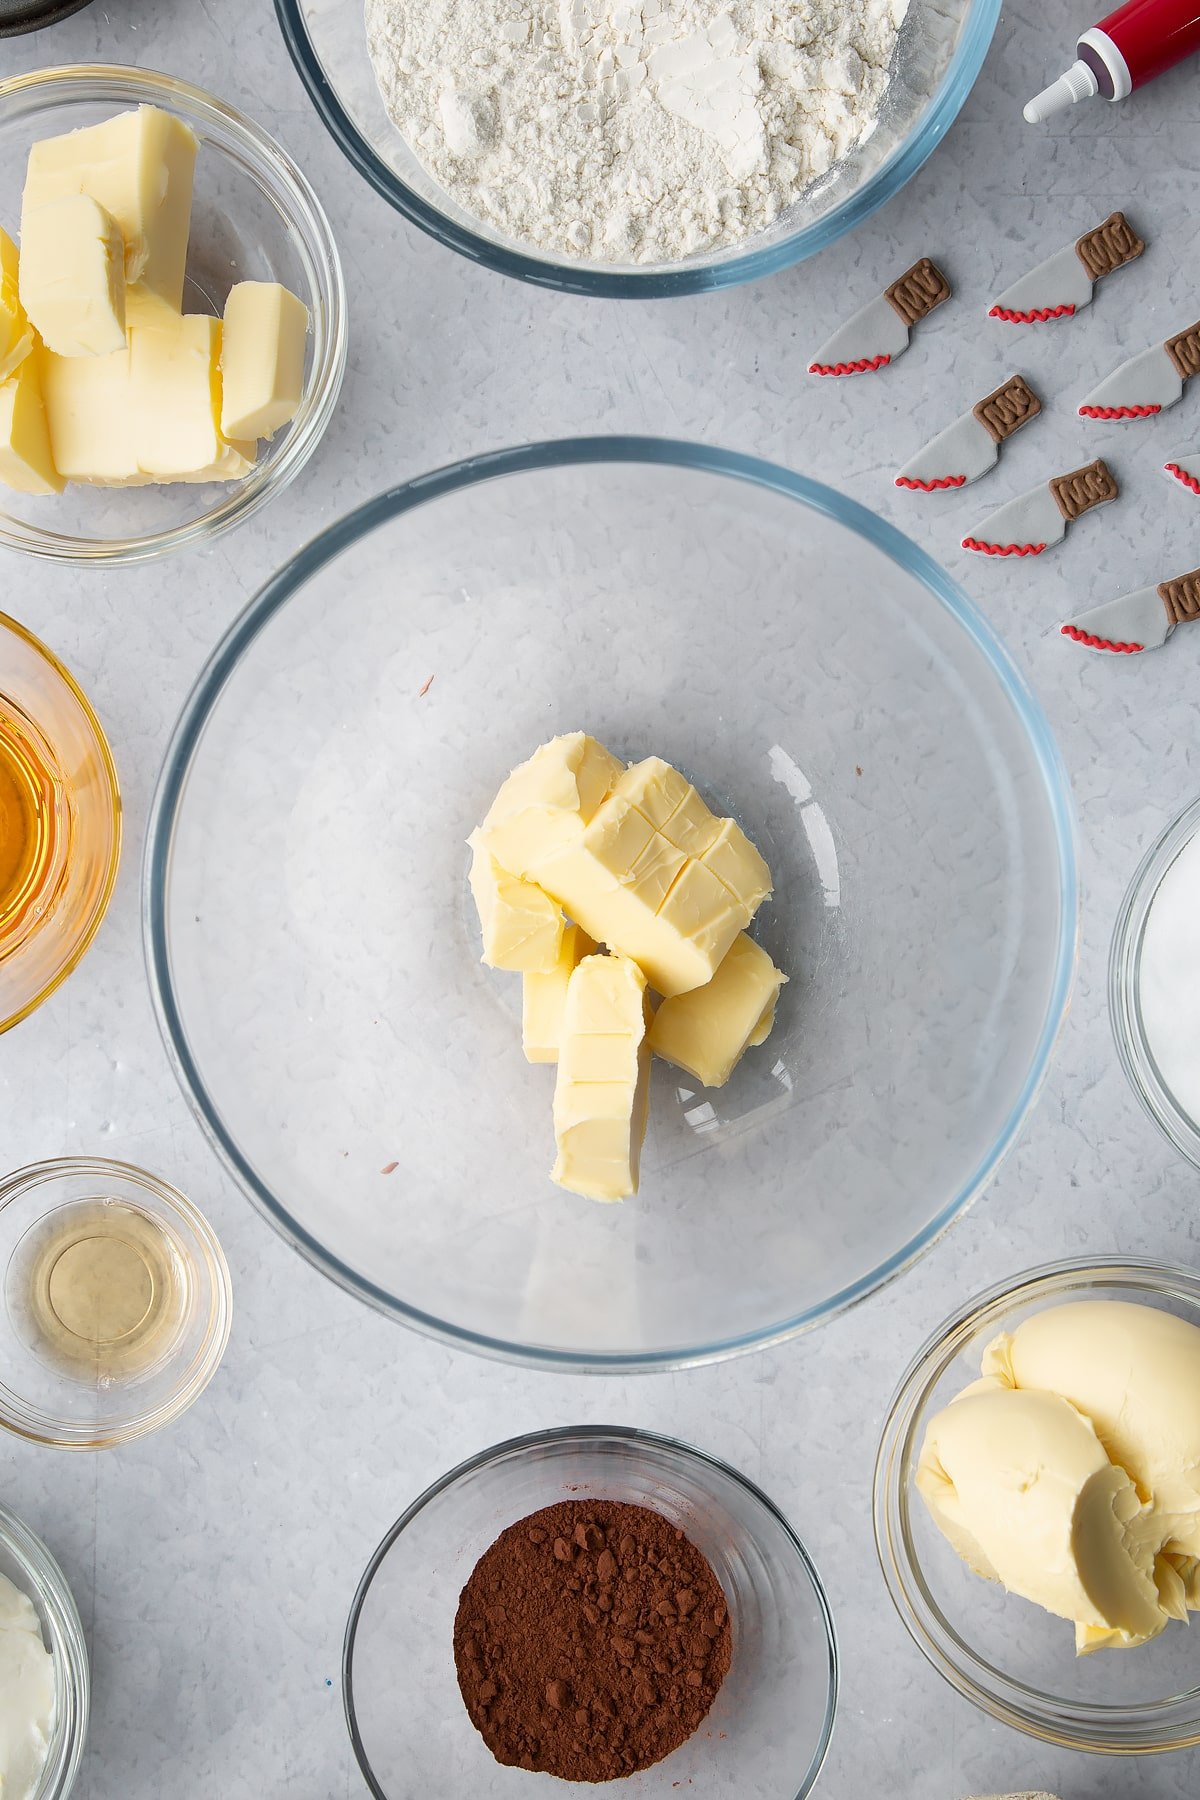
Whisk until creamy.
Sift in the icing sugar. Add the vanilla extract.
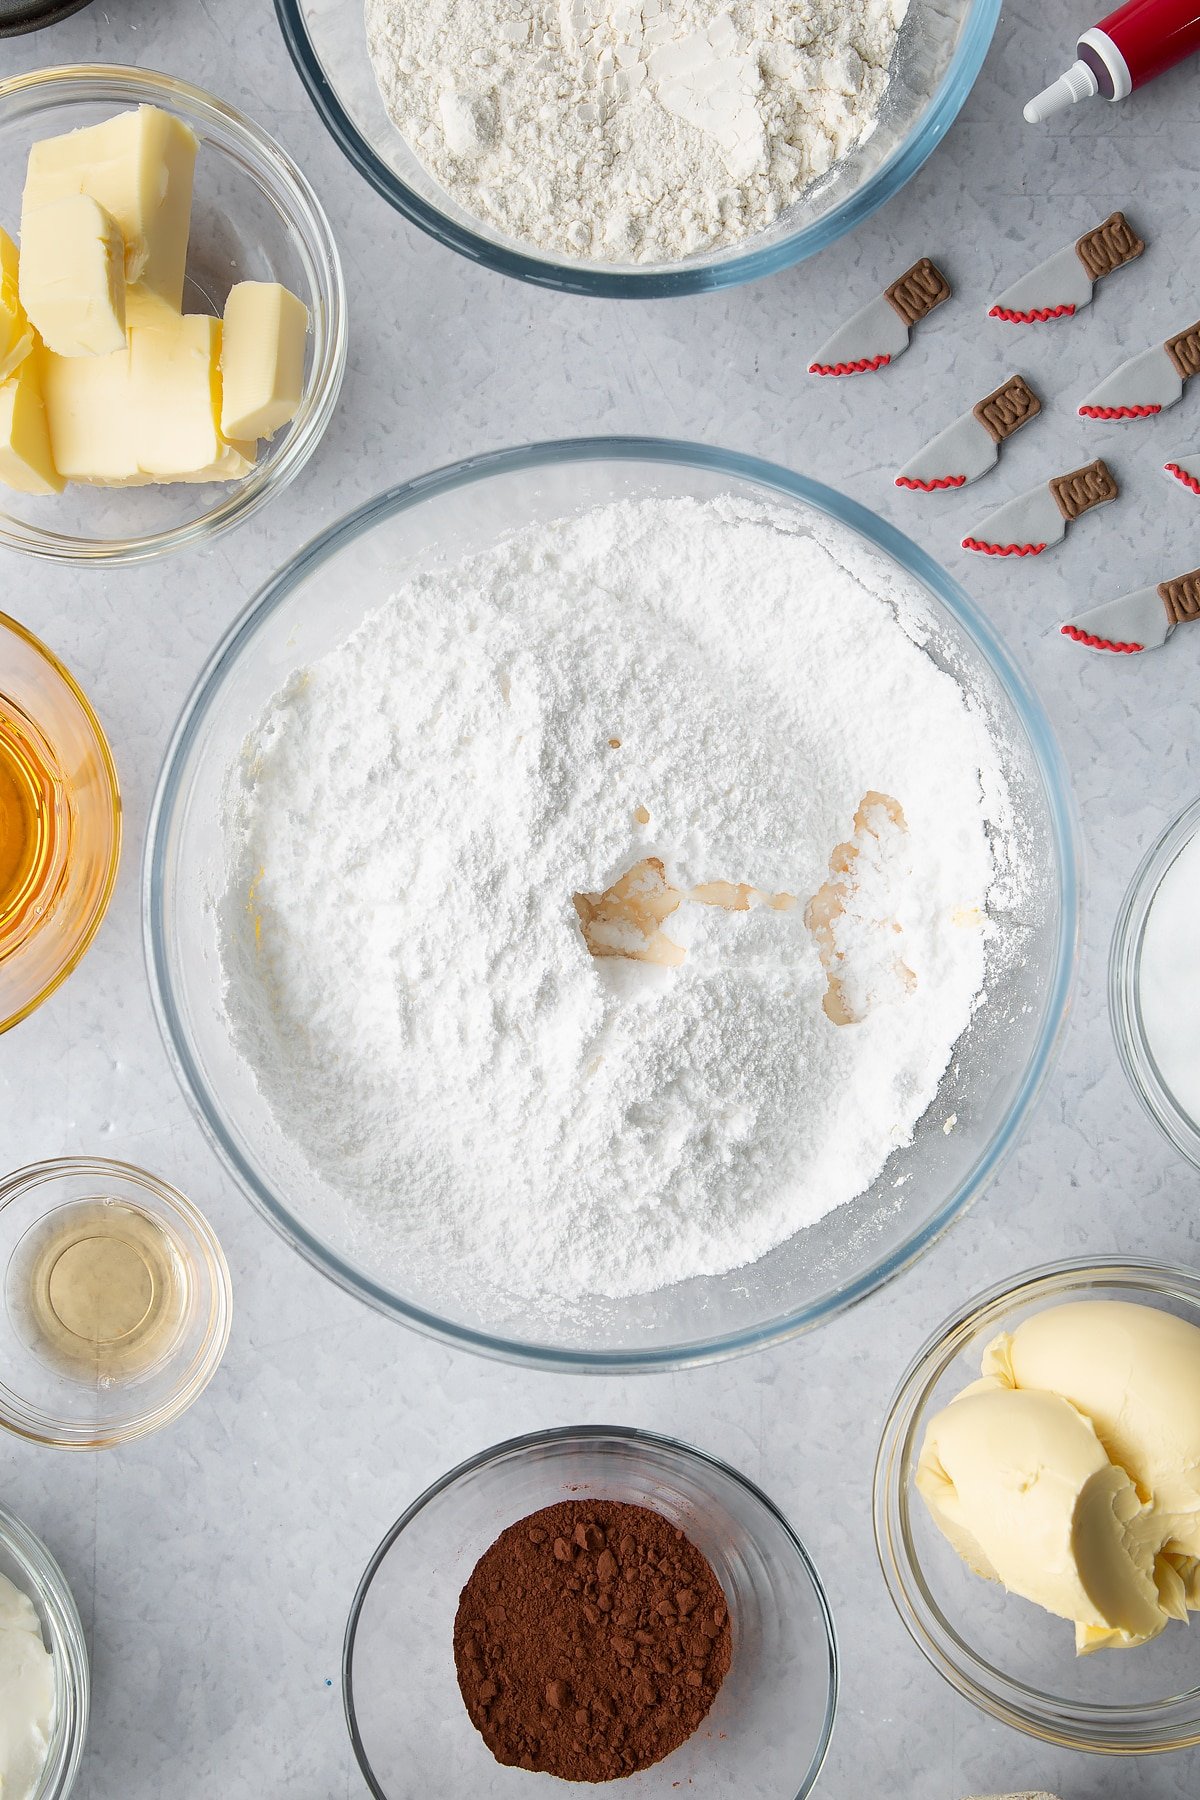
Whisk. At first it will seem clumpy.
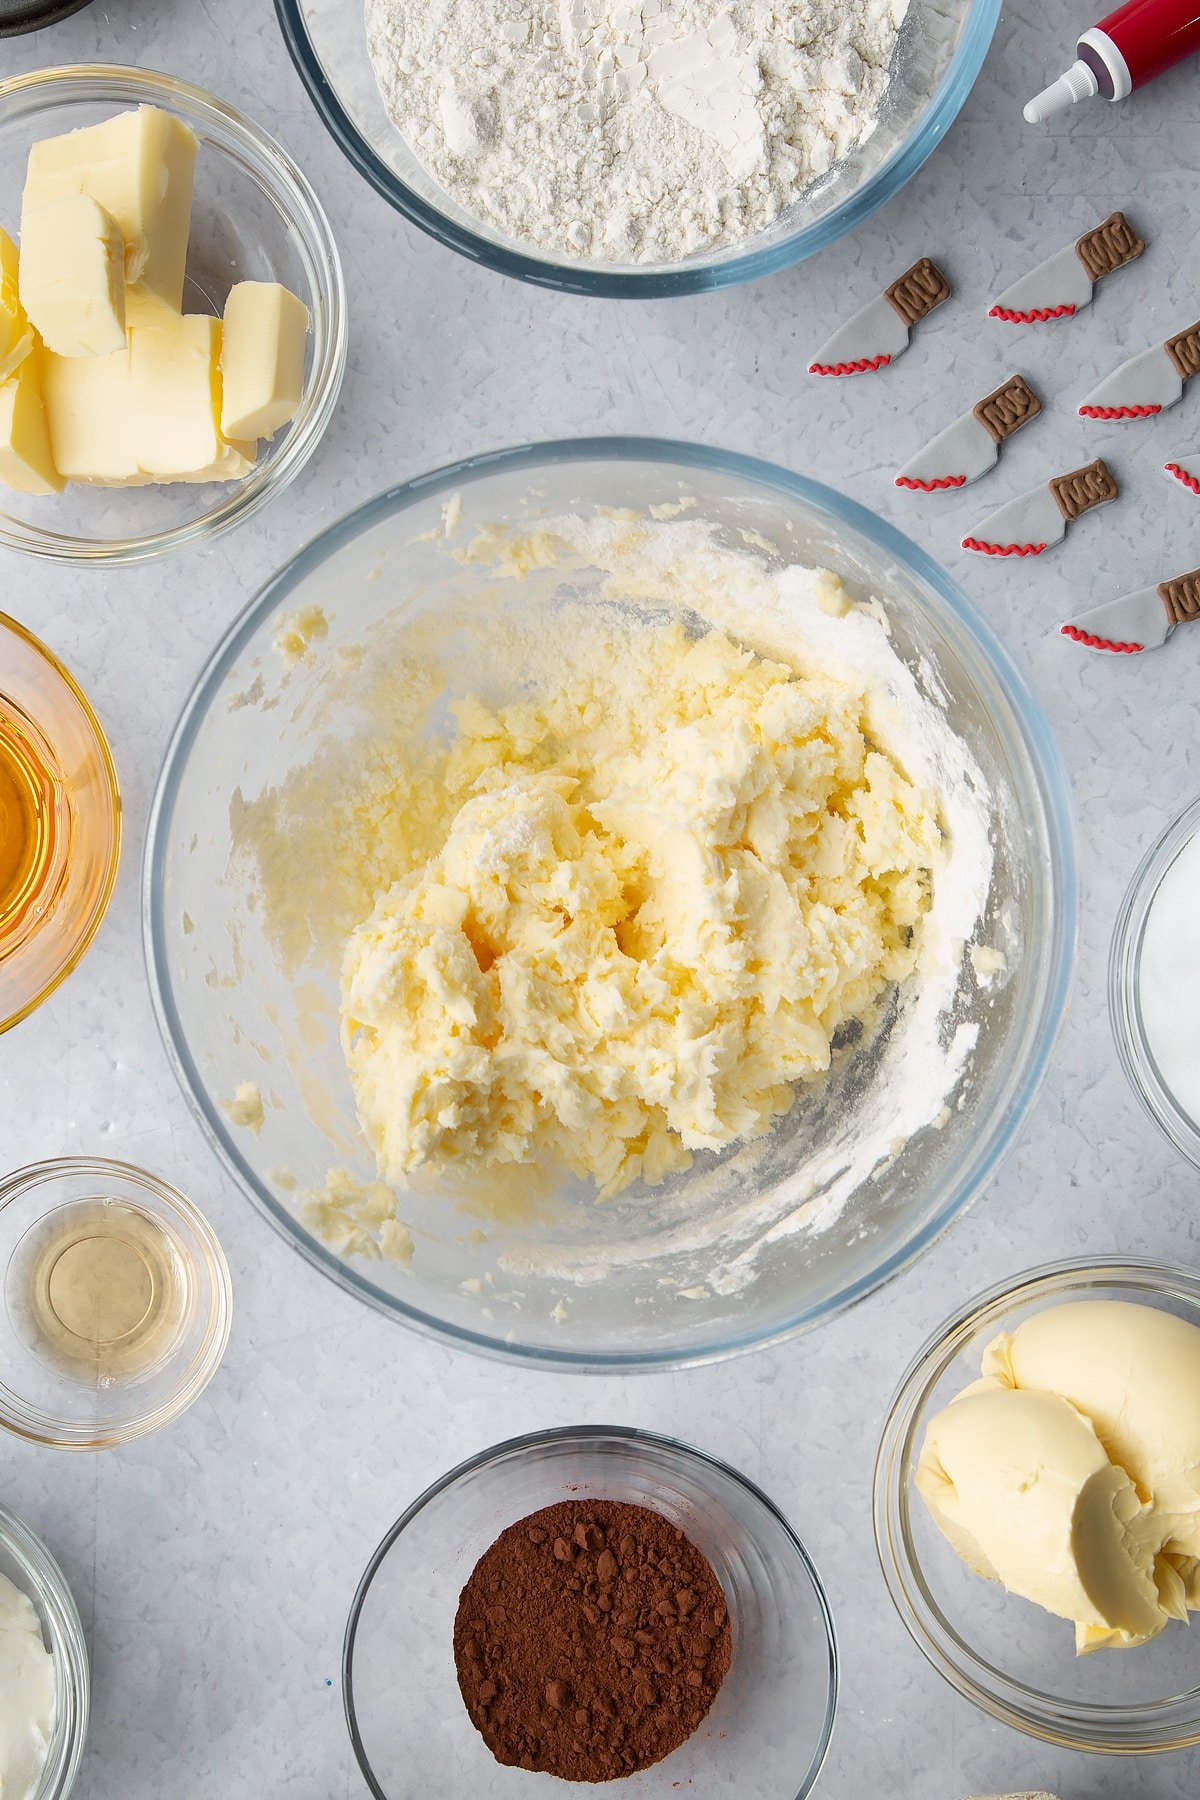
Keep whisking for a few minutes until very pale, creamy and increased in volume.
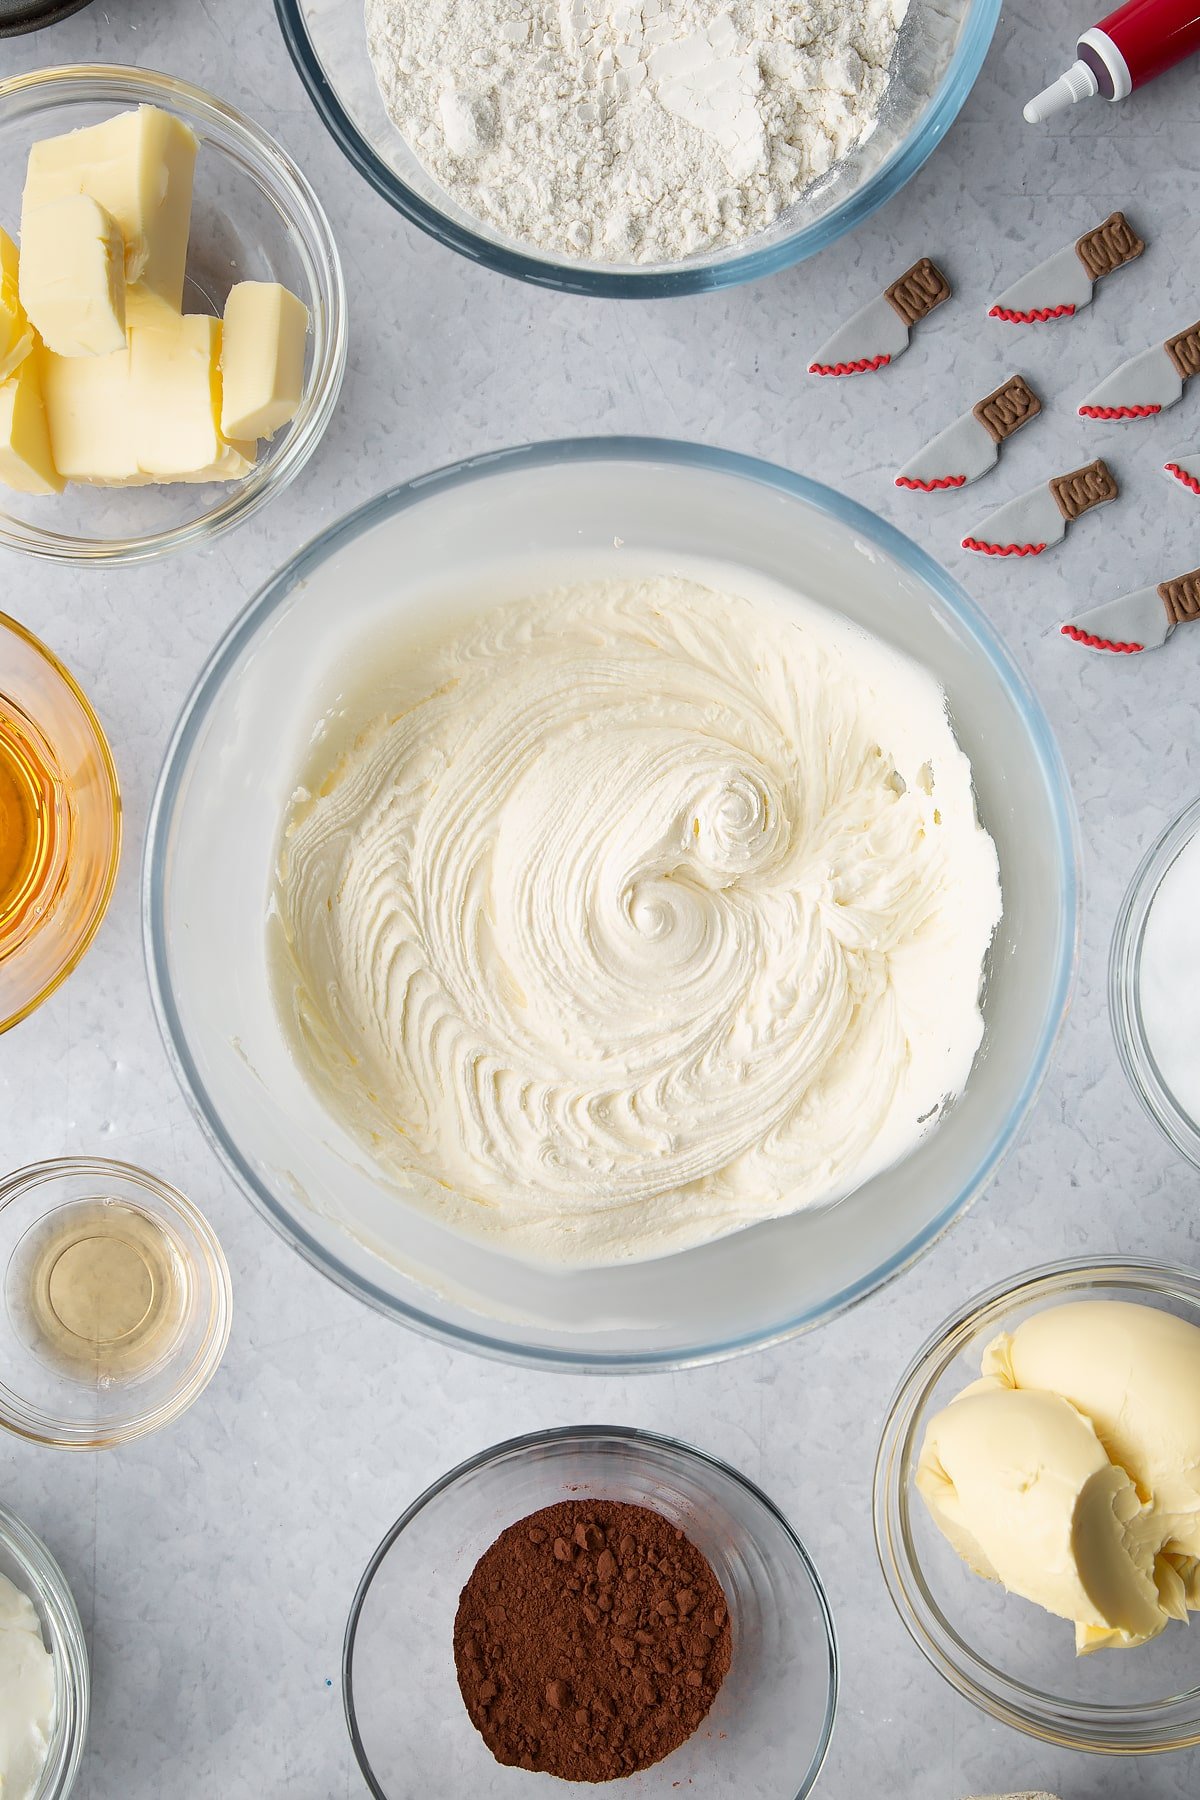
Add the chilled cream cheese.
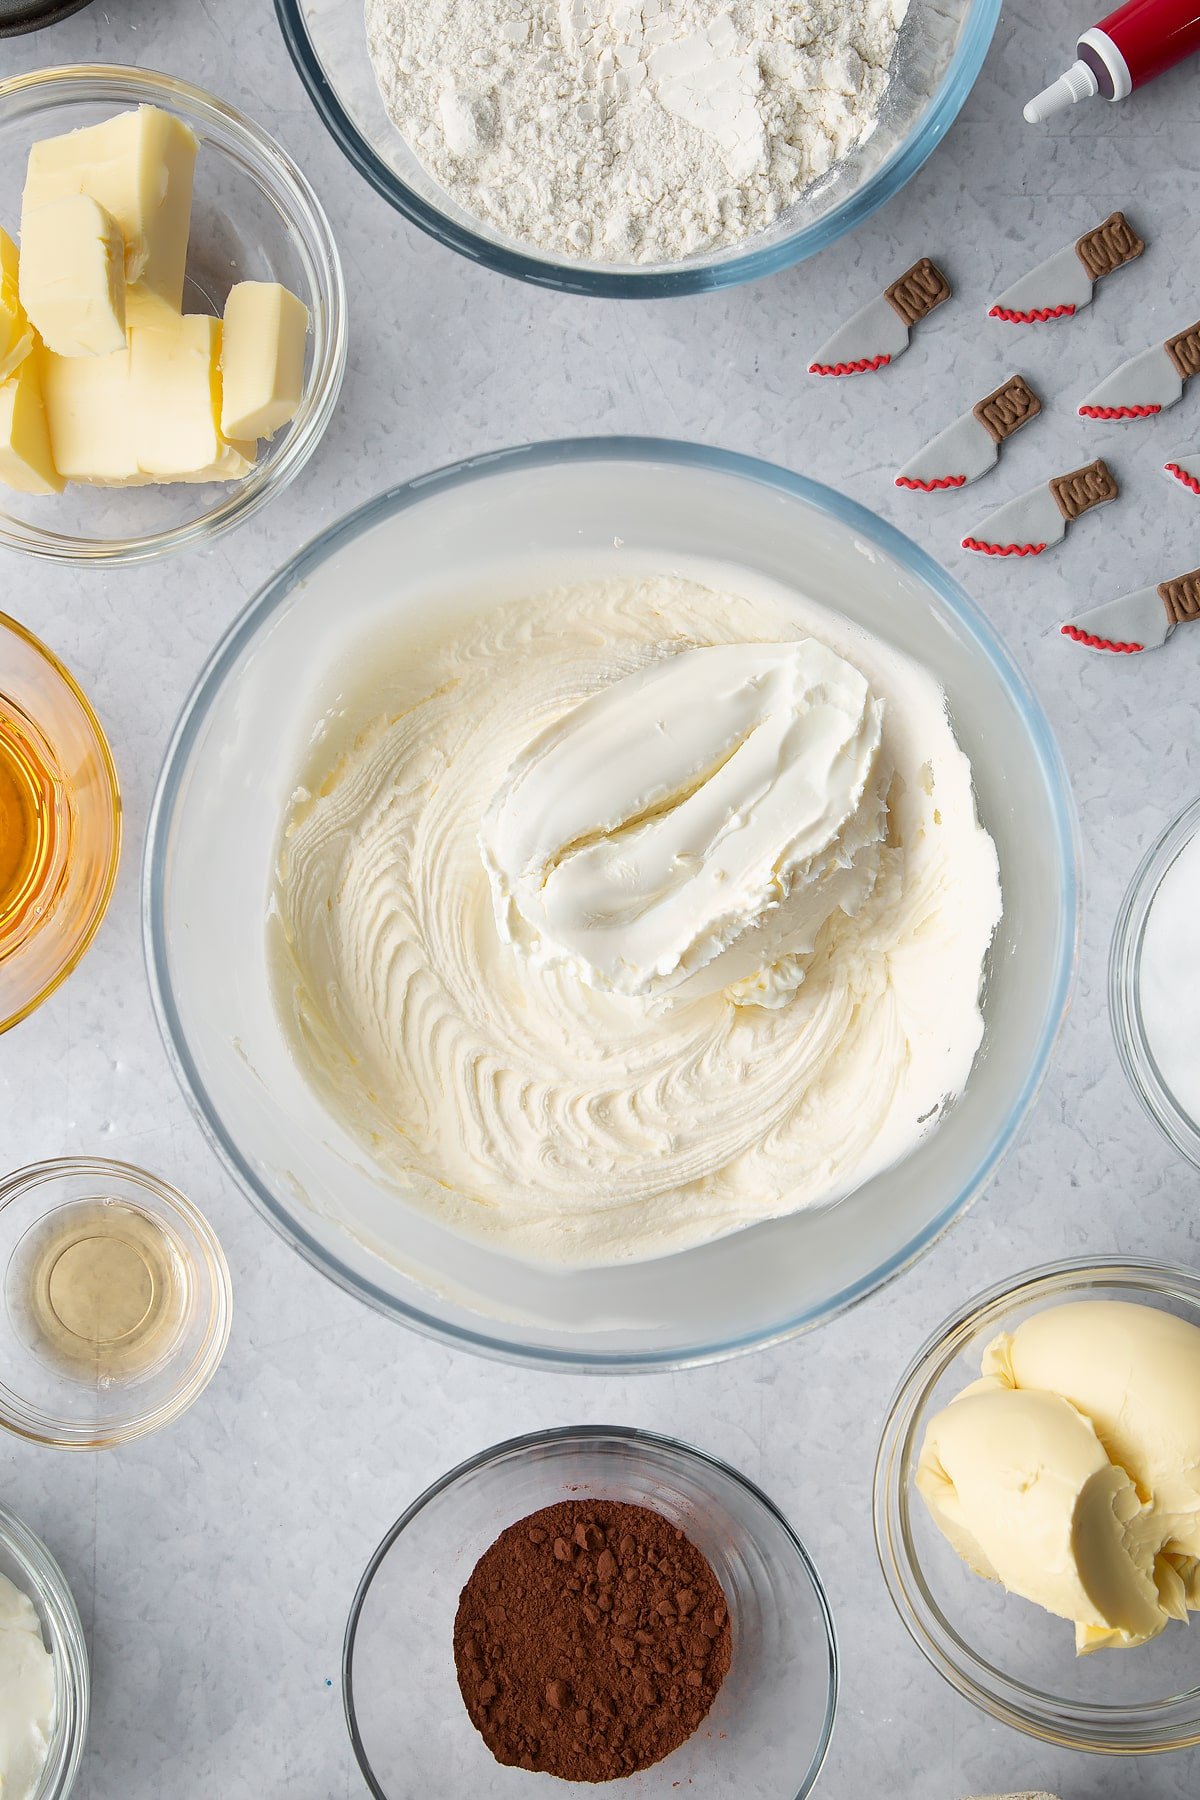
Fold together gently. Don't overwork it as it will loosen. If it looks like it’s starting to loosen, pop in the fridge for 10 minutes to firm up.
Transfer to a piping bag fitted with a star nozzle and pipe swirls on top of the completely cooled cakes.
Make the blood syrup
Put the golden syrup and a drop of food colouring into a small bowl.
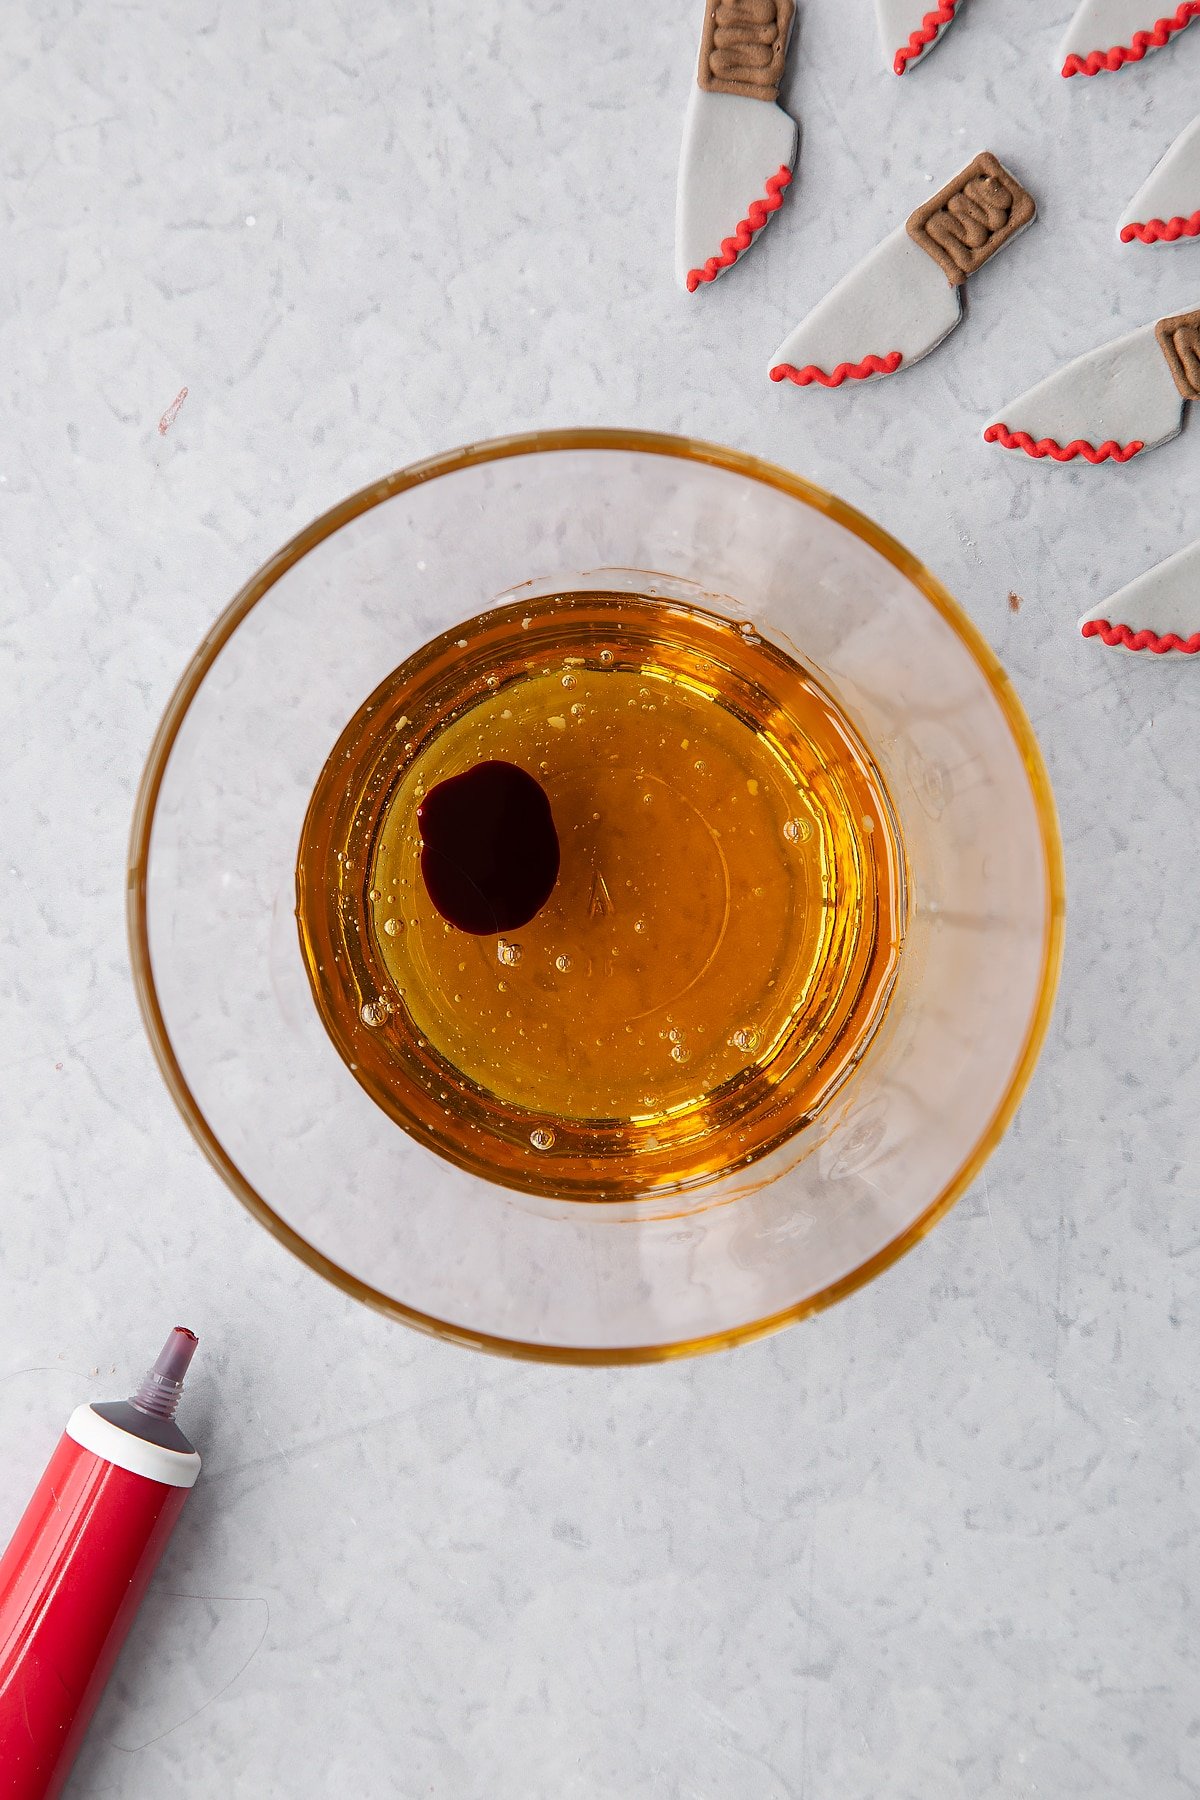
Mix, adding more colour if necessary until a translucent blood red is achieved.
Drizzle the syrup over the cupcakes.
I added little store bought knife toppers to complete the spooky Halloween look.

Happy Halloween!
Pointers, tricks and troubleshooting tips for the perfect Red Velvet Halloween Cupcakes
Are Red Velvet Halloween Cupcakes easy to make?
Red Velvet Halloween Cupcakes are actually pretty easy to make! The most important thing is to get the ratios of the ingredients right, so be precise when measuring.
Other than that, it's simply a case of mixing everything together and baking! There's no creaming of butter and sugar, and no need to add ingredients to the bowl in a certain order.
Once your cupcakes are baked and cooled, you'll top them with a simple cream cheese frosting made with cream cheese, icing sugar and butter.
The final touch is to drizzle them with a red syrup, which you can make easily by mixing golden syrup and red food colouring together. And that's it!
Will I need any special equipment for Red Velvet Halloween Cupcakes?
You'll only need some standard kitchen equipment to make your Red Velvet Halloween Cupcakes.
This recipe only requires one bowl for mixing your cupcake batter, and if you're good at washing up, you can reuse the bowl for the frosting while the cupcakes bake. To bake the cupcakes, you'll need a cupcake tray, and then you'll need an electric whisk to mix your frosting.
The only bit of kit you might not have is the piping bag and star-nosed nozzle. Luckily, these are very common, and you'll be able to buy one from the baking aisle of your local supermarket or from Amazon.
There is a full list of suggested equipment on the recipe card below.
Why do you recommend gel food colouring?
Most supermarkets sell two main types of food colouring: liquid colouring, which tends to come in a bottle, and gel colouring, which tends to come in a pot or tube.
Liquid colour is generally the cheapest, and while it will add pigment to frosting and sugar paste, it has downsides.
Using liquid food colouring adds extra moisture to your recipe, and you might find that you can't get the intensity of colour you want without making your sugar paste mushy, your frosting too thin, or your batter too watery.
On the other hand, gel colouring is much more concentrated than liquid colouring, so you need to add much less to get the desired effect.
The other big downside is that the liquid colouring you can buy in supermarkets is, generally speaking, not bake stable. Have you ever added some liquid colour to your cake batter, seen it turn a vibrant red, popped your cake in the oven, and then taken it out only to find your cake has returned to its original yellow hue? That's what happens when your colouring isn't bake-stable. Annoying, huh?
The good news is that gel food colouring is almost always baked-stable, meaning if you put a red batter in the oven, you'll get a red sponge. Hurrah!
For these reasons, I always recommend choosing gel food colouring for your bakes. If unsure, you can check the label to ensure it's bake-stable.
Where can I buy gel food colouring?
Gel food colouring is available in the baking aisle of most supermarkets or online. A popular brand in the UK is Dr Oetker, which works well.
It's worth noting that food colouring can sometimes contain additives or ingredients which are unsuitable for children prone to hyperactivity or vegans/vegetarians. So make sure you check the ingredients labels for further information.
A Mummy Too does not give medical advice. If you have concerns about eating artificial food colouring, please speak to your doctor or a medical professional.
How can I tell if eggs have gone off?
If you aren't sure if your eggs are fresh, you can do a float test to check them. This involves placing your egg in a cup or bowl of water to see if it sinks or floats.
As an egg ages, the water content evaporates through the shell and is replaced by gas. Fresh eggs will have very little gas inside the shell, making them more likely to sink. However, this isn't a foolproof test as bad eggs can still sink.
To ensure you don't contaminate a recipe with bad eggs, it's always best to crack eggs into a separate bowl or cup before adding them to a recipe.
This lets you check the egg for any broken shell fragments, but more importantly, it enables you to check that the egg is safe to use.
If your egg has any discolouration, odd appearance, or a strange or foul odour, you should throw it away and thoroughly wash any pots and utensils that have come into contact with it.
This goes for after cooking, too - you should never eat an egg that looks, smells, feels or tastes odd in any way.
Is it safe to use eggs stored on the counter?
Egg safety standards vary depending on location, so storage and use advice will vary too. For example, if you live in a warmer country, you will most likely be advised to keep your eggs in the fridge, and you will find eggs in the supermarket's refrigerated section.
However, if you live somewhere cooler, keeping your eggs on the counter or in the fridge might be acceptable, and you might find eggs on the ambient aisle.
In the UK, eggs are advised to be kept consistently below 20C. So even though you see them in the cool supermarket on the shelf, at home, you are best keeping them in the fridge. Even cool kitchens fluctuate in temperature during cooking, especially when the oven is on.
In the UK, eggs are given a "Best Before End" date, which is stamped on the box and often on the egg itself. The vast majority of eggs in the UK also bear the Red Lion stamp, which is a safety standard you can read more about on the Egg Info website. In the case of Red Lion stamped eggs, you can eat them past the Best Before End date, provided they have been properly stored, and there are no signs of spoilage.
In the United State, eggs are sold with an Expiration Date. Like a 'Use By' in the UK, an Expiration Date is a food safety limit that should always be adhered to. So never eat an egg past its expiration date, even if it looks and smells fine.
It’s important to note that these dates and guidelines are only valid if you store your eggs as the box advises.
A Use By/Expiration/Best Before date has been calculated for eggs tested and stored below a certain temperature, so if you store your eggs on the counter instead of the fridge then they may have spoiled well before that date.
A Mummy Too does not give medical advice. Please consult with your medical professional.
How can I tell if my butter is spoiled?
Butter is a dairy product, so it can go bad in the same way that milk, cheese and other dairy products can. If you're not sure if your butter has gone off, here are some signs to look out for:
- It has a sour smell.
- It has changed colour, usually becoming darker.
- It has translucent patches around the edges. Or it has a layer of condensation or 'sweat' (eurgh). This happens when bacteria cause the fat and liquid separate.
If your butter has any of these signs, it's best to throw it away and use fresh butter for your Red Velvet Halloween Cupcakes. The butter in this recipe is for the cream cheese frosting, so it should be as fresh as possible. There's nowhere to hide with uncooked frosting!
How can I tell if margarine has gone off?
Margarine can last for months in the fridge, but it will eventually start to go off. Margarine is made using oil, fat, and water, so it lasts much longer than dairy butter.
Unlike butter, when margarine spoils, it doesn't change dramatically in appearance when it's old. Though once it's really spoiled and contaminated with crumbs, it may become mouldy.
If you're unsure whether your margarine is still good to use, you can do a simple test. Place a small amount of margarine on your tongue. If it tastes rancid or has an off smell, it has gone bad, and you should discard it.
How can I tell if cream cheese has gone off?
Cream cheese can last for weeks in the fridge, but it will eventually start to go off.
When cream cheese spoils, it usually starts to dry out and develop cracks, while liquid pools at the bottom. Cream cheese also develops mould, especially if it's contaminated with crumbs or other substances from a butter knife.
So, if your cream cheese has any of these signs, it's best to throw it away and use fresh cream cheese for your Red Velvet Halloween Cupcakes frosting.
Are Red Velvet Halloween Cupcakes suitable for vegetarians?
Red Velvet Halloween Cupcakes are suitable for vegetarians as they do not contain any meat or fish. However, you should still check the ingredients to ensure they are vegetarian-friendly.
For example, if you decided to use a pre-mixed red velvet cake mix, it could contain animal-derived products. Some brands of red velvet cake mix and frosting contain gelatine, which is unsuitable for vegetarians.
So double check all of your ingredients labels to make sure to check that they are suitable for vegetarians. Don't forget to also check anything extra you intend to serve the recipe with.
Are Red Velvet Halloween Cupcakes suitable for vegans?
This recipe isn't suitable for vegans, as it contains dairy and eggs. However, you should be able to make a vegan version fairly easily with a few simple swaps.
- Margarine: Margarine is usually made using fat and water or, more often, oil and water. So most brands of margarine in your local grocery store are probably vegetarian already.
- Butter: In the UK, vegan butter is fairly widely available. In stores like Tesco, you'll find it with dairy butter. Though in other supermarkets, it might be sold with other dairy alternatives. I like using Flora Plant, as it has a very similar fat content to dairy butter (80-84%).
- Cream cheese: Cream cheese is easy to replicate with non-dairy ingredients. It's usually made using soy or coconut milk, blended with coconut oil or another plant-based fat. So, most supermarkets in the UK and Western Europe sell various brands of vegan/dairy-free cream cheese. I find that Sainsbury's own brand 'Free From' cream cheese is a good option for vegan baking, as it has a high-fat content. This means it performs similarly to full-fat dairy cream cheese.
- Eggs: For this recipe, I recommend using a powdered egg replacer, like Orgran Vegan Egg. It's easy to use and produces consistent results. You can also make your own egg replacer using ground chia or flax seeds, but I find egg replacer powder works best in cupcakes, as you're more likely to find the texture is affected by ground seeds in cupcakes.
- Food colouring: Make sure your food colouring is vegan. Most food colouring is now free from animal-derived ingredients, but some brands still use non-vegan ingredients.
Double check all of your ingredients labels to make sure to check that they are suitable for vegans. Don't forget to also check anything extra you intend to serve the recipe with.
Are Red Velvet Halloween Cupcakes gluten-free?
Red Velvet Halloween Cupcakes are not gluten-free, as they contain wheat flour. However, you could make a gluten-free version by using a gluten-free all-purpose flour blend in place of the wheat flour.
Many supermarkets now sell their own brand of gluten-free all-purpose flour. I prefer using a blend, like Doves Farm. A blend contains various ingredients that help replicate the starches and proteins in wheat flour.
Double check all of your ingredients labels to make sure to check that they are gluten-free. Don't forget to also check anything extra you intend to serve the recipe with.
Are Red Velvet Halloween Cupcakes keto-friendly?
These cupcakes aren't suitable for a keto diet, as they contain plenty of carbohydrates and sugar. Sorry!
Are Red Velvet Halloween Cupcakes healthy?
These Red Velvet Halloween Cupcakes aren't particularly healthy, as they contain sugar, butter, and cream cheese. However, there's nothing wrong with the occasional treat, especially during Halloween. So, who cares!?
Are Red Velvet Halloween Cupcakes safe to eat while pregnant?
Yes, Red Velvet Halloween Cupcakes are safe to eat while pregnant, as long as you take a few precautions. Firstly, check that all of the ingredients you use are pasteurized. This includes cream cheese, butter and eggs.
Pregnant people are told to avoid 'soft cheese' as it is usually unpasteurised. Cream cheese in supermarkets typically doesn't fall under this category, as it is pasteurised. However, if you shop at a farmer's market or buy your cheese from a farm, you may want to confirm with the supplier whether the cheese is pasteurised.
In the UK, pregnant people can eat eggs produced to the British Lion standard, runny or even raw. This is because eggs carrying the British Lion stamp come from hens inoculated against salmonella and are treated to kill bacteria. This may not be the case with other eggs, so to be safe, you should make sure that you cook your cupcakes thoroughly.
If you follow this recipe precisely, you should have no problem with undercooked cupcakes. Still, make sure your cupcakes are thoroughly cooked before serving them to a pregnant person.
A Mummy Too does not offer medical advice. Please seek help from a medical professional if you need further information or have any concerns.
What goes well with Red Velvet Halloween Cupcakes?
There are loads of things that go well with Red Velvet Halloween Cupcakes. Here are a few ideas:
- A glass of cold milk
- Chocolate sauce
- Whipped cream (vegan or not!)
- Ice cream
- Caramel sauce
- Crumbled cookies or candy bars
- Fresh berries.
Can I make these Red Velvet Halloween Cupcakes without food colouring?
If you make these cupcakes without food colouring, they won't have the distinct red velvet colour, and the topping won't look like blood.
They'll still be delicious, so feel free to skip the food colouring if you prefer, but they won't be very spooky!
Can I make the frosting without cream cheese?
Yes, you can make the frosting without cream cheese by using a vegan buttercream recipe. I have a great one here. Simply follow the recipe, but leave out the cream cheese.
If you don't want to use any dairy at all, you could try making a coconut whipped cream. This would be delicious with the Red Velvet Halloween Cupcakes, but it wouldn't have the same dense, creamy texture as the cream cheese frosting.
Where did you get those cute knife toppers?
I bought the knife toppers from Amazon, but sometimes they aren't in stock. I've looked elsewhere online and couldn't find an alternative. However, you may have better luck during Halloween. Failing that, you'll probably be able to find some other spooky sweets in stores over Halloween.
Does it matter if I use baking margarine of butter in the cupcake batter?
Margarine has a high water content because it is usually an emulsion of oil and water. So baked goods made with margarine will often have a softer texture - perfect for cupcakes!
One downside of using margarine is that it has less flavour than butter. So if you use baking margarine in the sponges, the cupcakes will be a bit less rich.
I haven’t got golden syrup, can I use something else to make the blood?
If you want to make the blood without golden syrup, you could try using honey, agave, corn syrup or rice syrup. These will both work, but the blood won't be quite as sticky or viscous.
Can I add extra chocolate to this recipe?
Yes, you can add extra chocolate to the recipe if you want. I would recommend adding chocolate chips to the cupcake batter. Or you could add melted chocolate to the frosting.
If you want to add chocolate chips or chopped chocolate to the cupcake batter, make sure you add them before spooning the batter into the cases. This way, they'll be evenly distributed.
How should I store Red Velvet Halloween Cupcakes?
Red Velvet Halloween Cupcakes are best stored in an airtight container. They will stay in the fridge for up to 3 days at room temperature or up to 5 days.
If you want to freeze the cupcakes, ensure they are completely cooled before wrapping them tightly in clingfilm or freezer bags. Red Velvet Halloween Cupcakes will
How long will my Red Velvet Halloween Cupcakes keep?
Red Velvet Halloween Cupcakes will keep in an airtight container for up to 3 days at room temperature or up to 4 days in the fridge.
If you want to freeze them, ensure they are completely cooled before wrapping them tightly in clingfilm or freezer bags. Red Velvet Halloween Cupcakes will keep in the freezer for up to 2 months.
Can I leave Red Velvet Halloween Cupcakes out on the counter?
No, your Red Velvet Halloween Cupcakes contain dairy in the frosting, so they will spoil within hours if left at room temperature. So your cupcakes are best stored in an airtight container in the fridge.
They will stay fresh in the fridge for 3-4 days. Though they'll taste best as fresh as possible.
Can I make Red Velvet Halloween Cupcakes ahead?
If you want to make Red Velvet Halloween Cupcakes ahead, I would recommend baking the cupcakes a day or two in advance. Store them in an airtight container, and then frost them when you're ready to serve them.
Or you could bake the cupcakes, frost them and then store them in the fridge for up to 3 days.
Can I keep Red Velvet Halloween Cupcakes in the refrigerator?
The fridge is the best place to store your Red Velvet Halloween Cupcakes. They should stay fresh in the fridge for 3-4 days. I would recommend storing them in an airtight container.
Can I freeze Red Velvet Halloween Cupcakes?
If you want to freeze your Red Velvet Halloween Cupcakes, I would recommend baking the cupcakes and then wrapping them tightly in clingfilm or freezer bags. Your unfrosted Red Velvet Halloween Cupcakes will keep in the freezer for up to 2 months.
When you're ready to eat them, defrost the cupcakes overnight in the fridge and then bring them to room temperature before piping the frosting over the top.
Or, you could freeze your cupcakes with the frosting! Though I'd freeze them without the candy knife and fake blood as they will begin to melt and look scruffy once your cupcakes are defrosting.
It's best to freeze your frosted cupcakes upright in a sealed container in a single layer to avoid damaging the piped frosting.
However, if you're short of freezer space, you could arrange the cupcakes flat and spaced out on a plate or baking sheet and freeze them overnight. Once they’re frozen, you can put them into freezer bags or a sealed container to save on freezer space. Remember to label your bags, so you know when you froze them.
What is the best way to defrost Red Velvet Halloween Cupcakes?
I find it best to defrost cupcakes in the fridge overnight. This will reduce the chance of the buttercream melting or attracting condensation and keep them nice and neat looking.
All you need to do is transfer the container to the fridge and forget about them until the next day. Once thawed, do not refreeze your cupcakes. They will need to be eaten within 24 hours.
Can I make these Red Velvet Halloween Cupcakes in a different quantity?
If you want to make more or less of this recipe, then go right ahead. This recipe makes 12 cupcakes. So if you only have a 6-hole cupcake tray, you could halve the ingredients to make less.
Or, if you're having a big Halloween party and want to make more, you could double or triple the ingredients to make 24 or 36 cupcakes! It's best to work within multiples of 12, as it's easier to work out. Plus, most cupcake trays contain 6, 12 or 24 holes.
You can use a free online recipe scale calculator to automatically work out the ingredients for the number of cupcakes you want to make.
Can I make these Red Velvet Halloween Cupcakes as one big cake?
If you want to make a big Red Velvet Halloween Cake instead of cupcakes, then go ahead!
This recipe has similar ratios and quantities to some of my sponge cake recipes. So if you add 1tsp baking powder, the existing recipe should make one 8-inch sponge. Cook the sponge in a high-sided cake tin to produce a thick sponge that you can slice into two sponges. It should take around 40 minutes to cook at 180C (Fan).
You can fill and decorate a large cake by doubling the amount of buttercream, so you have enough for filling and topping.
Can I make Red Velvet Halloween Cupcakes in a stand mixer such as a KitchenAid or Kenwood Mixer?
Yes, you can make this recipe in a stand mixer. Simply add the ingredients into the bowl and mix on a low-medium setting until everything is combined. This recipe requires no creaming or whipping, so it should be a quick and easy process.
Ensure not to overmix your batter, so the flour doesn't become tough. And always ensure you scraper down the bowl's sides so all ingredients are incorporated.
If you don't have a stand mixer, you can mix it by hand. The margarine will make it much easier to mix than a butter-based batter (whew, what a tongue twister!)
Can I make Red Velvet Halloween Cupcakes with a food processor?
I wouldn't use a food processor to mix your cake batter or frosting, as it will most likely cause the frosting to split, and it would be very messy and difficult to remove the cake batter!
How can I make sure my Red Velvet Halloween Cupcakes turn out perfectly?
I've put together my Top Tips for Perfect Cupcakes to help you troubleshoot any issues and make perfect cupcakes every time!
- Use fresh ingredients: This recipe uses dairy and eggs, which are always better when fresh. So make sure all of your ingredients are fresh - or at least well within the use-by date!
- Preheat your oven to the correct temperature: This will ensure your cupcakes cook evenly. If your oven isn't preheated, your cupcakes may end up undercooked or flat as the raising agents won't work properly. Or, if your oven is far too hot, the cupcakes will end up overcooked on the outside and raw in the middle. If you think your oven runs too hot or too cool, you could use an oven thermometer to get an accurate read for the inside of the oven.
- Measure your ingredients accurately: Baking is a science, so making sure you measure your ingredients correctly is crucial in getting the perfect results. Take care when adding tsp (teaspoons) and tbsp (tablespoons). Make sure you're using the right measurements, i.e. grams or oz.
- Use an ice cream scoop: This will ensure all of your cupcakes are the exact same size. This is important as it will help them to cook evenly.
- Don't overmix the frosting or let it get warm: If you over whisk your frosting, it will split as the bonds holding the emulsion of fat and liquid break. So make sure you only whisk your frosting enough to become fluffy and firm. Equally, heat will also cause the fat to melt and the emulsion to break, so keep your frosting nice and cool in the fridge until you need it.
- Allow the cupcakes to cool fully before frosting: Otherwise, the frosting will melt when it comes into contact with the warm cakes.
- Use a piping bag: A piping bag with a star nozzle will make your frosting look 10 x more professional, even if you don't have the steadiest hand. Piping bags and nozzles are usually inexpensive and available from most supermarkets, so try to get one if you can!
Why did my red velvet sponges turn out dry/crumbly?
There are a few reasons this could happen:
- You may have overcooked them. Red velvet sponges should be cooked until they're just done and spring back when lightly pressed in the centre. Any longer and they will become dry and crumbly.
- You might not have used enough fat. Red velvet sponges rely
Why didn’t my red velvet cupcakes rise?
There are a few possible reasons why your cupcakes didn't rise. It could be related to your ingredient ratios, something might have gone wrong during mixing, or your oven temperature might be the culprit. Here are some of the most common causes of a cake not rising:
Self-raising flour or baking powder can last for a long time, but if they've been sitting in the back of the cupboard for a while, especially if the container is unsealed, they may have lost their potency. It’s always best to use fresh ingredients and make sure your dry ingredients are in date.
Equally, as soon as you introduce liquid to your cake mix, the raising agents in the flour start to work and produce the bubbles of carbon dioxide that create the crumb structure. If you leave your batter sitting on the counter, those bubbles will be lost. So it's important to preheat your oven when you start making the recipe so that it's ready for the cupcakes to go in straight away.
If your raising agents are in date and you put your cupcakes in to bake quickly, then you may have over-mixed the cake batter. Over mixing cake batter can over-activate the gluten, making your cakes dense and tough so they struggle to rise.
Or the temperature can affect the way your cakes rise. When you bake cakes, the batter fills with hot air as it cooks which helps set the batter into the sponge texture of a cooked cake. If your oven is too hot, the cupcakes will rise rapidly and pop, just like a bubble that grows too big.
Equally, if your oven is too cold then there won't be enough heat for the reaction to happen as it should.
Why did my cream cheese frosting split or turn very loose?
If your frosting has split, it is most likely due to overbeating or the temperature being too high or too low.
Cream cheese has a lot of fat which can melt. So this frosting is especially prone to splitting if it is too warm, too cold or has been overbeaten. When cream cheese is over-beaten, it affects the fat, liquid and protein in the cream cheese and can cause them to separate, which results in splitting.
If you’ve over-beaten your cream cheese frosting, you can try to rectify things by adding a little full-fat milk or extra cream cheese and gently mix it through, then chilling the frosting. This should help to rebalance the protein, fat and liquid content and repair the split cream cheese.
If you still aren’t sure, there’s a great video here that shows you how to save split frosting.
How can I add/change the flavours in these Red Velvet Halloween Cupcakes?
There are lots of ways you can change up the flavours in these Red Velvet Halloween Cupcakes. Here are some ideas:
- Add a teaspoon of ground ginger or cinnamon to the cupcake batter for a warming twist.
- For a zesty kick, add the zest of an orange or lemon to the frosting.
- Add a handful of chocolate chips, chopped nuts or dried fruit to the batter before baking.
- Swap out the red food colouring for green or orange for a different kind of Halloween-themed cupcakes.
- Top the cupcakes with mini marshmallows, sprinkles or candy corn for a fun, festive finish.
Who invented red velvet cake?
Red velvet cake is thought to have originated in the United States, although its exact origins are unknown. It became popular in the 1920s and 1930s, and has since become a classic American dessert. Red velvet cake is usually made with a red food colouring, but can also be made without it. The food colouring is what gives the cake its distinctive red hue.
Why is it called red velvet cake?
Red Velvet Cake probably got its name from its red hue and tender, velvety texture. Before food colouring became widely available, Red Velvet Cake got it's colour from the reaction of vinegar, and buttermilk with the cocoa powder in the batter. Similar to the way that vinegar enhances the colour of red onions during cooking.
What is the difference between red velvet cake and chocolate cake?
Red velvet cake is usually made with a small amount of cocoa powder, which gives it a light chocolate flavour. It also has a distinctive warm red tint, which is usually achieved with red food colouring. On the other hand, chocolate cake is made with a higher proportion of cocoa powder, giving it a richer chocolate flavour. Chocolate cake is also usually darker in colour than Red Velvet Cake.
Why do we eat sweets during Halloween?
There are a few theories about why we eat sweets during Halloween. One theory is that it dates back to the Celtic festival of Samhain when people would offer treats to the spirits of their deceased loved ones and use carved turnips and potatoes to ward off evil spirits.
As Irish immigrants moved to the United States, turnips were swapped for pumpkins. And as confectionary became more commercially available, sweet treats became a popular way to celebrate.
Another theory is that it's a way of celebrating the harvest, as Halloween falls at the end of the harvest season.
Print these red velvet Halloween cupcakes

Red Velvet Halloween Cupcakes Recipe
Ingredients
For the sponges
- 4 medium free-range eggs
- 200 g (7.1 oz) self-raising white flour (self rising flour)
- 200 g (7.1 oz) white caster sugar (superfine sugar)
- 200 g (7.1 oz) margarine
- 4 tbsp whole milk
- 2 tbsp cocoa powder (dutch processed)
- 2 tsp red gel food colouring vegetarian if required
For the cream cheese frosting
- 400 g (14.1 oz) icing sugar (powdered sugar)
- 200 g (7.1 oz) salted butter softened
- 220 g (7.8 oz) full fat cream cheese chilled
- 2 tsp vanilla extract
For the “blood” syrup
- 50 g (1.8 oz) golden syrup
- ½-1 tsp (0.5 tsp) red food colouring
Equipment
- Cupcake cases
- Star piping nozzle
Instructions
Make the sponges
- Preheat the oven to 180C (160C fan).
- Line a muffin tray with cupcake cases.
- Put the margarine, milk, sugar, flour, cocoa, eggs and food colouring in a large mixing bowl. Beat together until smooth and pale.
- Spoon the batter into the cases, sharing evenly between them, and level off.
- Bake for approximately 25 minutes until risen and springy on top. Transfer to a wire rack to cool completely.
Make the cream cheese frosting
- Put the softened butter in a bowl and whisk until creamy.
- Sift in the icing sugar. Add the vanilla extract.
- Whisk until very pale, creamy and increased in volume.
- Add the chilled cream cheese.
- Fold together gently. Don't overwork it as it will loosen. If it looks like it’s starting to loosen, pop in the fridge for 10 minutes to firm up.
- Transfer to a piping bag fitted with a star nozzle and pipe swirls on top of the completely cooled cakes.
Make the blood syrup
- Put the golden syrup and a drop of food colouring into a small bowl.
- Mix, adding more colour if necessary until a translucent blood red is achieved.
- Drizzle the syrup over the cupcakes. I added little store bought knife toppers to complete the spooky Halloween look.
Video
Nutrition
Pin these red velvet Halloween cupcakes
More Halloween recipes to try
Have you got my book?
'This is a great kids cookery book. Emily is a star' - Simon Rimmer
'The book I'd like to force into any mother's kitchen' - Prue Leith
"A fab book with a plan." - Jane Devonshire, 2016 Masterchef UK winner
'Emily has managed to combine her mummy knowledge and passion for food to make a truly helpful and brilliant cookbook' - Priya Tew, RD, BSc (Hons), Msc
Get Your Kids to Eat Anything is an achievable 'how to' for parents in the battle to overcome picky eating and 'make new the norm'. Emily Leary's unique 5-phase programme looks at the issue of 'fussy eating' in a holistic way that links imagination with food, and which situates parents alongside - not in opposition to - their children.
Leave a Reply