
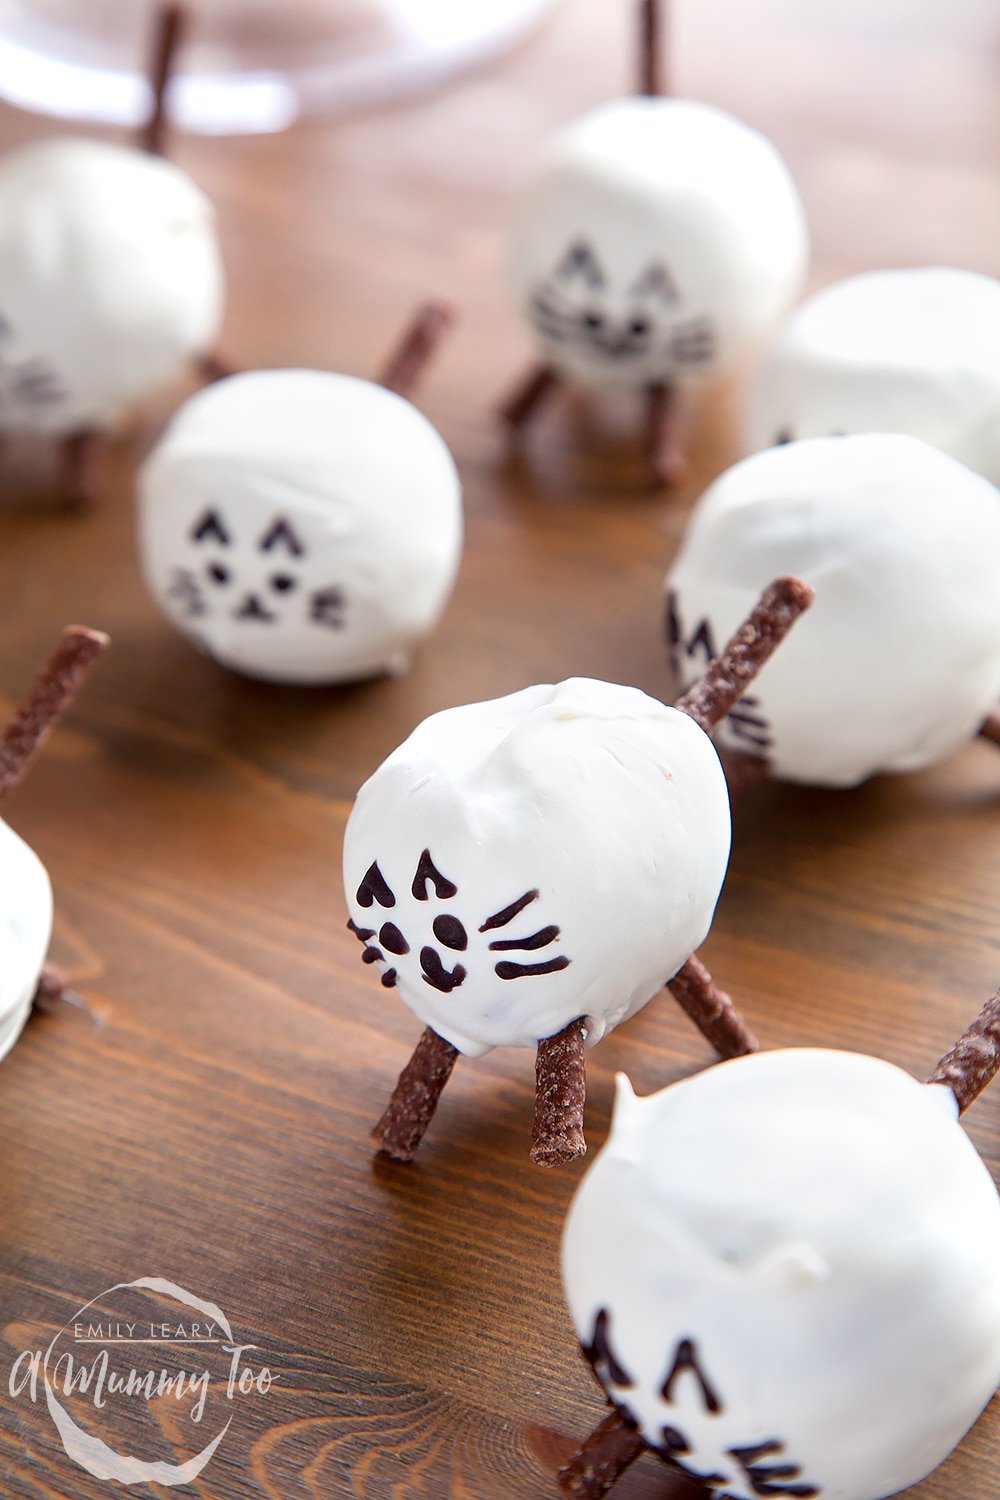
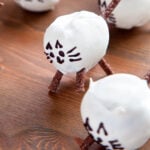
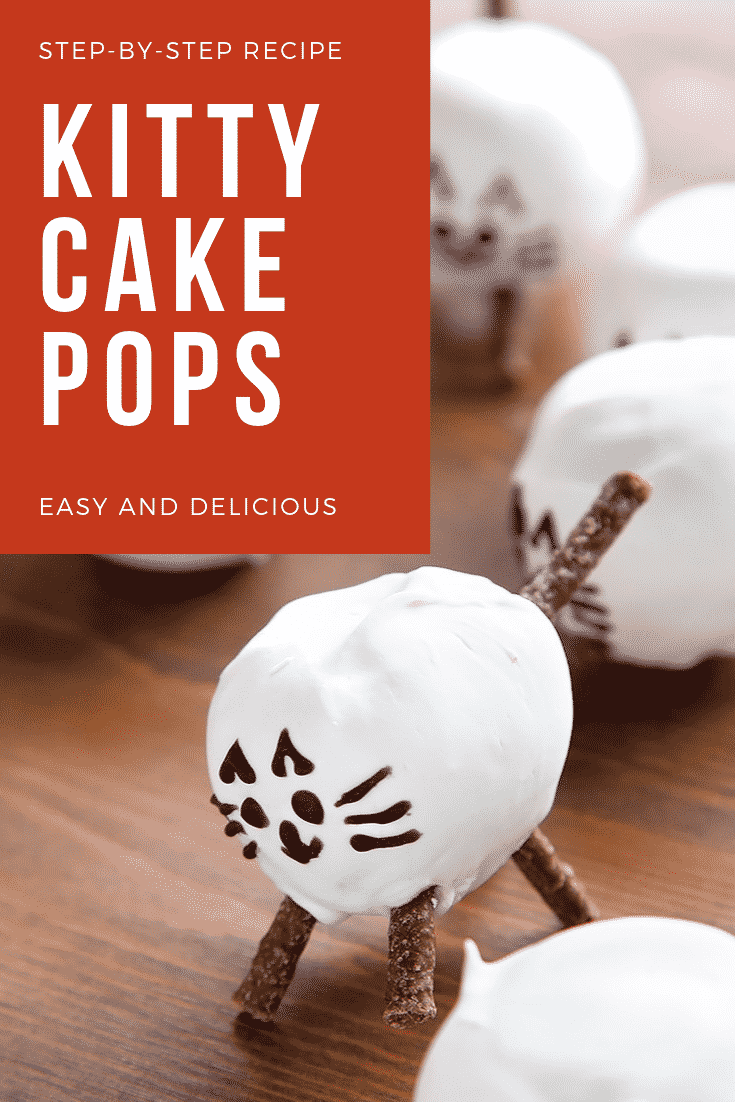
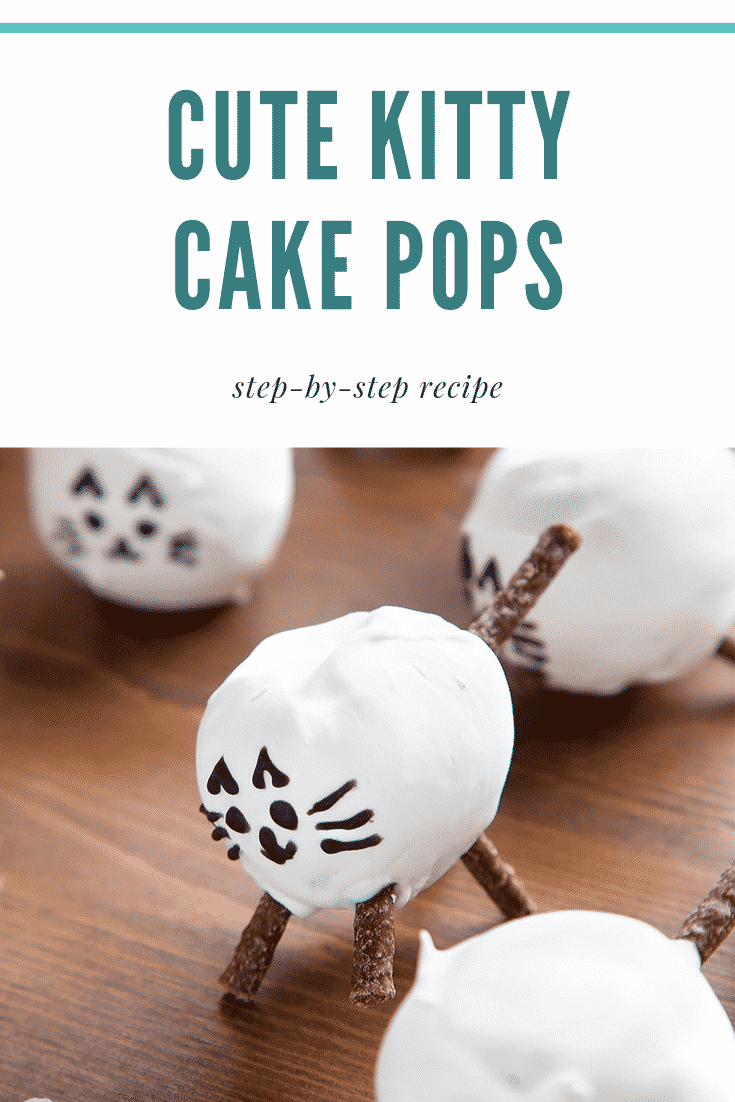
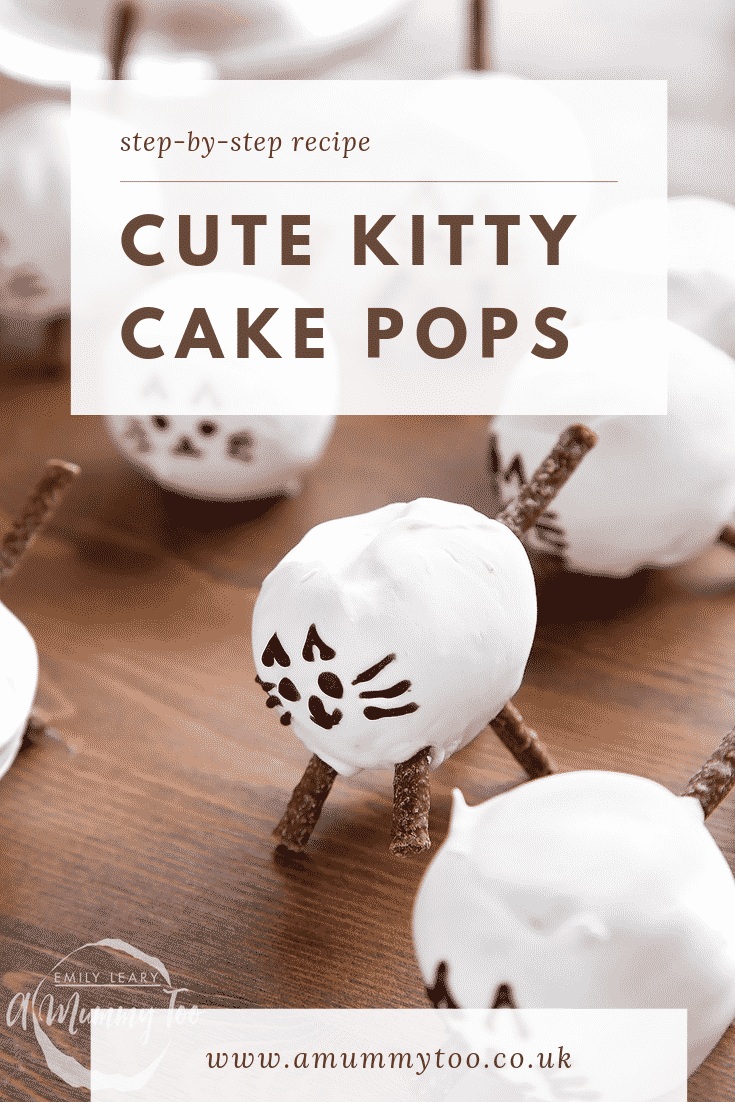
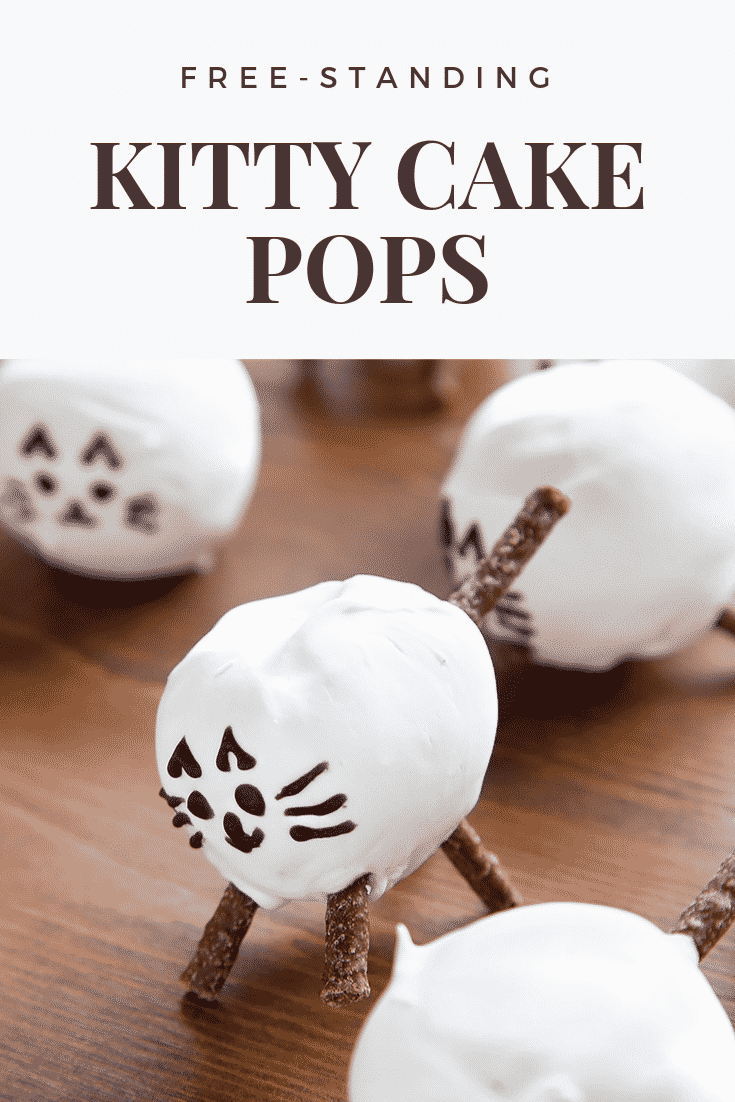
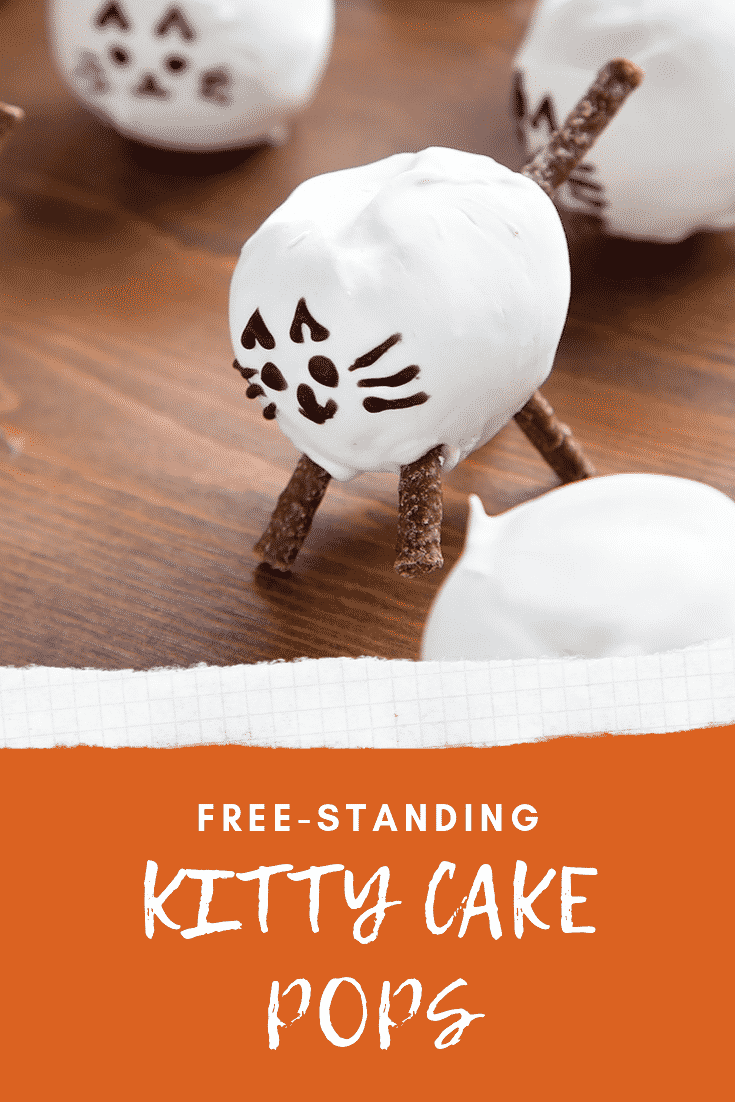
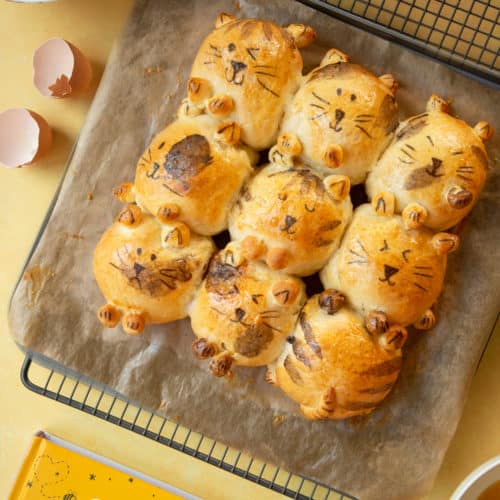
Do you like my kitty cake pops? I think they are so cute, and the perfect size for little hands!
Cakes aren't for every day, of course, but if you're keen to enjoy a treat on a special occasion, these are just the ticket.
My daughter, J spent a good few minutes meowing conversations between her own cake pop and the others on the plate before ruthlessly devouring it - much hilarity!
What do they taste like?
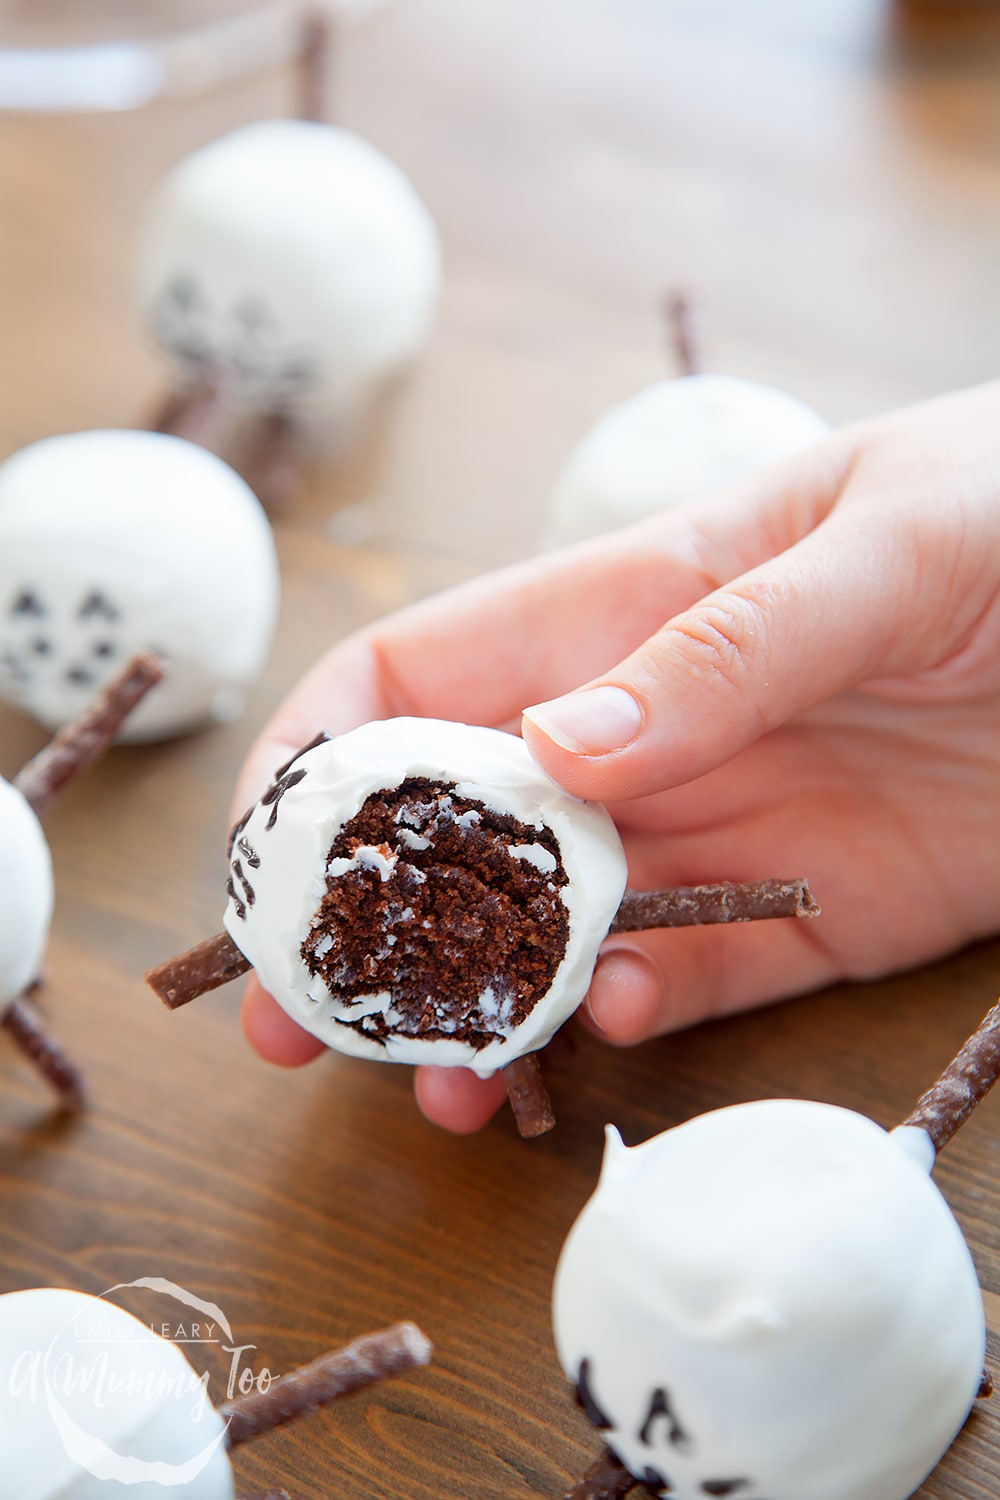
These kitty cake pops are sweet and chocolatey. The inside is just the right amount of fudgey and cakey.
I found the peppermint sticks add a nice extra crunch. And drawing on the faces is something that kids should definitely find fun, especially if they get to eat their own creations. If you're having a party why not bring them out blank and let the kids go wild with icing pens?
We also made a few of the pops with just a tail to make them look like they were sitting down (see the one in the background top left in the image above), which worked really well, and looked adorable.
Here's how to make them...
Ingredients
For the sponge
- 150 g (5.29 oz) salted butter or margarine, softened
- 200 g (7.05 oz) white caster sugar (superfine sugar)
- 3 medium free range eggs medium free range
- 1 tsp vanilla extract
- 200 g (7.05 oz) self-raising white flour (self rising flour)
- 1 tsp baking powder
- 2 tbsp cocoa powder (dutch processed)
To create the pops
- 8 tbsp (8 tbsp) chocolate frosting (we used store-bought Chocolate Fudge Icing)
- 20 cake pop sticks
- 30 g (1.06 oz) milk chocolate melted, for securing the sticks
To decorate
- 350 g (12.35 oz) white candy melts or white chocolate, melted
- 100 g (3.53 oz) chocolate peppermint sticks straight pretzels will also work
Equipment
Instructions
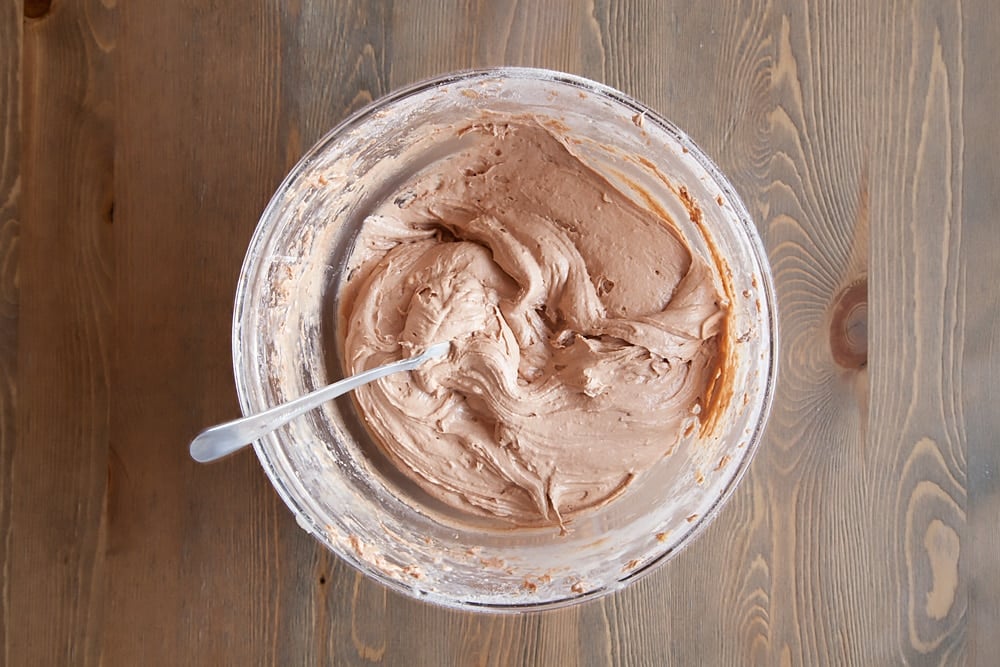
Preheat the oven to 170C/240F (150C/300F fan). Add the butter, sugar, eggs and vanilla essence to a bowl and beat. Fold in the flour, baking powder and cocoa.
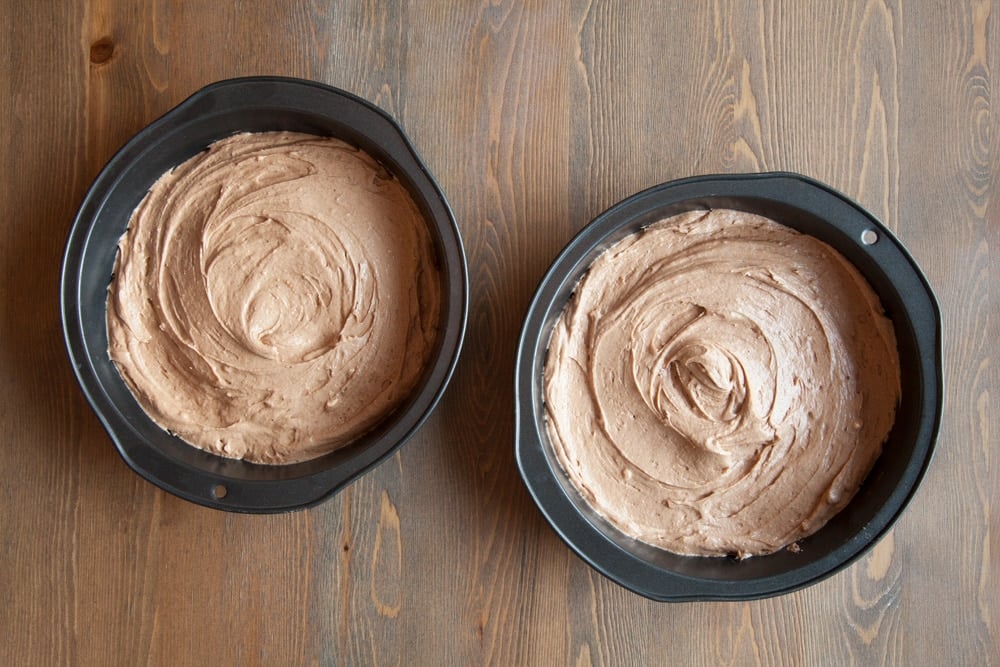
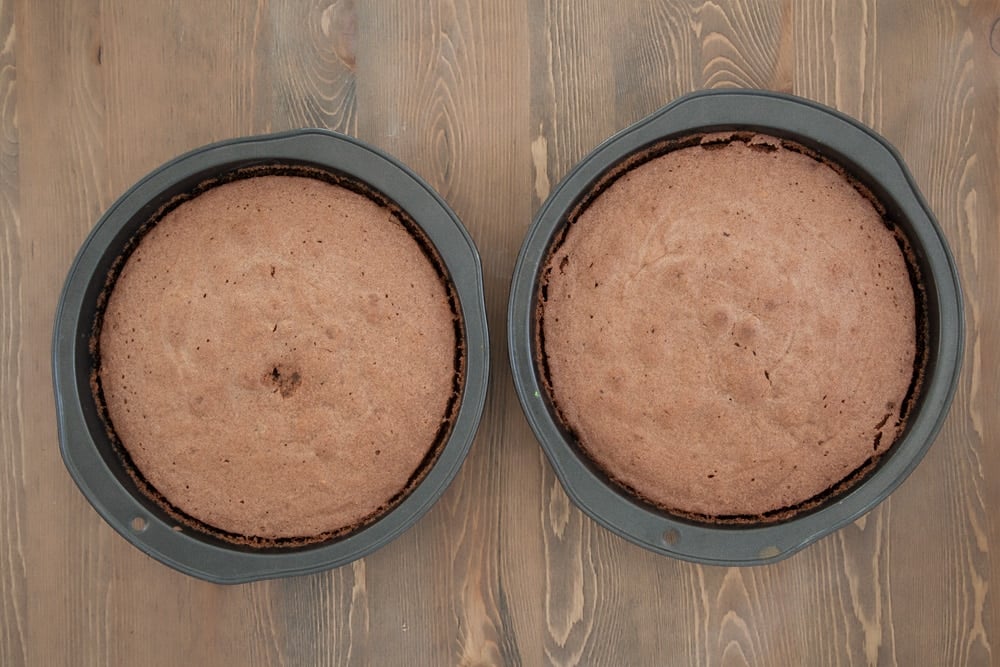
Spread evenly in a cake tin and bake for around 25 minutes until springy on top. You can use one cake tin, but spreading the mixture out over two will make it cook and cool more quickly. If you're in a hurry you can also buy a chocolate sponge.
Wait for the cakes to completely cool.
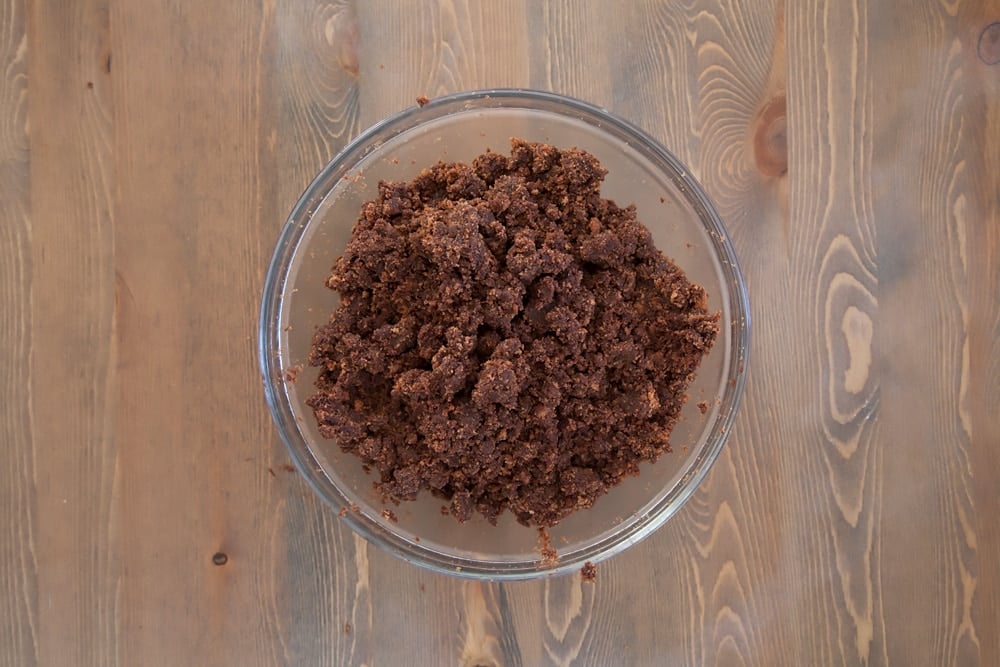
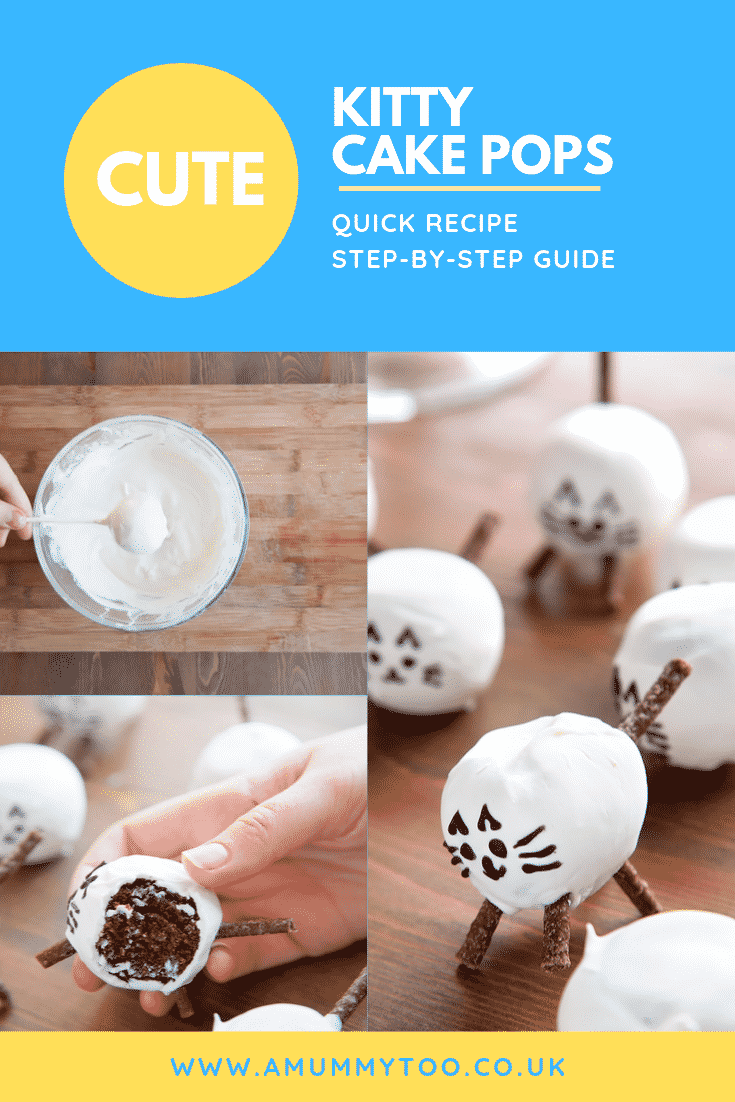
Cut the cake into large chunks and place in a large bowl. Crumble the cake with your hands gently until it resembles coarse bread crumbs, then use your hands to work in the frosting, adding spoonful by spoonful until it just starts to come together as a crumbly but mouldable mixture.
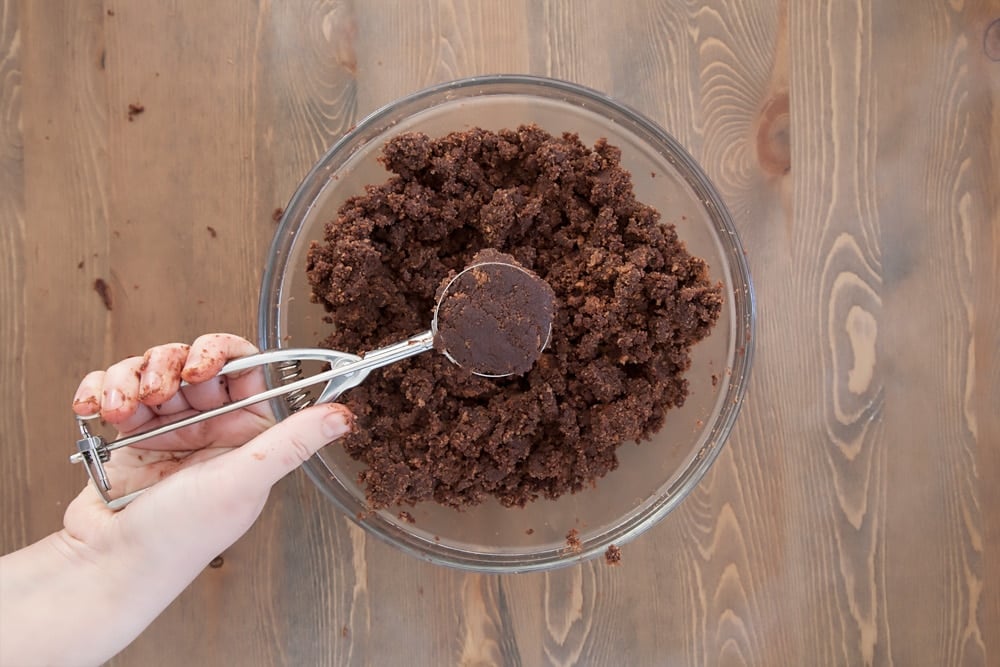
If you have an ice scream scoop handy it's a great way of making sure all the balls will be of an even size, if not you can just do it by eye.
Once you have your portions ready you can begin to roll.
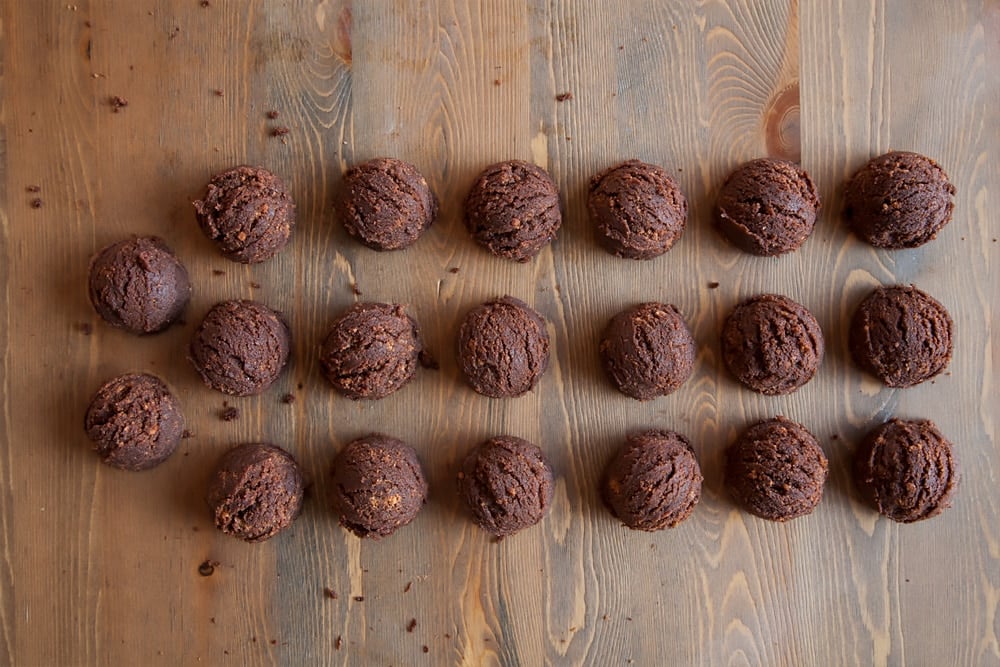
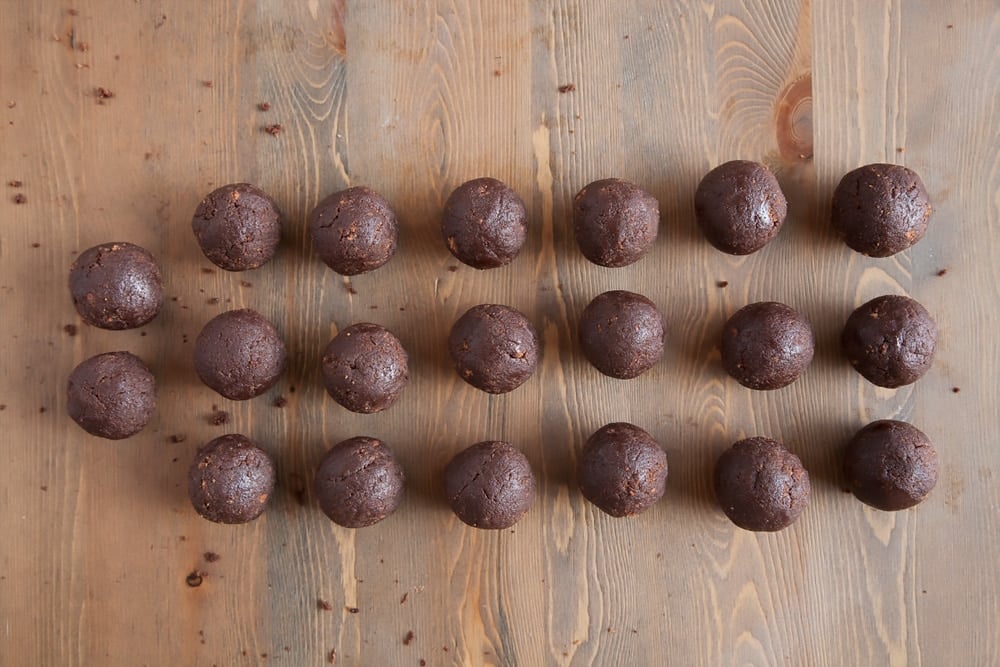
Try to get them as round as possible but don’t squash them too much – you don’t want them to be too dense.
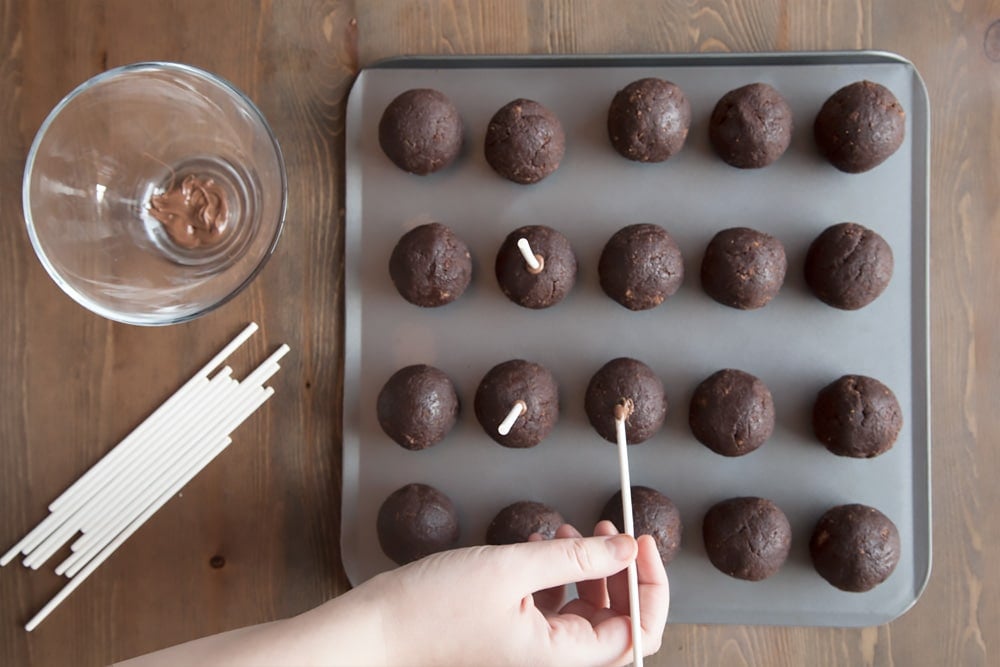
Take your melted chocolate and dip each cake pop stick about 1/2 a cm into it, then push it halfway into the cake ball. Repeat until you’ve pushed all the sticks into an equal depth, then put them all in the fridge to chill for at least an hour, preferably two or more.
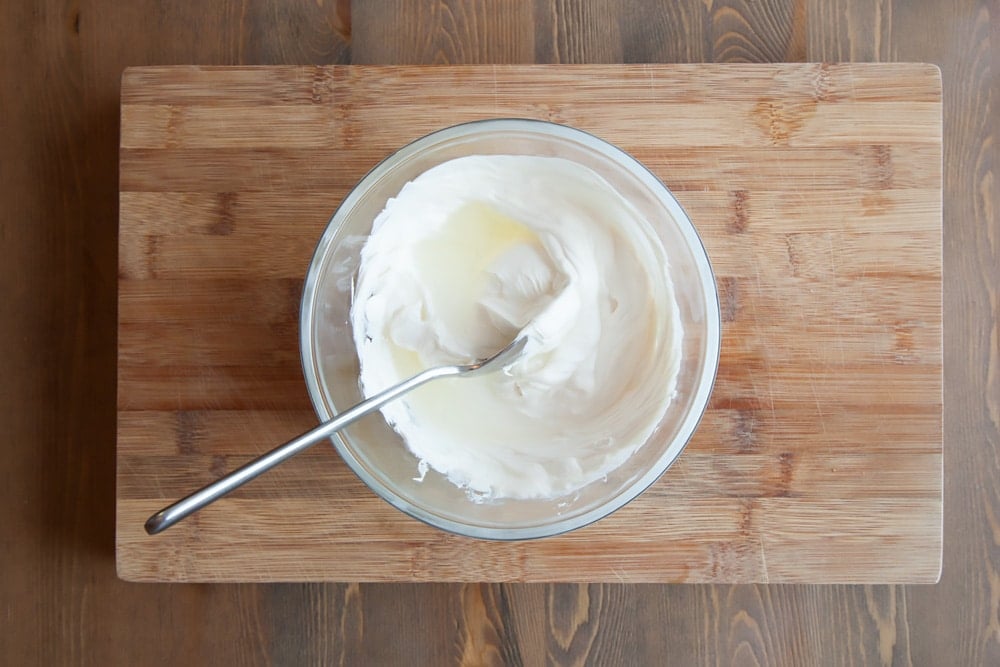
Melt the chocolate / colour melts as directed. Make sure everything is ready before you take the cake pops out of the fridge so that they stay as cold as possible.
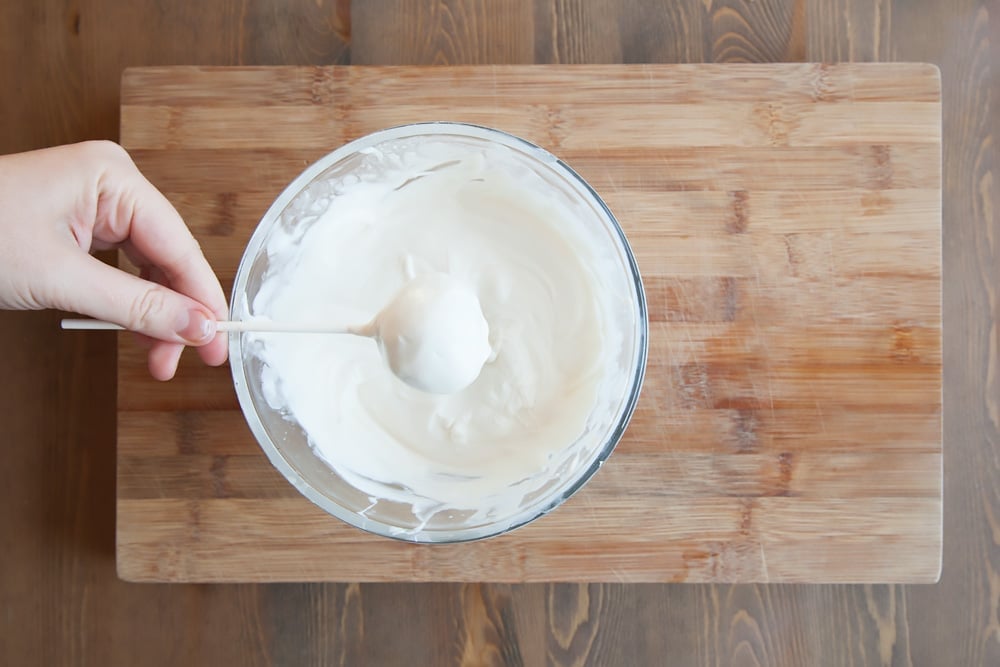
Dip each cake in turn to cover the whole pop, then twist a few times over the tub to get rid of the drips.
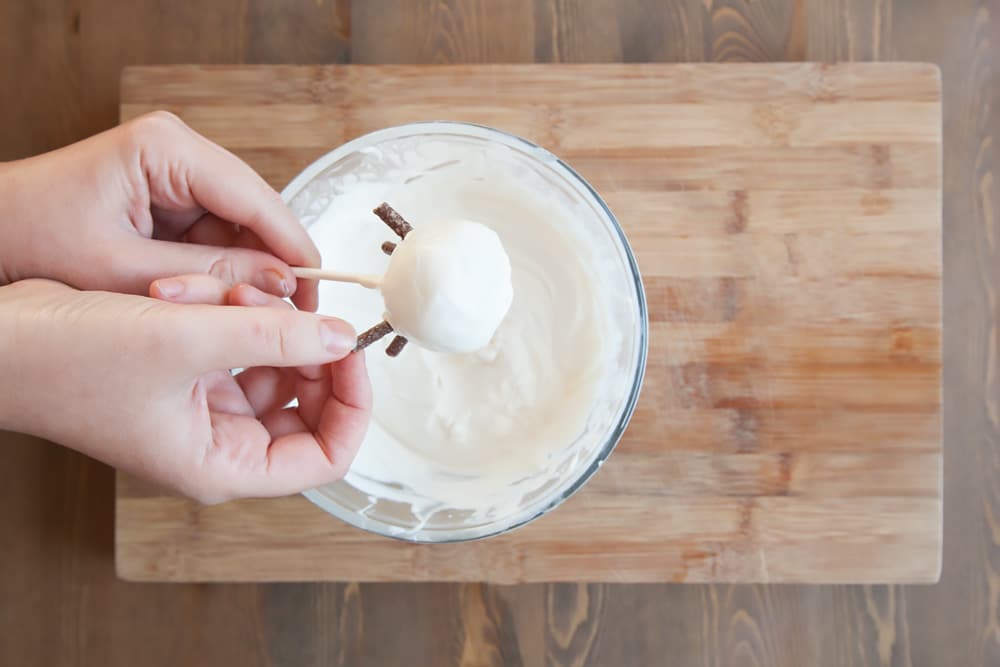
Before it dries, carefully push the chocolate sticks in to form the legs and tail, 1 cm into the cake pop. Place in a piece of polystyrene or box lid so that the pops stand up while they set.
Once the cake pops are fully set you can remove the sticks and start to add the faces using the icing pens.
Print this kitty cake pop recipe
If you want to make your own kitty cake pops here’s the recipe again in a helpful, printable format. Just use the grey ‘PRINT’ button in the recipe card below.
Kitty Cake Pops Recipe
Ingredients
For the sponge
- 150 g (5.29 oz) salted butter or margarine, softened
- 200 g (7.05 oz) white caster sugar (superfine sugar)
- 3 medium free range eggs medium free range
- 1 tsp vanilla extract
- 200 g (7.05 oz) self-raising white flour (self rising flour)
- 1 tsp baking powder
- 2 tbsp cocoa powder (dutch processed)
To create the pops
- 8 tbsp (8 tbsp) chocolate frosting (we used store-bought Chocolate Fudge Icing)
- 20 cake pop sticks
- 30 g (1.06 oz) milk chocolate melted, for securing the sticks
To decorate
- 350 g (12.35 oz) white candy melts or white chocolate, melted
- 100 g (3.53 oz) chocolate peppermint sticks straight pretzels will also work
Instructions
To make the sponge
- Preheat the oven to 170C/240F (150C/300F fan). Add the butter, sugar, eggs and vanilla essence to a bowl and beat. Fold in the flour, baking powder and cocoa.
- Spread evenly in a cake tin and bake for around 25 minutes until springy on top. You can use one cake tin, but spreading the mixture out over two will make it cook and cool more quickly. If you're in a hurry you can also buy a pre-made chocolate sponge.
- Wait for the cakes to completely cool.
To turn in pops
- Cut the cake into large chunks and place in a large bowl. Crumble the cake with your hands gently until it resembles coarse bread crumbs, then use your hands to work in the frosting, adding spoonful by spoonful until it just starts to come together as a crumbly but mouldable mixture.
- If you have an ice scream scoop handy it's a great way of making sure all the balls will be of an even size, if not you can just do it by eye.
- Roll your portions into balls. Try to get them as round as possible but don’t squash them too much – you don’t want them to be too dense.
- Dip each cake pop stick into melted chocolate to about 1/2cm.
- Push each stick half way into a cake ball. Repeat until you’ve pushed all the sticks in to an equal depth.
- Put them all in the fridge to chill for 2 hours.
To decorate
- Make sure everything is ready before you take the cake pops out of the fridge so that they stay as cold as possible.
- Dip each cake in turn into the candy melts to cover the whole pop, then twist a few times over the tub to get rid of the drips.
- Before it dries, carefully push in the chocolate peppermint sticks into the cake pops to form the legs and tail.
- Push the cake pop stick into a piece of polystyrene or box lid so that the pops stand up while they set.
- Once the cake pops are fully set you can remove the sticks and add the face details using an icing pen.
Video
Nutrition
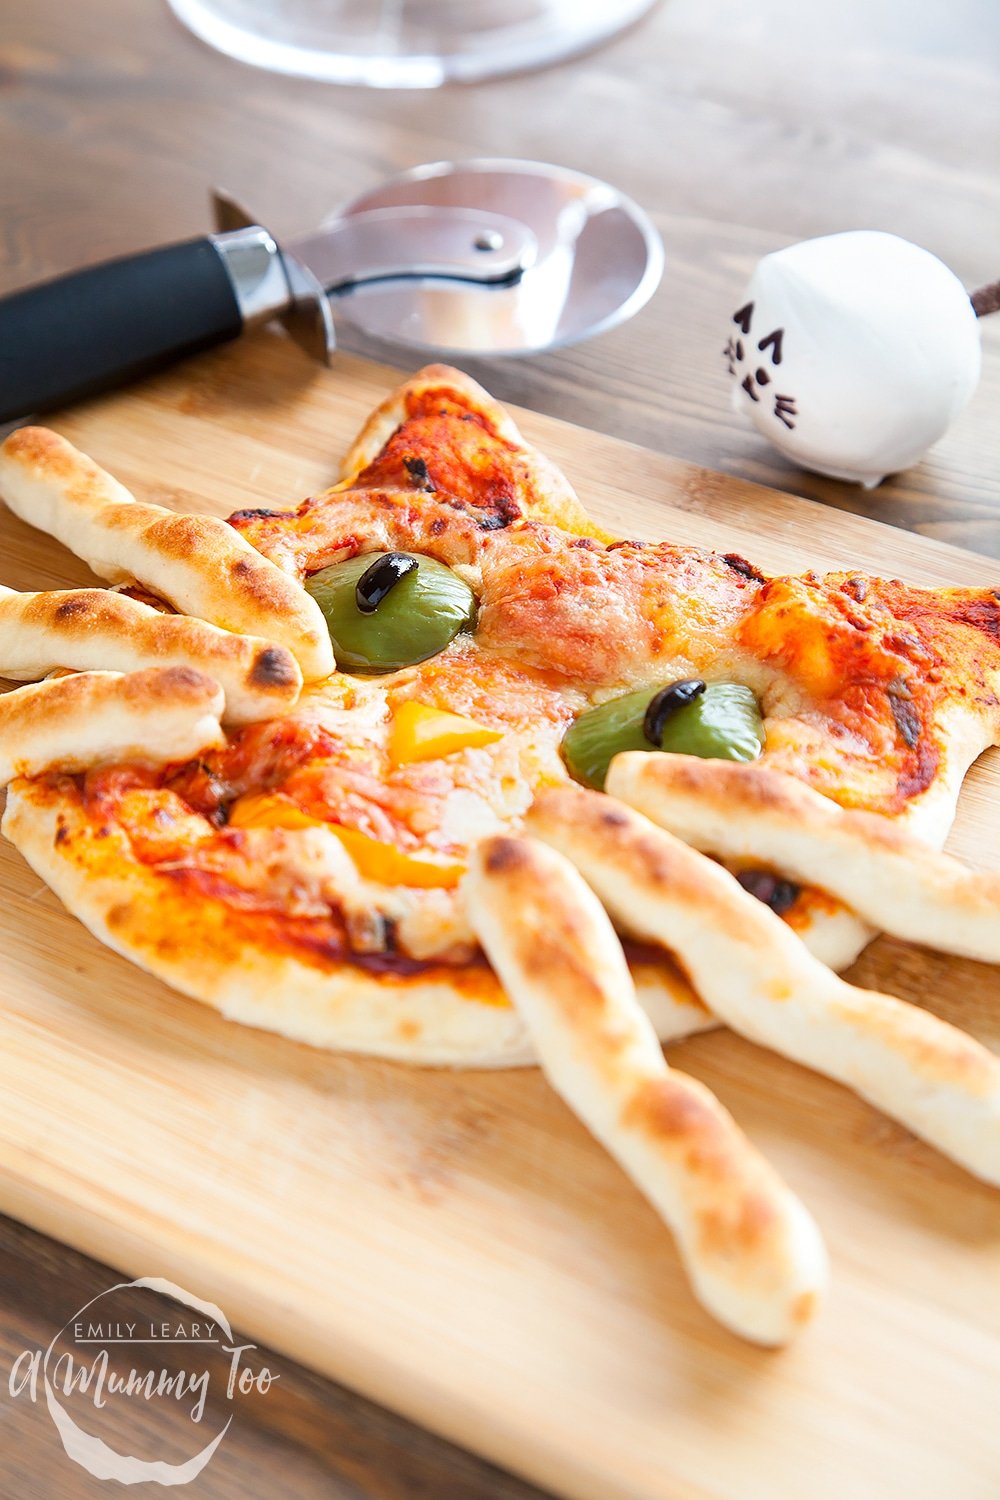
If you enjoyed this recipe be sure to check out my guide to cat-themed party food with sandwiches & a happy cat pizza.
Pin these kitty cake pops for later
More cat-themed recipes to try
Have you got my book?

'This is a great kids cookery book. Emily is a star' - Simon Rimmer
'The book I'd like to force into any mother's kitchen' - Prue Leith
"A fab book with a plan." - Jane Devonshire, 2016 Masterchef UK winner
'Emily has managed to combine her mummy knowledge and passion for food to make a truly helpful and brilliant cookbook' - Priya Tew, RD, BSc (Hons), Msc
Get Your Kids to Eat Anything is an achievable 'how to' for parents in the battle to overcome picky eating and 'make new the norm'. Emily Leary's unique 5-phase programme looks at the issue of 'fussy eating' in a holistic way that links imagination with food, and which situates parents alongside - not in opposition to - their children.
Leave a Reply