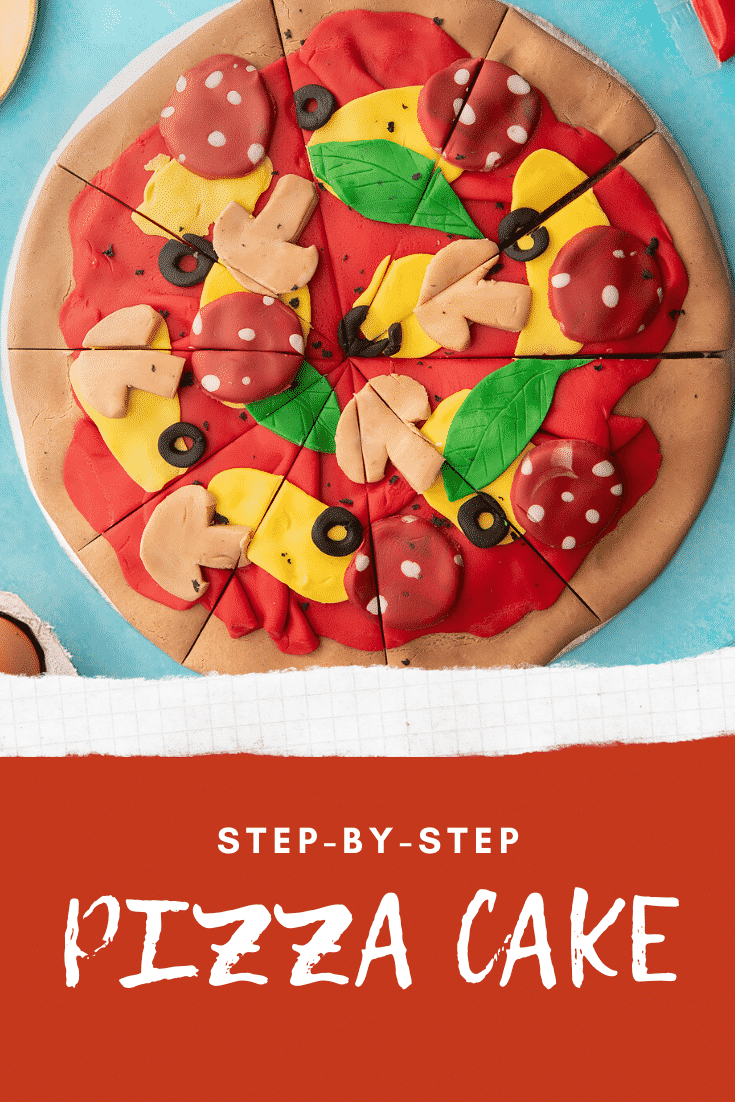
This incredible pizza cake is actually a delicious two-layer Victoria sponge, filled with jam and buttercream and covered with sugar paste to look like a classic pizza!
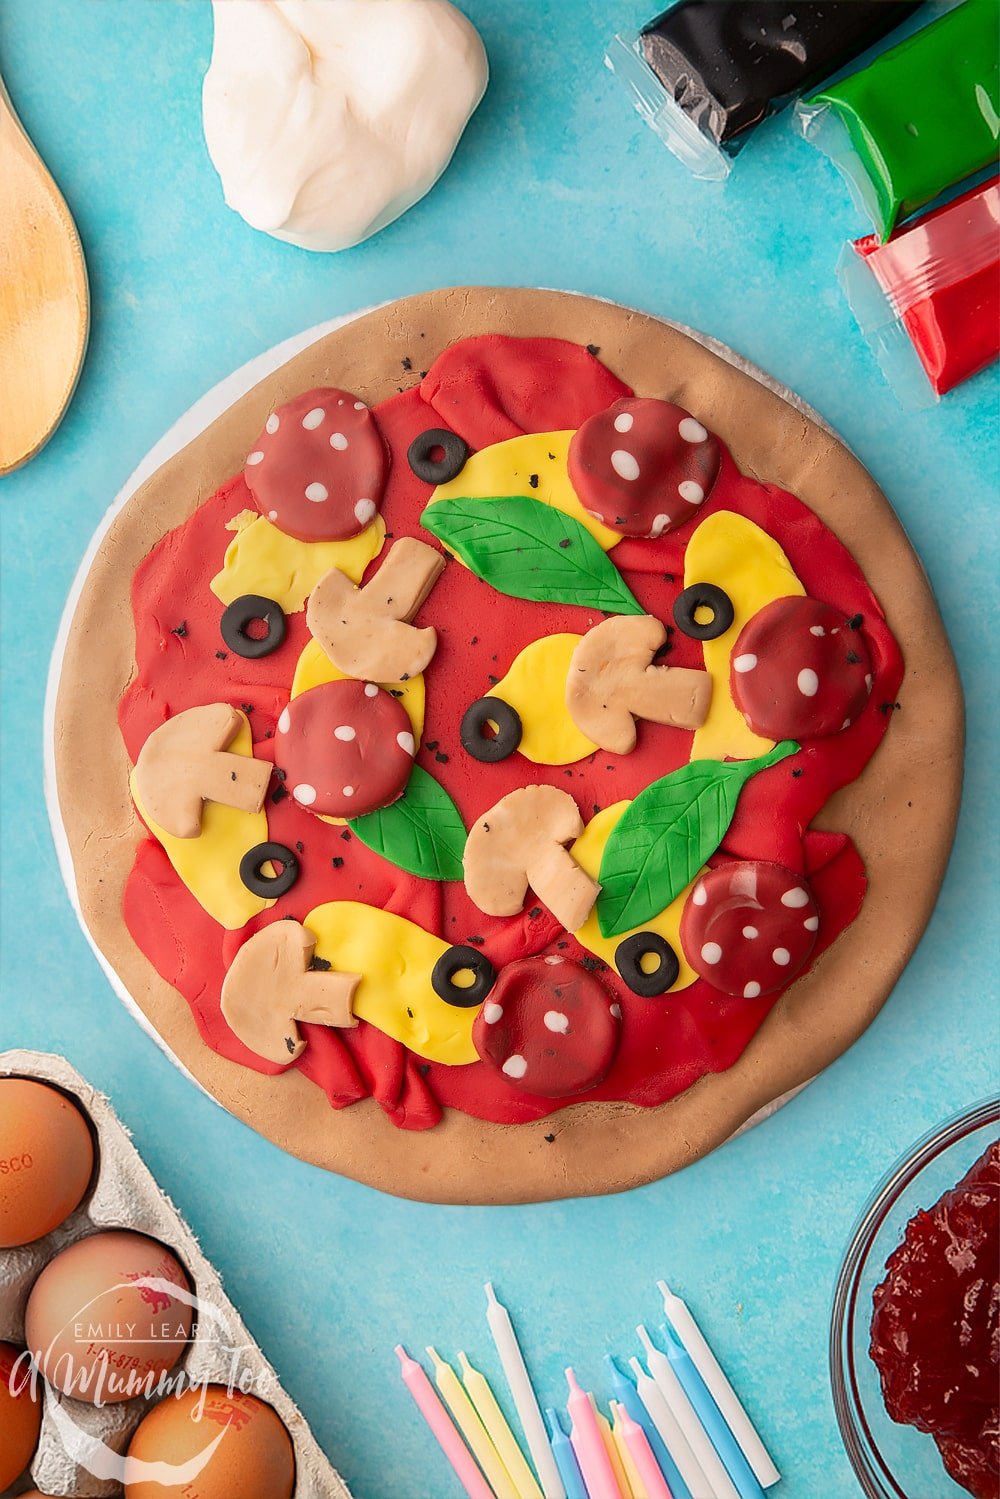
The detail is so much fun! From the mushroom and pepperoni slices to the basil leaves and black olives to the cheese and tomato base, it's the sweetest pizza you'll ever taste!

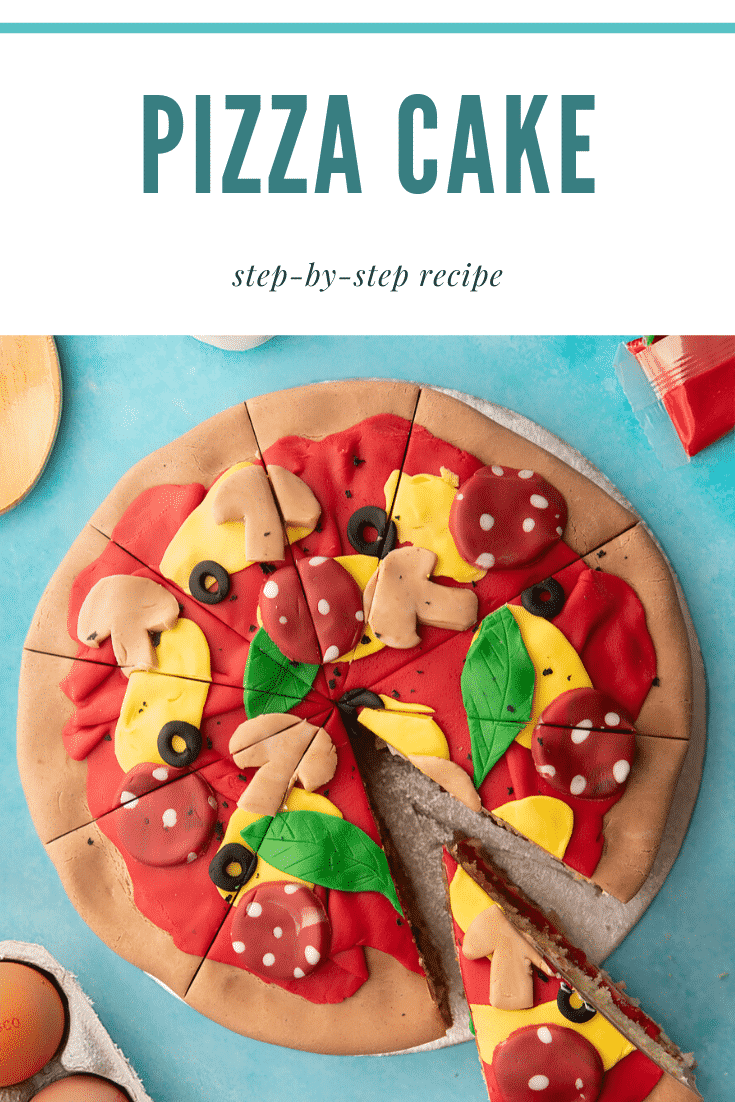
It looks great when you slice into it, doesn't it? That's one deep dish pizza!
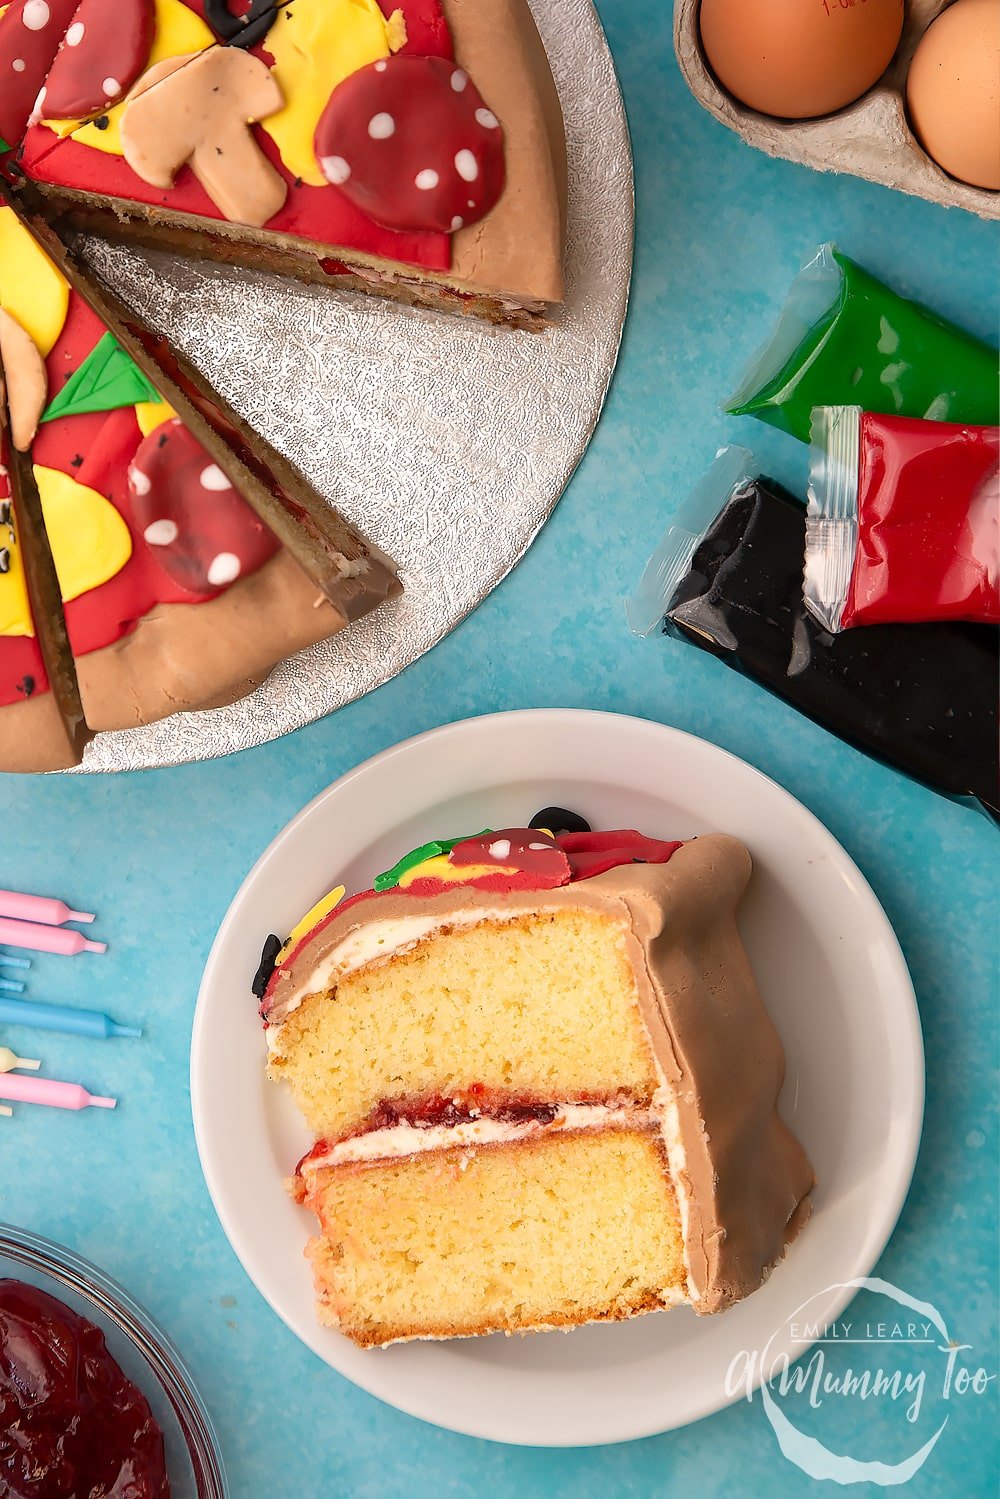
But there's more good news. This pizza cake is not only great looking and super tasty, it's also WAY easier to make that it looks.
I've created a full step-by-step tutorial with plenty of pictures so that you can create it yourself with confidence.
Ingredients
For the sponge
- 400 g (14.11 oz) white caster sugar (superfine sugar)
- 300 g (10.58 oz) salted butter
- 1 tsp vanilla bean paste
- 6 medium free range eggs
- 400 g (14.11 oz) self-raising white flour (self rising flour)
For the filling
- 1/2 tsp vanilla bean paste
- 300 g (10.58 oz) icing sugar (powdered sugar) powdered sugar
- 150 g (5.29 oz) salted butter
- 200 g (7.05 oz) jam
To cover
- 750 g (3.53 oz) white sugar paste
- 100 g (2.2 lb) yellow sugar paste (you will have offcuts)
- 1 tbsp (3.53 oz) cocoa powder (dutch processed)
For the toppings
- 125 g red sugar paste
- 10 g white sugar paste
- 40 g yellow sugar paste
- 25 g black sugar paste
- 20 g green sugar paste
Equipment
- 2 Round loose-bottomed 20cm (8") nonstick cake tin
Instructions
To make the sponge
Preheat the oven to 180C (160C fan).
Put the butter and sugar in a large bowl.
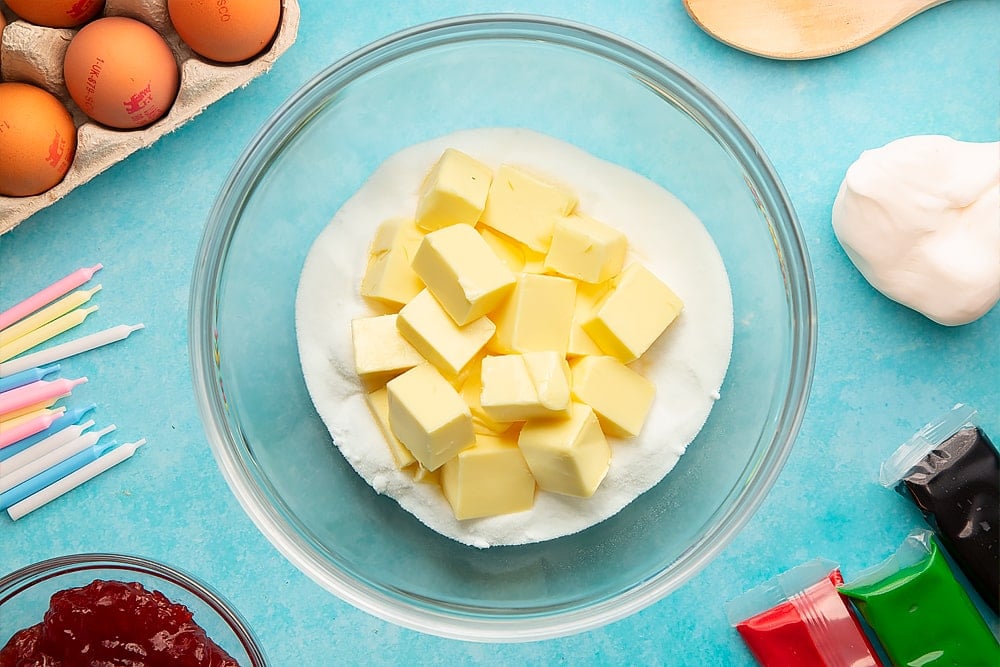
Beat together until pale and fluffy.
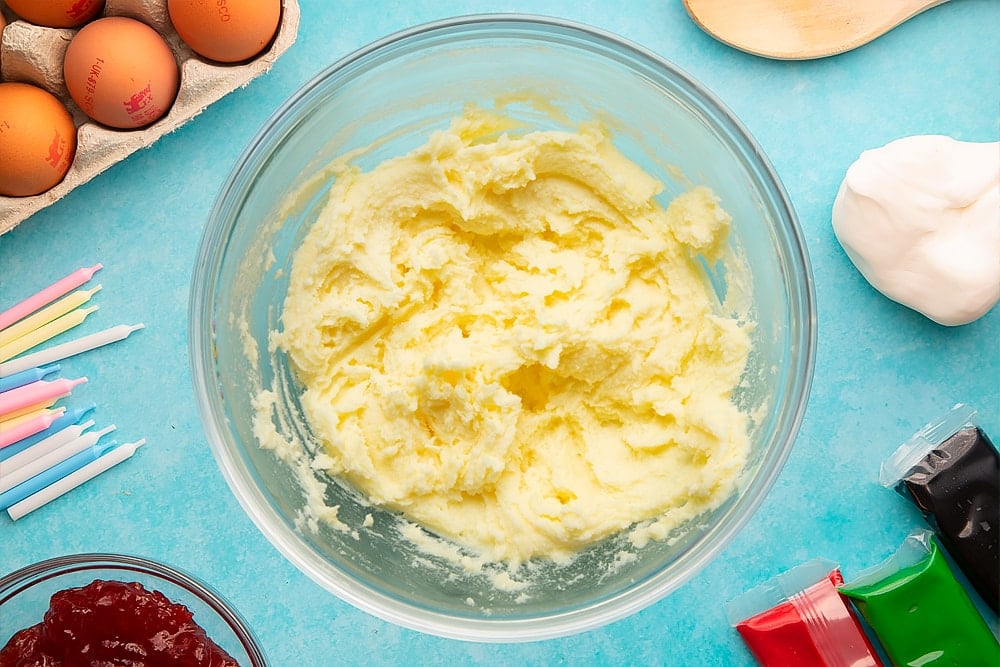
Add the eggs and vanilla to the bowl, along with a couple of spoonfuls of the flour to prevent curdling.
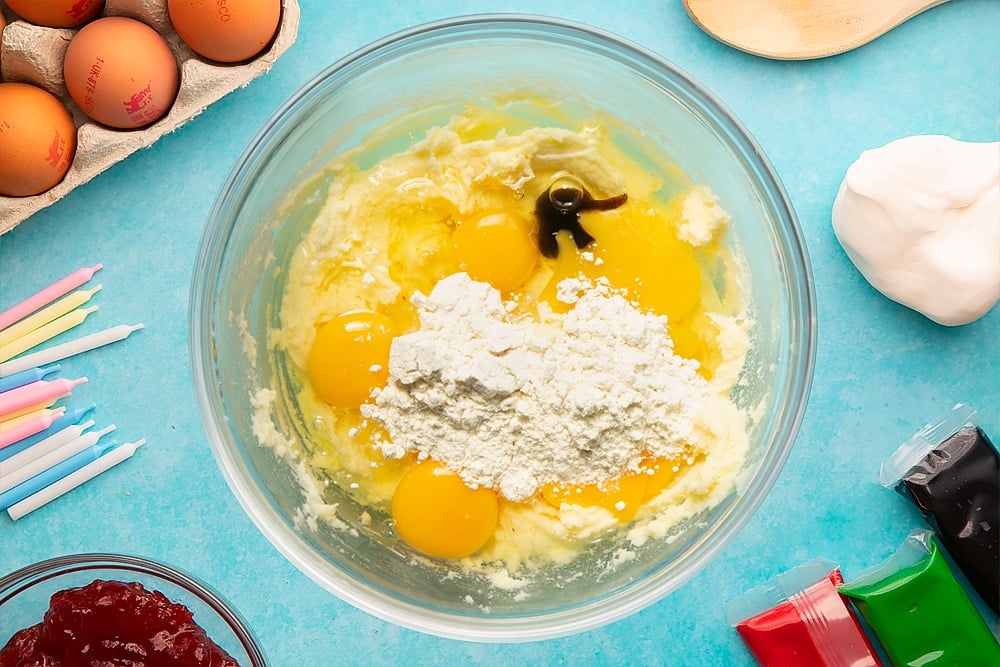
Beat until you have a smooth, thin batter.
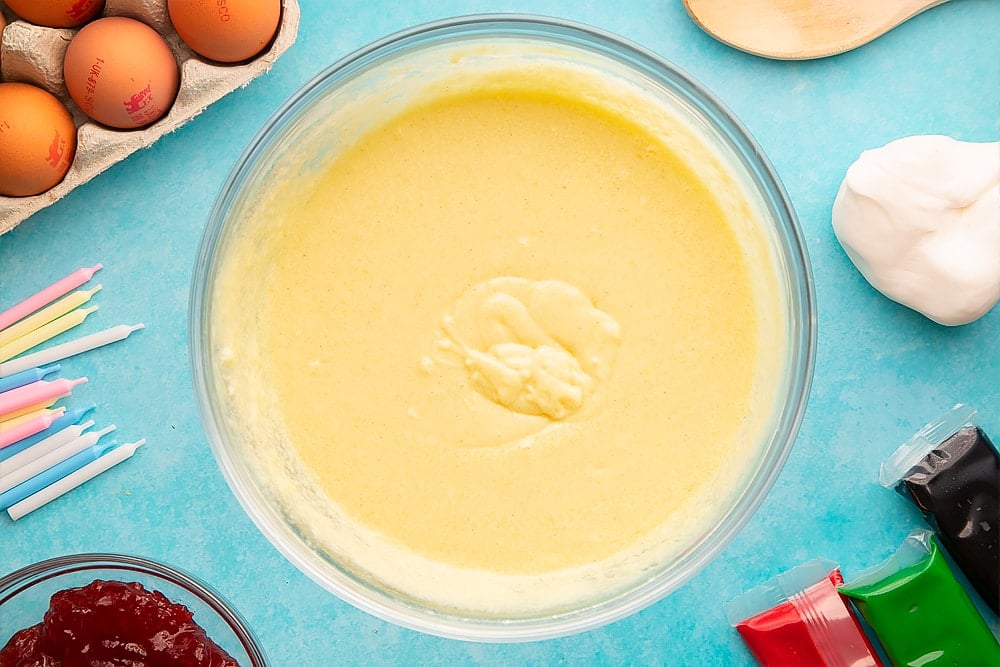
Sift the remaining flour into the bowl.
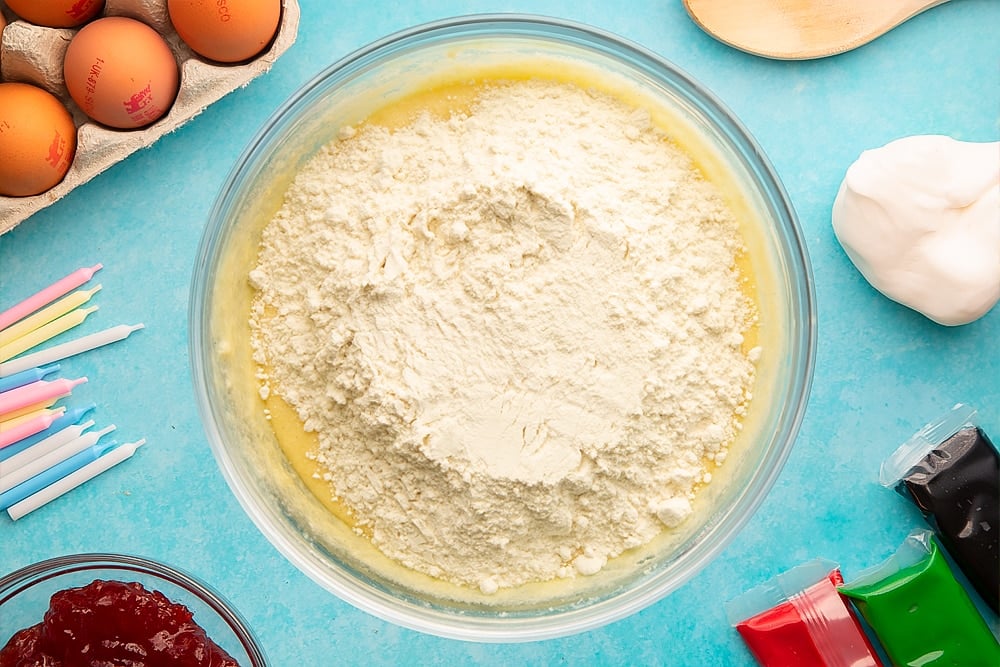
Gently fold through until the flour is entirely incorporated. Don't over-mix.
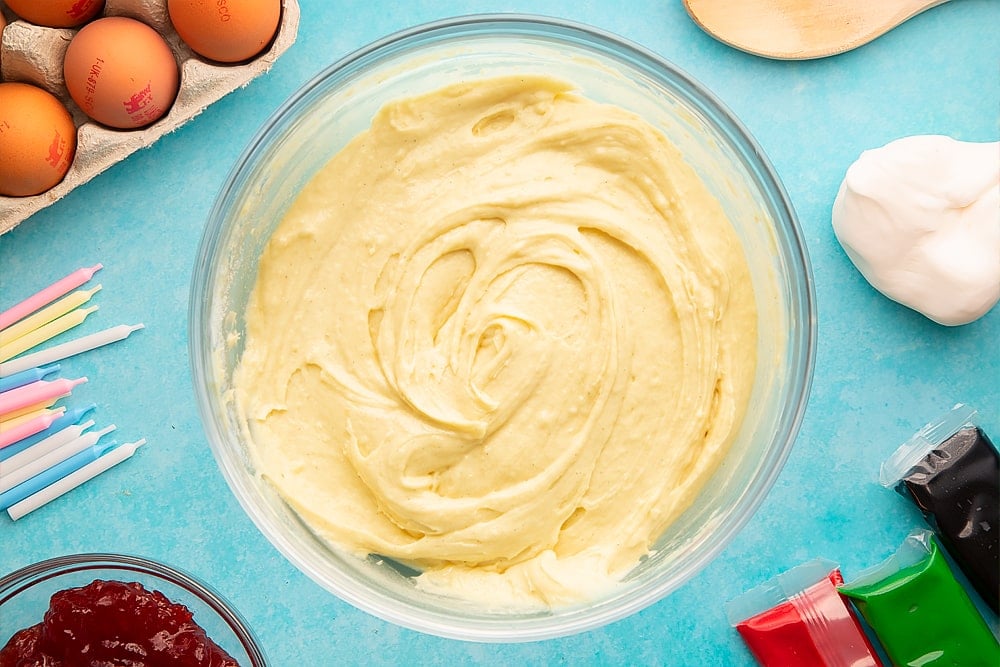
Grease and line two loose-bottomed, straight-sided, 20cm cake tins.
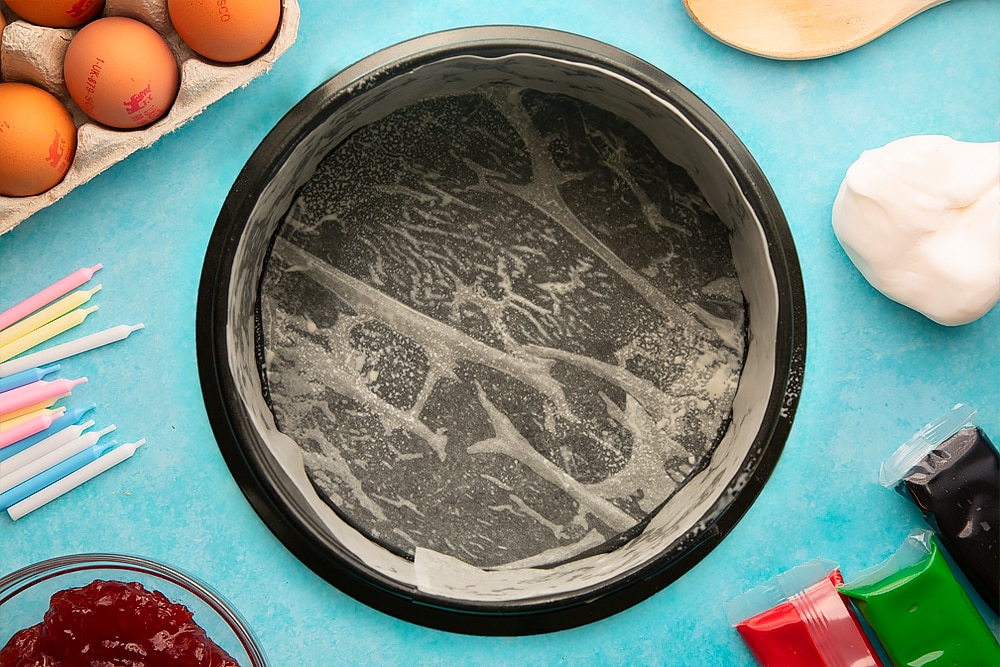
Divide the batter evenly between them and level off.
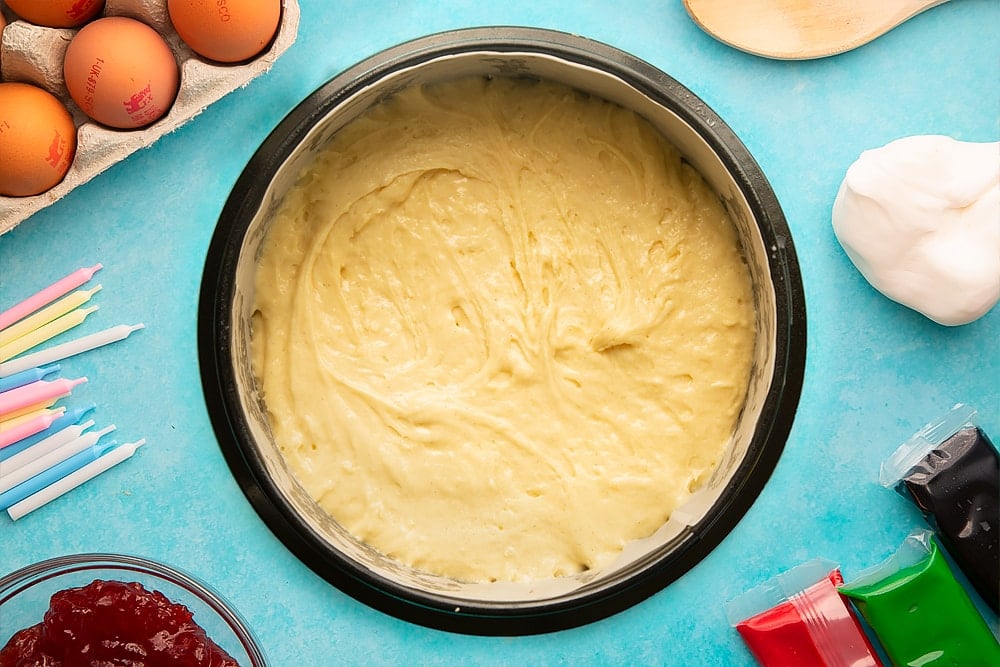
Bake for approximately 20-25 minutes until the cakes are risen and gently golden.
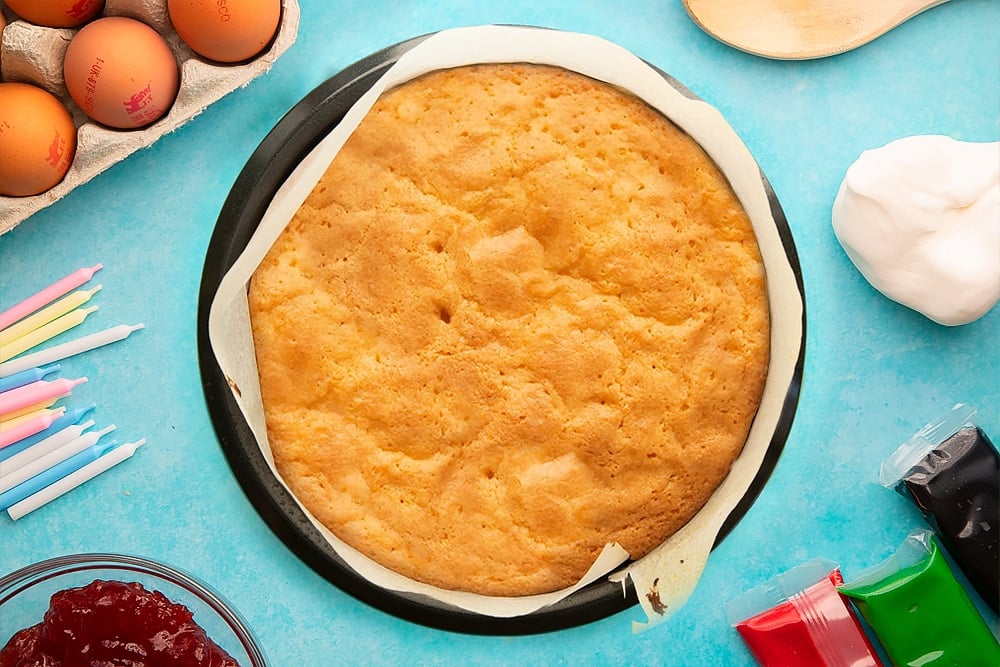
Allow to cool on a wire rack until cool enough to handle, then release the cakes from their tins and return them to the wire rack to cool completely.
If necessary, once cool, you can trim the very tops of your cakes off to allow them to sit flat.
To fill and assemble
In a fresh bowl, beat your vanilla, icing sugar (powdered sugar) and butter together until light, fluffy and significantly increased in volume.
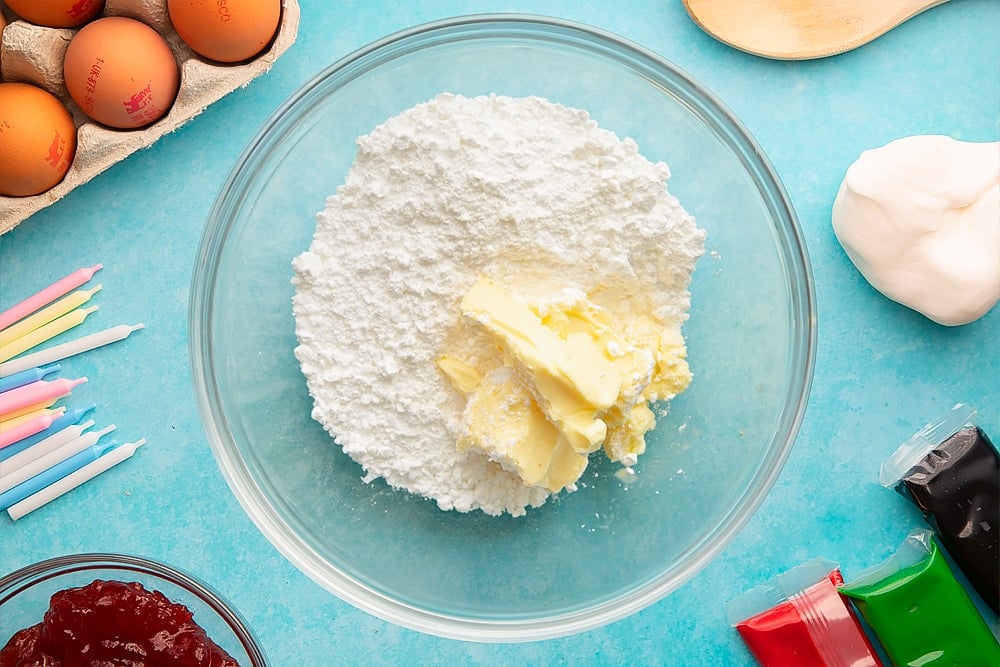
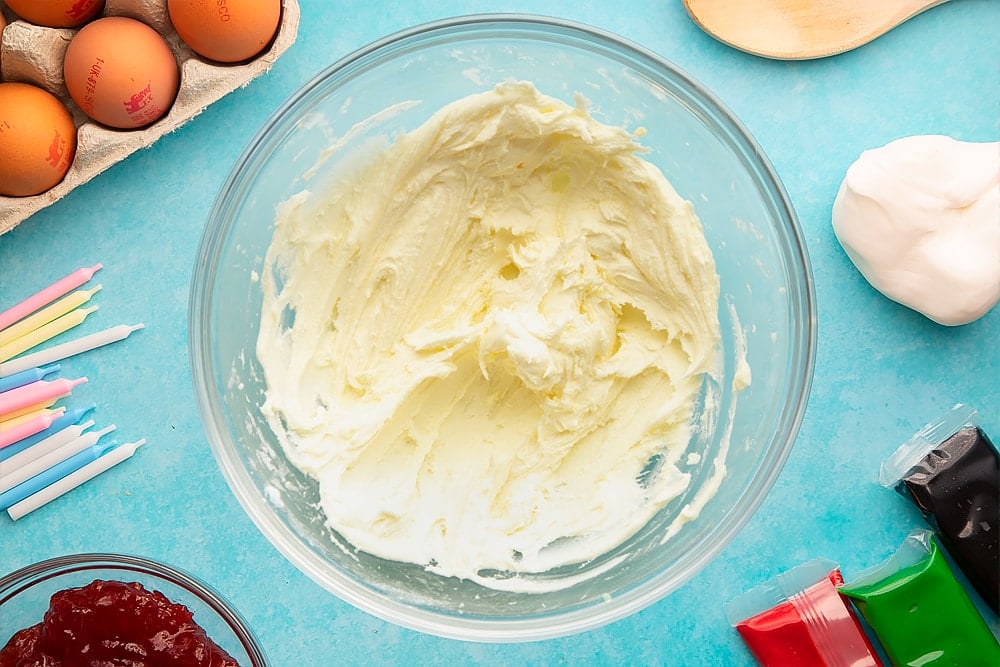
Take a completely flat board or plate, at least 25cm in diameter and spread a thin layer or frosting onto the center to help stop your cake from sliding around.
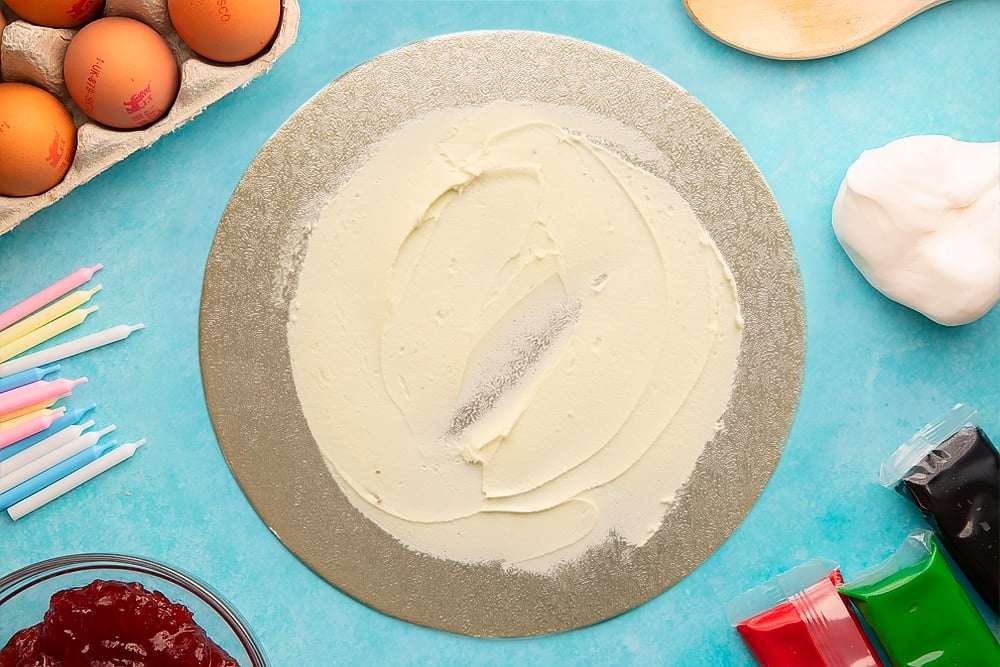
Place one of your cakes top down on the board, then spread with half the remaining frosting.
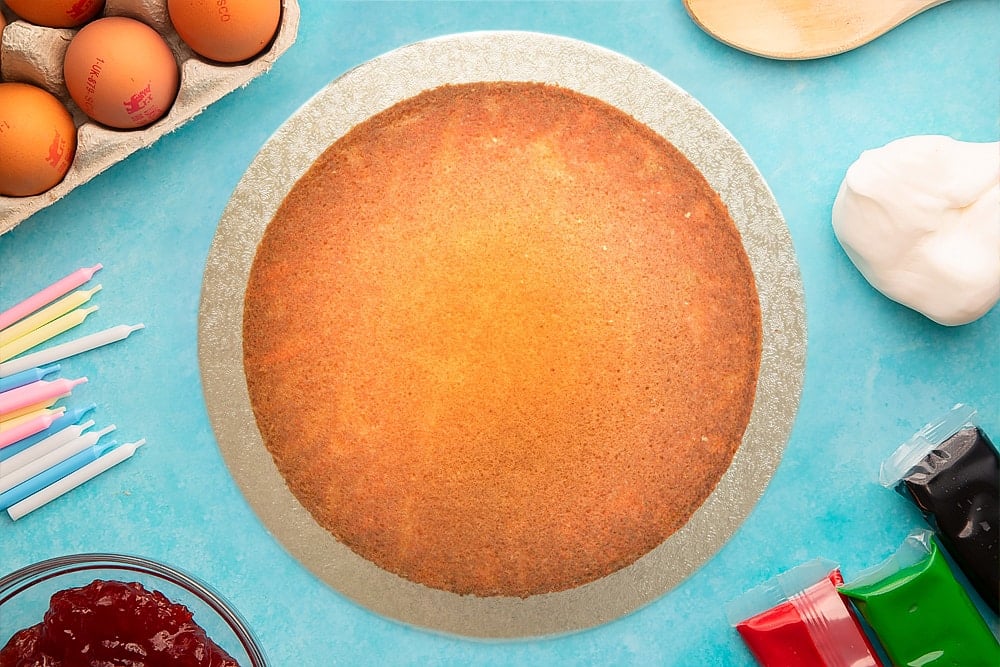
Gently spread your jam on top of the frosting – you might not need all of the jam.
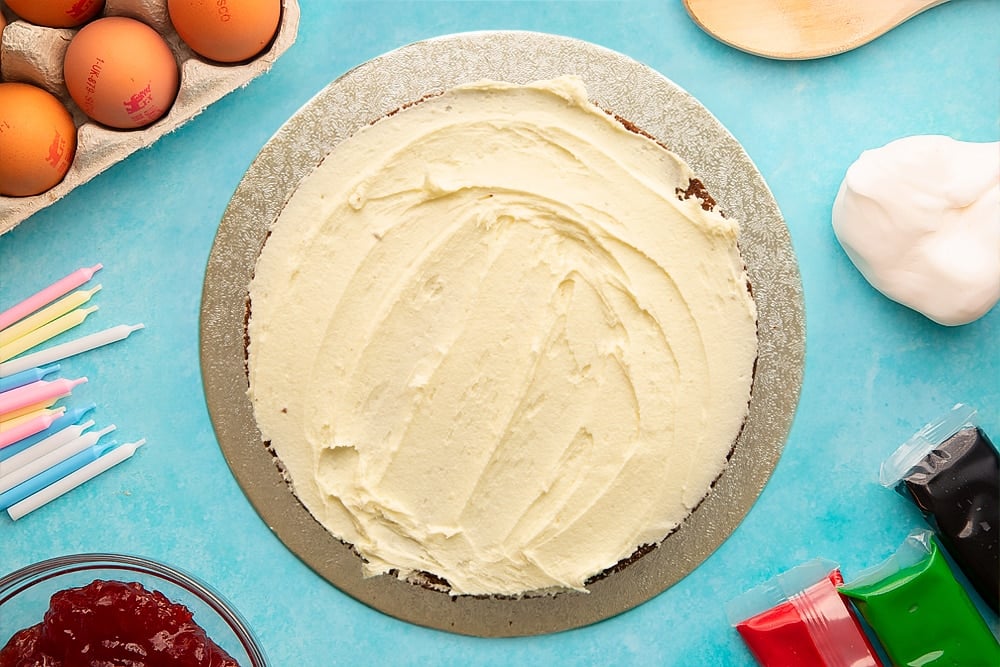
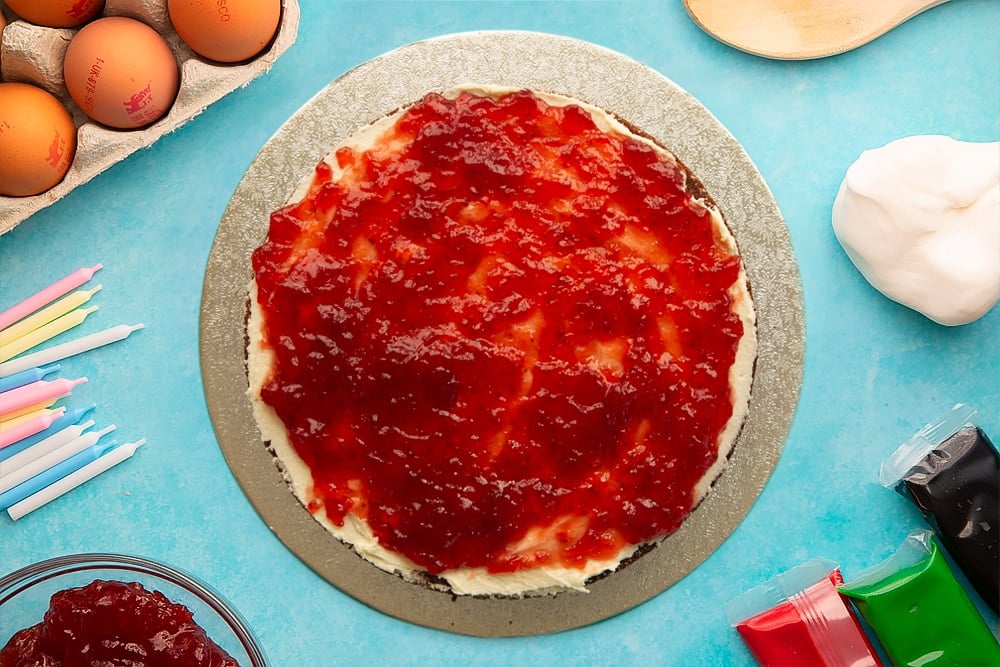
Place your second cake on top of the jam, again top-down to give nice clean edges.
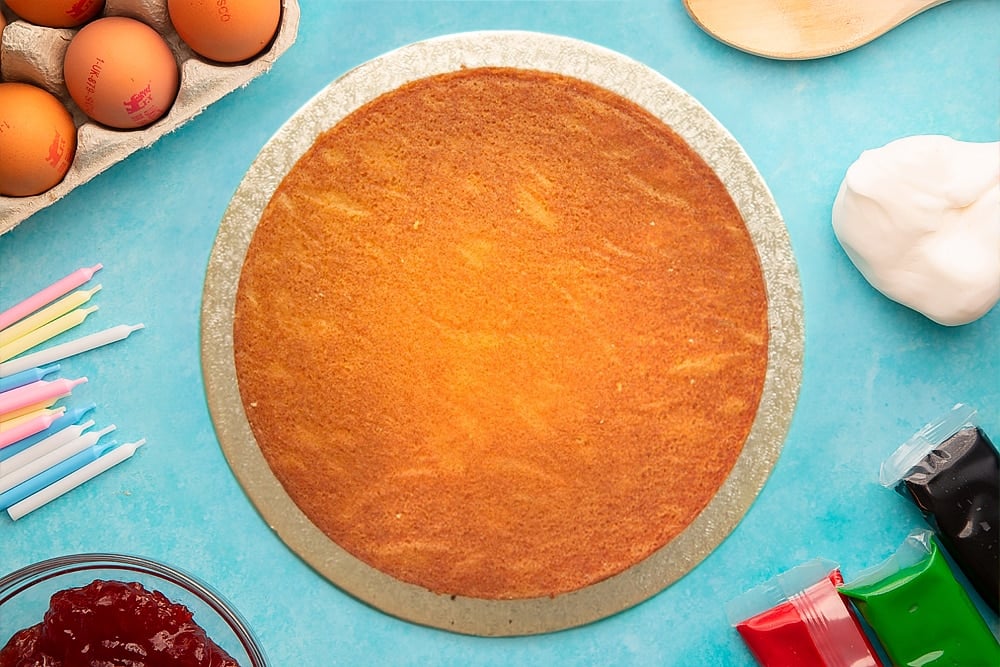
Use the remaining frosting to cover the whole cake in a thin layer.
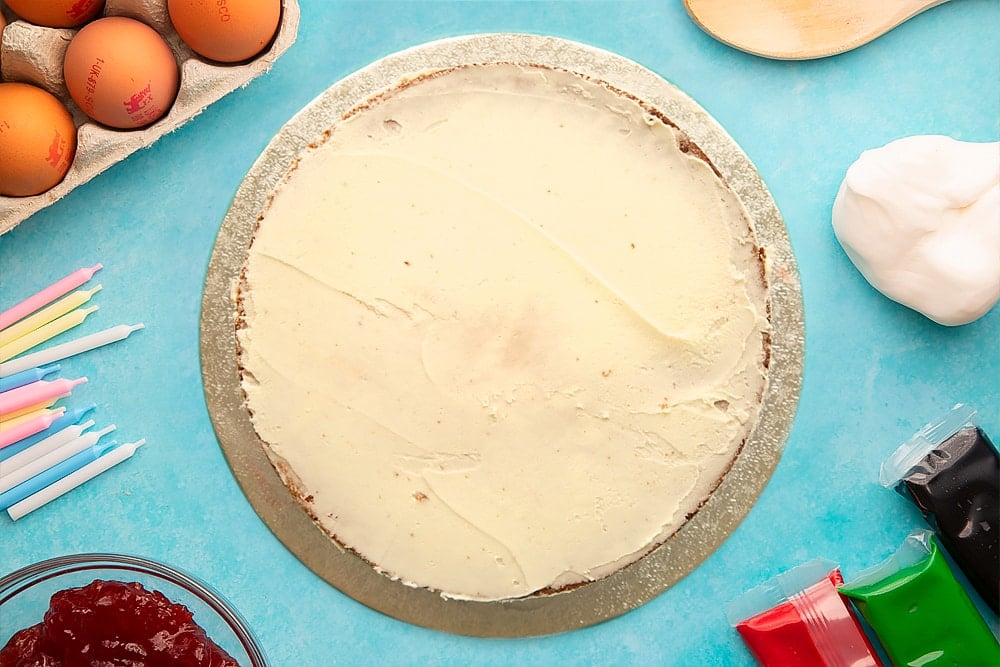
Now place your cake in the freezer to firm up the frosting while you prepare the covering. If you don’t have room in the freezer, a cold fridge will do.
To cover
Knead your white sugar paste, yellow sugar paste and cocoa together until you have a brown sugar paste.
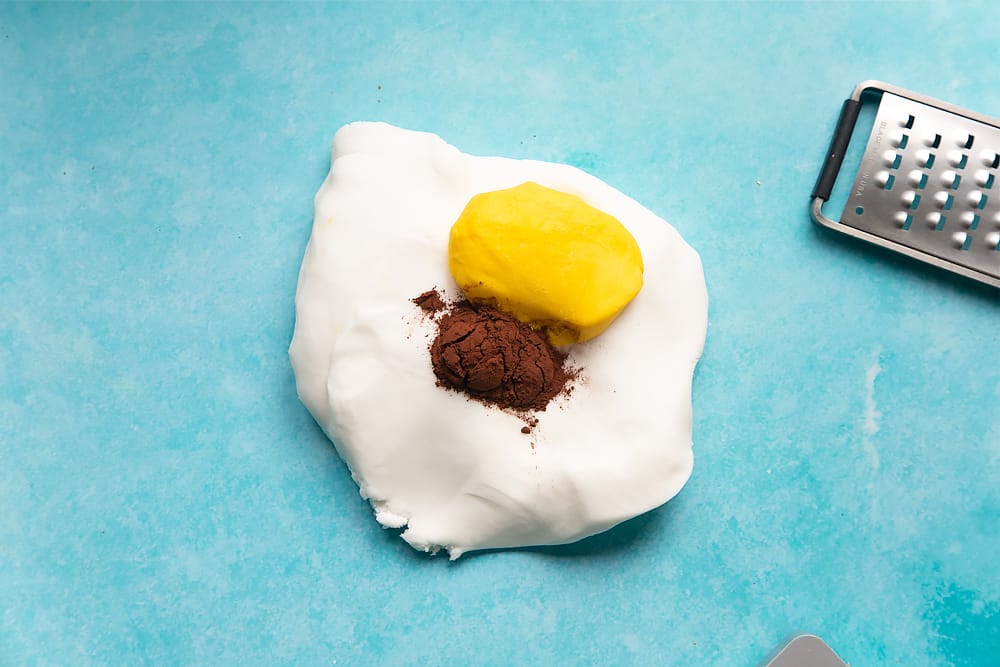
Roll the brown sugar paste out to for a disc about 35cm in diameter. It's easiest to do this between sheets of baking paper, or on a cornflour dusted surface.
Lay your sugar paste over the cake and allow the sides to drop down.
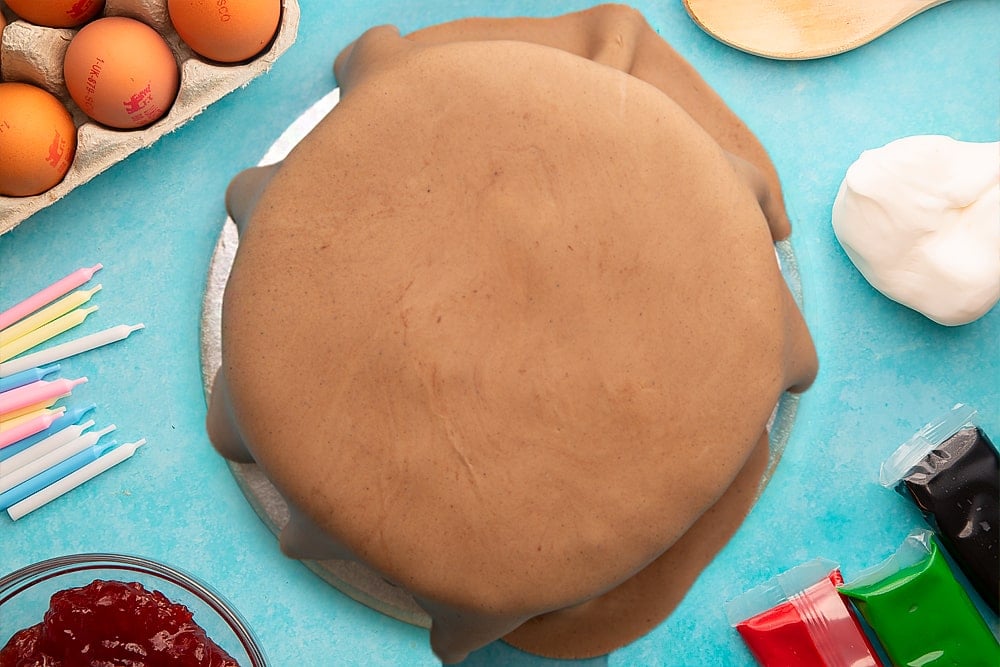
Working gently, ease and smooth the sugar paste down the sides of the cake until fully covered and trim off any excess at the base.
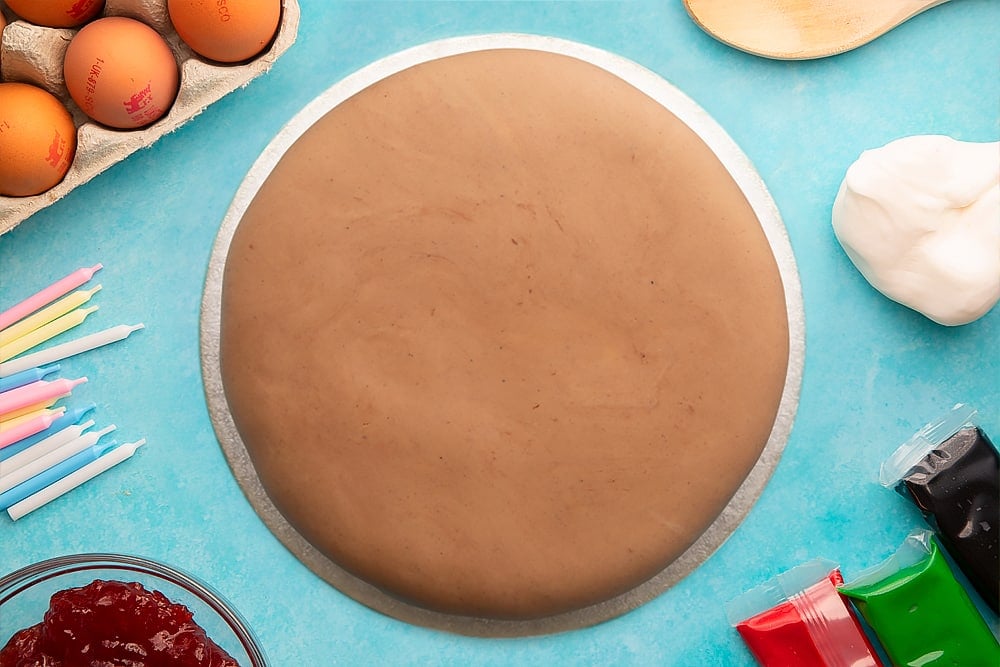
Use your fingertips to press around the circumference of the pizza to create a 'crust'.
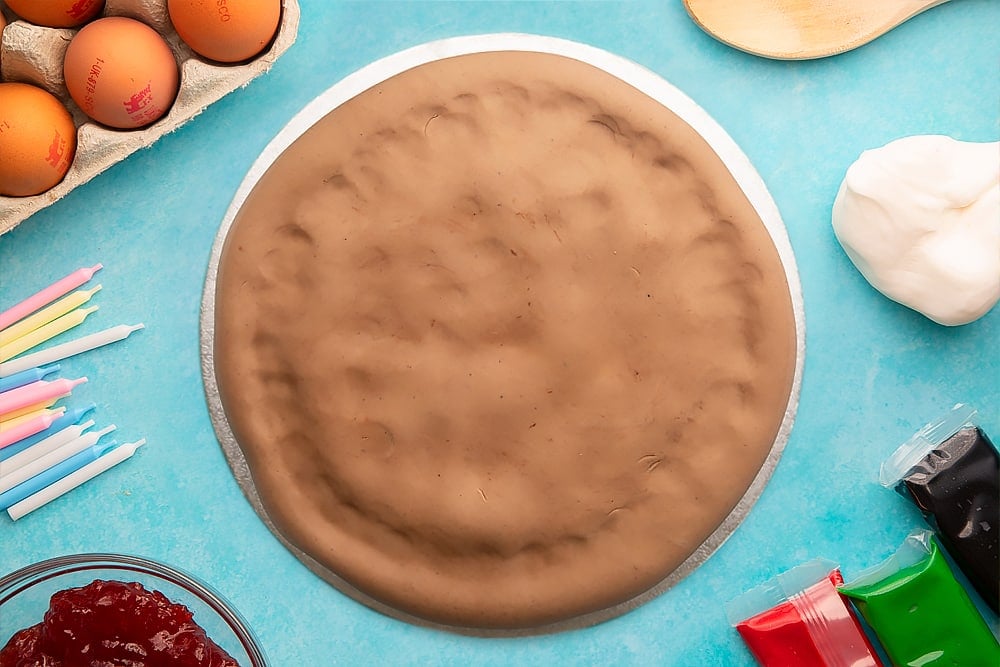
To decorate
Roll out 100g red sugar paste very thinly so it is a little wider than your cake.
Place the sugar paste on top of the cake and allow it to slightly ruffle and overlap as you do so - this helps it resemble tomato sauce.
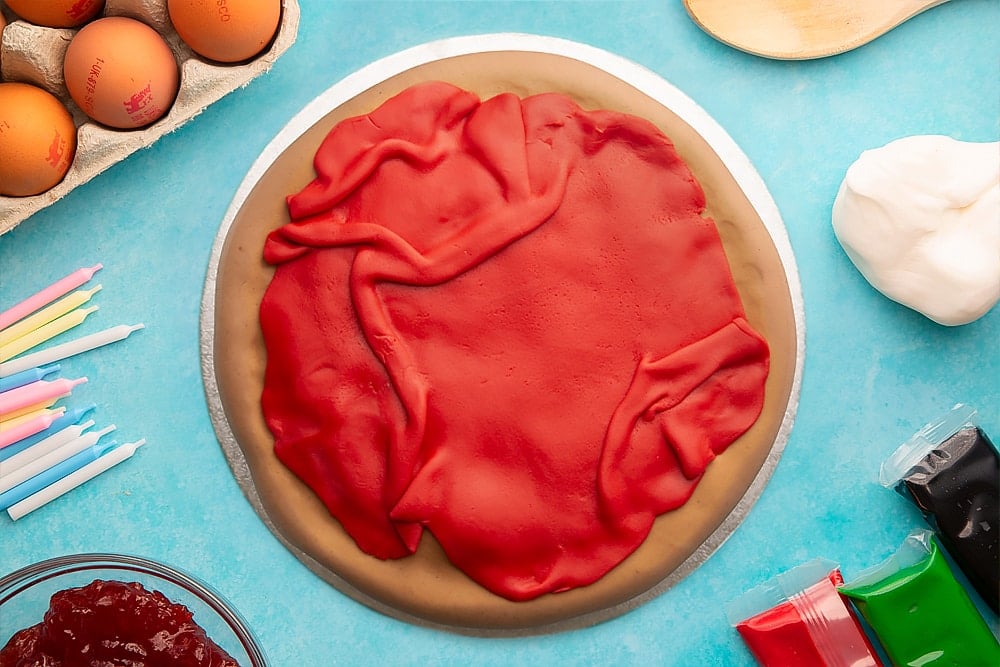
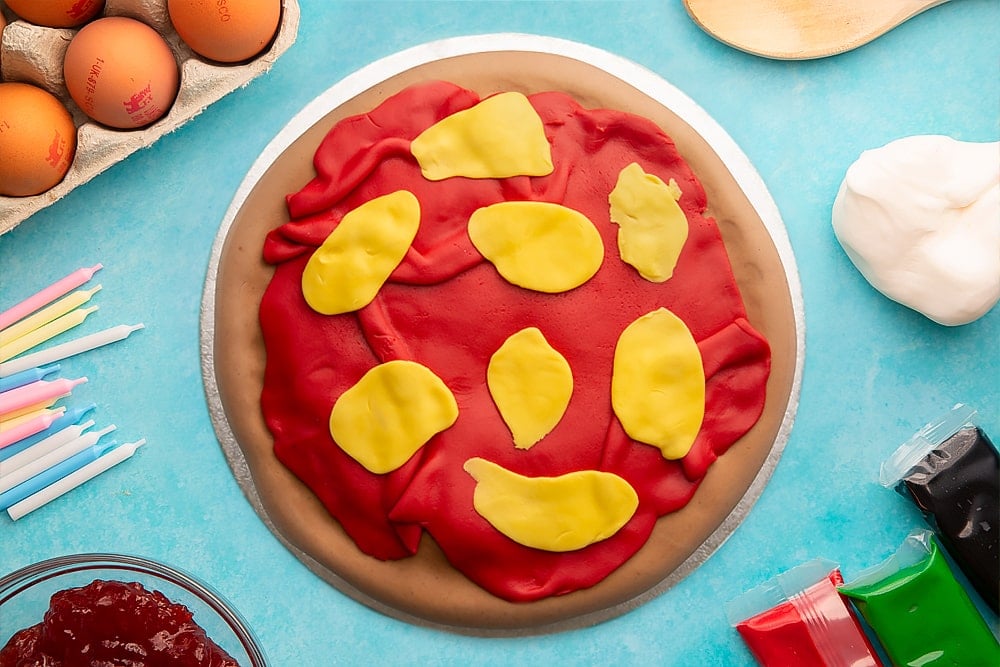
Use about 40g yellow sugar paste to form 8 small balls, then roll them out very thinly and unevenly. Place them on top of the pizza to resemble melted cheese.
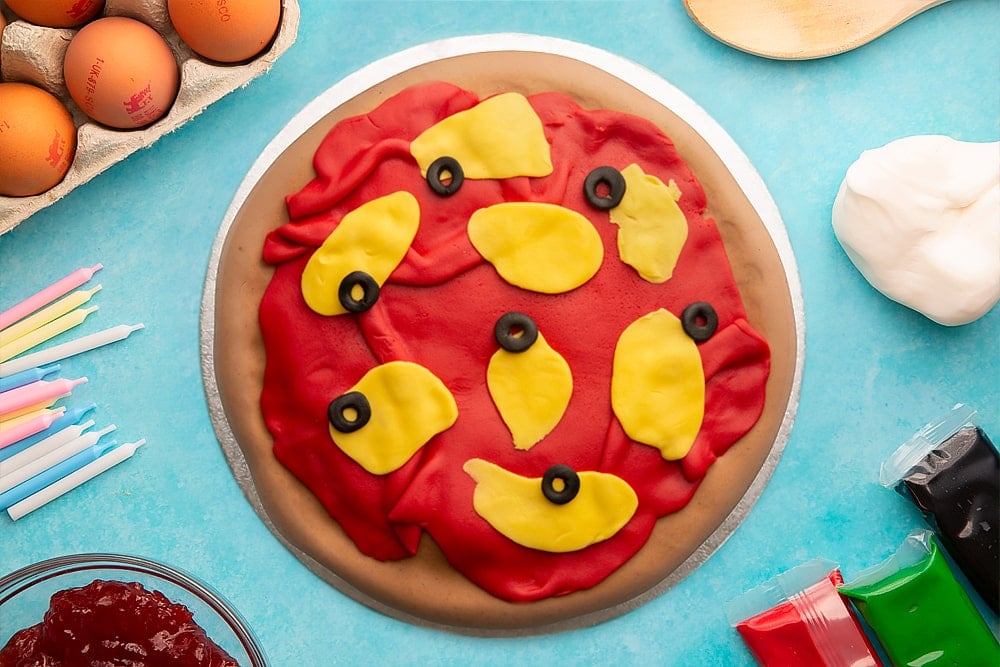
For the olives, roll out about 10g a little black icing and cut out little circles, then use a straw to cut the holes from the centre and create the look of sliced black olives. Scatter onto the cake.
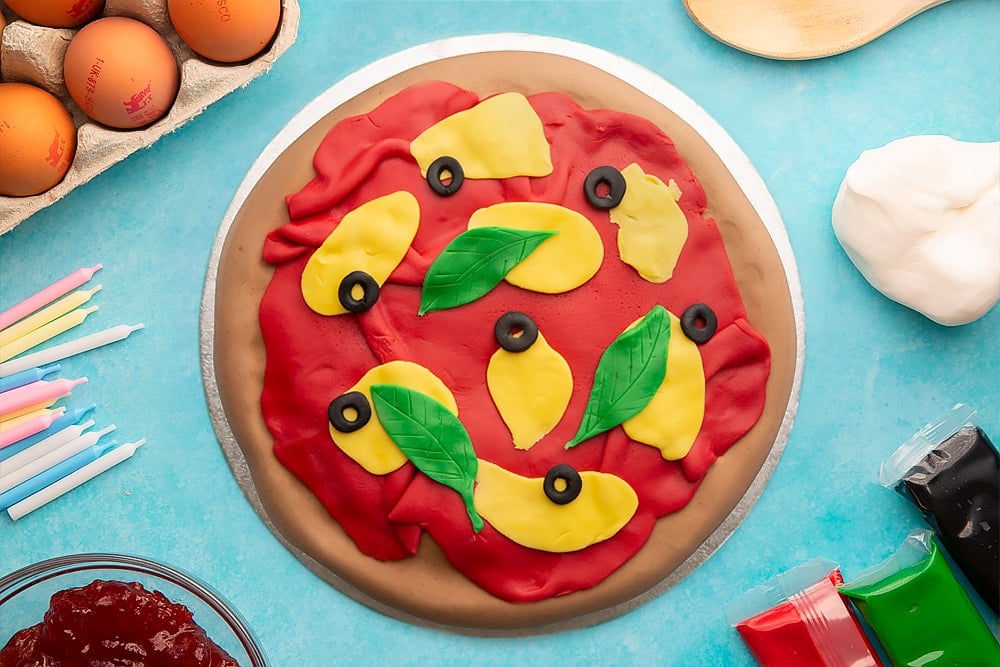
Roll about 20g of green sugar paste out very thinly and cut out a few shapes to resemble basil leaves. Use your knife to score a little vein detail onto each leaf and then arrange on the cake.
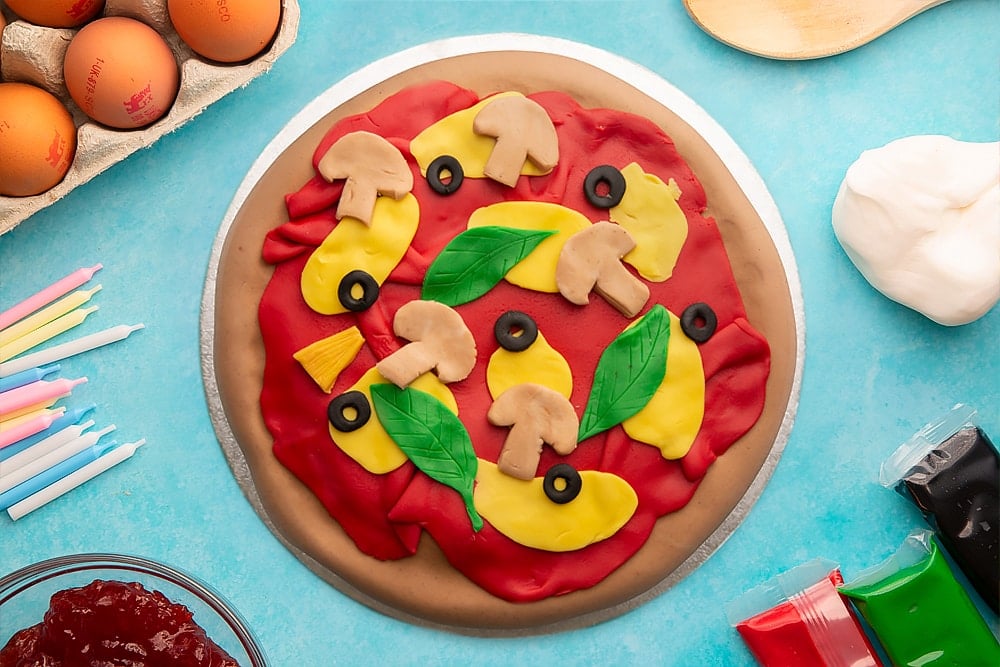
Use some of your brown sugar paste off cuts mixed with a little white sugar paste to give a mushroom shade. Roll out thinly and then cut our mushroom shapes with a sharp knife. Arrange on the cake.
To make the pepperoni, mix some of your red sugar paste with a tiny bit of black to create a darker red. Roll out quite thickly, then dot all over with tiny balls of white sugar paste.
Roll out a little more to flatten the white sugar paste, then cut out discs to resemble slices of pepperoni. Arrange on the cake.
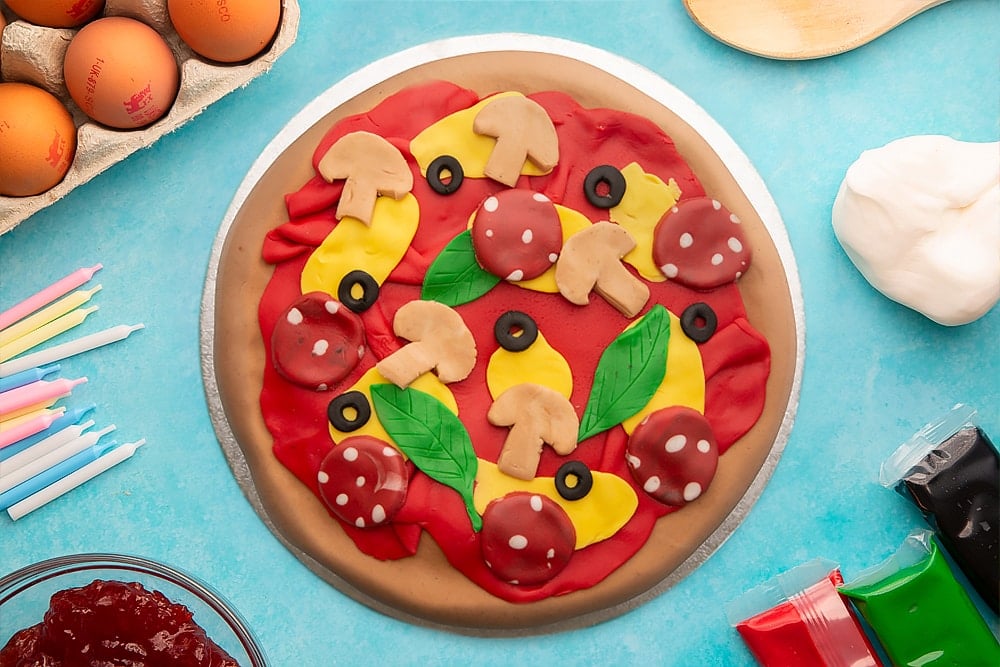
For a final touch, grab a fine grater and a little black sugar paste and grate it over the cake to resemble black pepper.

Ta da!
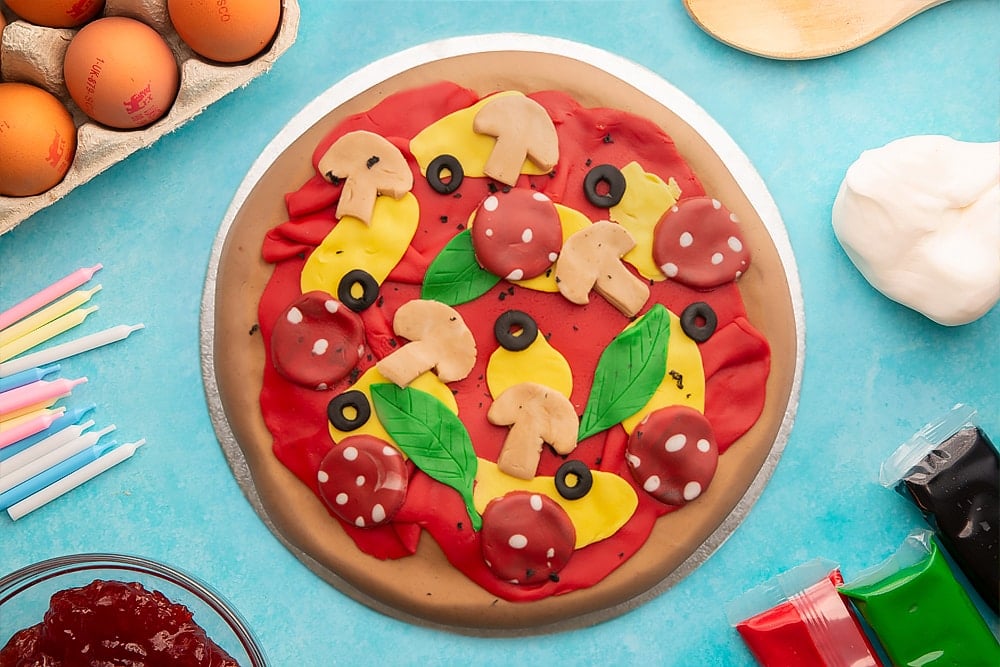
You can now make final alternations to your pizza. I recommend squeezing the crust from above and underneath at this stage to give it a perfect pizza shape.

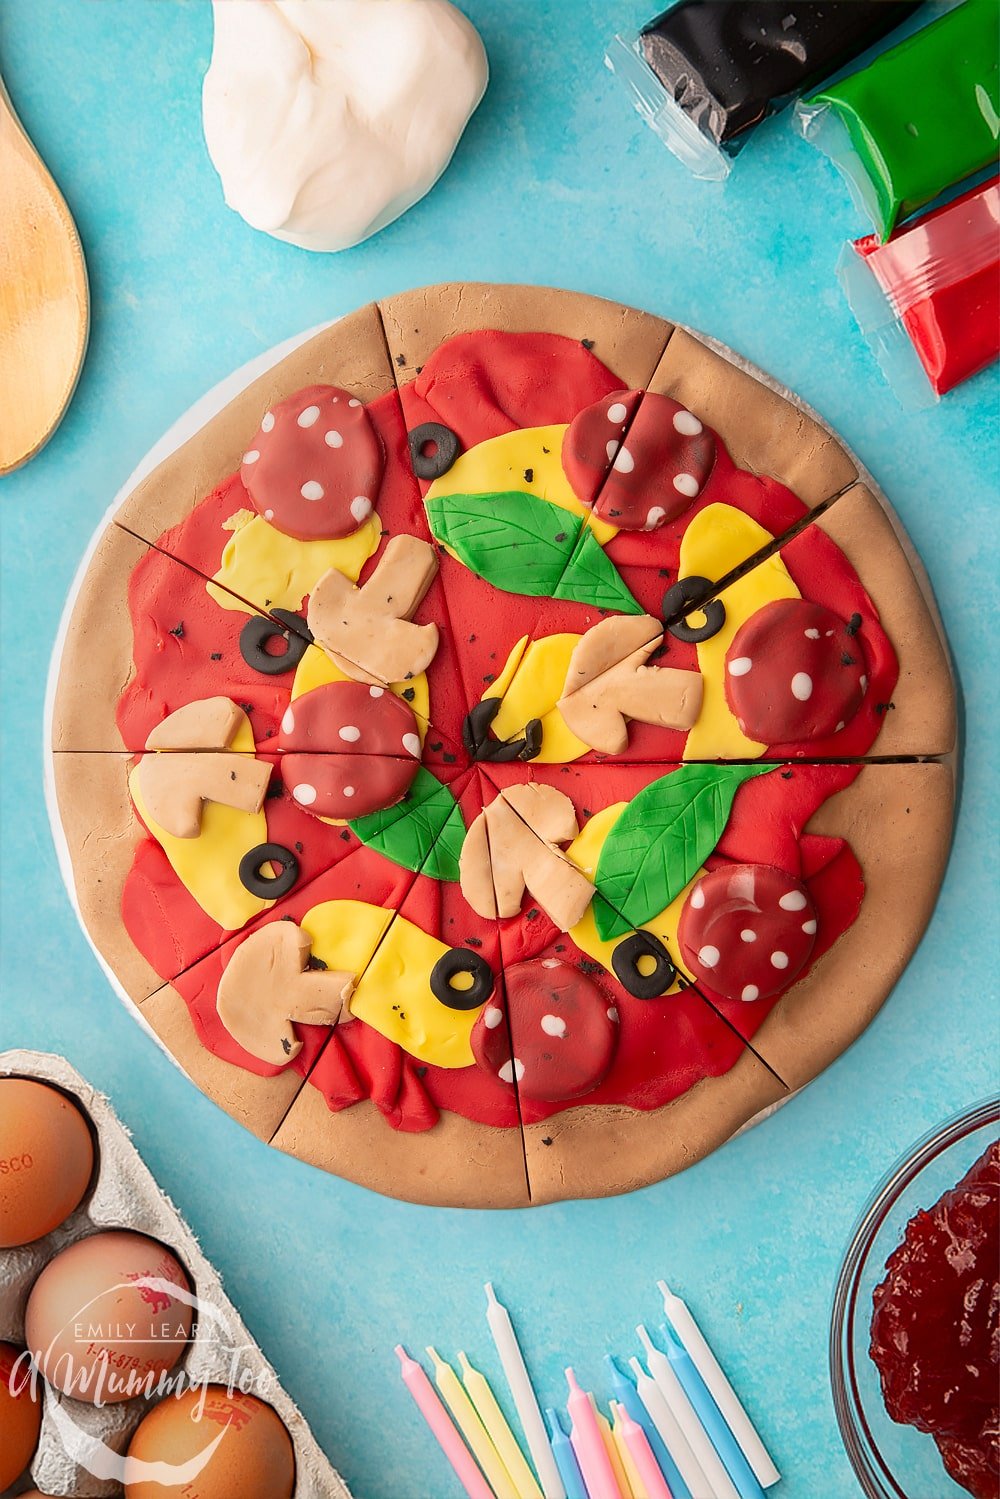
Your pizza cake is now ready to cut into slices and enjoy!
Pointers, tricks and troubleshooting tips for the perfect pizza cake
Is pizza cake easy to make?
Despite appearances, this cake is actually really easy to make!
The sponge is a foolproof Victoria sponge, and although sugar paste can be a little bit tricky to work with at first, with the step by step directions and images to guide you, it's really straightforward.
With a little bit of patience and concentration, you can definitely achieve a cake just like the one pictured.
Will I need any special equipment to make pizza cake?
You shouldn't need any special equipment to make this cake.
For the sponge, you'll just need weighing scales and measuring spoons, a bowl, whisk and mixing spoon, something to spread your frosting such as a palette knife, and a couple of 20 centimeter sandwich tins and some baking paper.
Then for the decorations, you'll just need a cake board, rolling pin and kitchen knife.
Is pizza cake suitable for vegetarians?
There are no meat or fish products in this recipe, so it is totally suitable for a vegetarian diet.
Is pizza cake suitable for vegans?
This cake contains butter and eggs and so it's not suitable for a vegan diet.
However, you could try replacing the butter with a plant-based baking margarine and the eggs with one of the following alternatives (each = 1 egg, so multiply as needed for any given recipe).
- 1 tablespoon of crushed chia seeds or flax seeds mixed with 2 tablespoons of water and left for 10 minutes in the fridge.
- 3 tablespoons of aquafaba (the water you get in a tin of chickpeas).
- 3 tablespoons of applesauce (bear in mind this will add sweetness).
Note: I have not tested all of these replacements with this particular recipe, so let me know how you get on.
Is pizza cake gluten-free?
The sponge in this pizza cake is made using a wheat-based self raising flour, so is not suitable for a gluten-free diet.
However, you could replace the self-raising flour with a gluten-free self-raising flour. I always recommend using a good quality brand, which will usually be made from a blend of different flours such as rice flour, and oat flour, raising agents, of course, and usually a binding agent such as xanthan gum.
If making this cake for somebody who needs to avoid gluten in their diet, then you should also check the label of all ingredients to make sure that they don't contain any traces of gluten. This includes checking the decorative elements, such as the cocoa powder and sugar paste.
Is pizza cake keto-friendly?
This cake is definitely not keto-friendly as it's high in carbohydrates.
Is pizza cake healthy?
This pizza cake is an indulgent celebration cake with lashings of butter and sugar, so it should be enjoyed as a celebratory treat rather than an everyday indulgence.
Is this pizza cake safe to eat while pregnant?
There is nothing in this pizza cake recipe that should present a risk to pregnant people if the ingredients are in good condition and have been stored correctly, and the recipe is cooked hygienically and safely.
You should certainly make sure all dairy products use are pasteurised.
Egg safety varies from country to country and you should always seek country-specific advice. The NHS has a great resource that will help review the latest advice regarding foods that are safe to eat while pregnant in the UK.
Note: this website does not offer medical advice and you should always check with your health professional.
What goes well with pizza cake?
With this cake, you get fluffy sponge, smooth buttercream, fruity jam and sweet sugar paste, so you really don't need any accompaniments.
However, if you serve this at a birthday party, you could offer a scoop of ice cream to serve alongside each slice.
You could also offer some pots of smooth strawberry coulis and lightly whipped cream to look like ketchup and mayo!
Where can I buy sugar paste?
Sugar paste, also known as fondant or modelling icing, can be found in the baking aisle of most supermarkets. You'll almost always be able to buy white sugar paste and most stores will also stock a selection of coloured sugar paste options.
If you're unable to find the sugar paste you need at your supermarket, you can easily purchase them online either from suppliers such as Amazon, or from specialist makers.
What does sugar paste taste like?
Fondant icing is essentially sugar, so that’s what it tastes like! It has a pleasantly gummy, smooth texture that dissolves in the mouth as you chew.
Can I colour sugar paste myself instead of buying lots of colours?
You can absolutely colour your own sugar paste if you wish.
One way to so this is to combine colours. For example, in this recipe, you'll combine yellow sugar paste, white sugar paste and cocoa powder to create a brown pizza crust shade.
You can also colour fondant using food colouring, although this should be done sparingly because adding too much can overly loosen the sugar paste and make it wet and difficult to work with.
I recommend using gel food colouring, ideally one with 'highly concentrated' or similar on the label as this will mean you need to use just a small amount to achieve your chosen colour.
If you are going from white to black, I recommend adding some cocoa as well as a black pigment as this will help to bring the colour down without needing to add as much pigment.

My sugar paste is rock hard. What should I do?
When you first open a packet of sugar paste, it should feel firm and slightly breakable. Don't worry. Kneading it in your hands for a short time should allow it to warm, soften and become easier to work with.
When your sugar paste has been left unwrapped, the air reaches it and it can become hard quite quickly. It might also form a crust where it seems pliable but cracks on the surface.
If it's just slightly dry and hard, kneading should fix it, but if it's really hard, you can place it in a microwave safe bowl, cover and zap for about 15 seconds until soft and pliable again,
Be aware that sugar-based products like this can become incredibly hot when microwave, so be really careful when removing from the microwave in case there are any hot spots. If it feels hot, set it aside and it has cooled down before attempting to handle it.
My sugar paste has turned really loose. What should I do?
Sugar paste responds to the warmth from your hands, so if you handle it for a long time it may become too paste-like rather than mouldable. If this happens, simply set it down for a few minutes and it should firm up again.
If you have warm hands, this might happen more often than you'd like. Try rinsing your hands under cold water and then patting them dry before handling the sugar paste.
If you find that your sugar paste is sticking to the surface when you roll it out, try placing it between two pieces of baking paper. You should find it then rolls out easily without sticking and gives a lovely smooth surface.
Can I use flood-consistency icing instead of sugar paste?
You could, in theory, cover the cake with brown sugar paste to represent the crust and then add all the other details by piping flood-consistency icing onto the pizza cake as you would with a cookie.
Personally, I find working with sugar paste much easier.
I haven’t got jam can I use something else?
If you haven't got strawberry jam, you could another flavour of jam, or you could use lemon curd or marmalade.
Alternatively, you could leave the jam out entirely and just have buttercream between the layers. However, I really like the jam because it helps moistening the sponge and adds a slightly tart flavour between layers.
Can I add extra buttercream to this recipe?
You could put a more generous layer of butter cream in the centre of cake if you like. However, be aware that beyond a certain point, the cakes may start to slide around or lose stability.
If you are going for a thick central buttercream layer, I recommend chilling the cake for as long as possible after sandwiching and before decorating with sugar paste to give the whole thing a chance to firm up.
You could even use dowel rods to help keep the cake stable.
Can I make this recipe without buttercream?
You really need the buttercream in this recipe as it helps to adhere the two layers of sponge together. It also allows the sugar paste to stick to the cake.
If you'd like to reduce the amount of buttercream used in this recipe, you could use it to sandwich the two layers together.
You could then spread jam or buttercream on the top before applying a circular disc of brown frosting, brown sugar cream to represent the crust and then decorating from there.
You can see a similar technique used to make this sailing boat cake.
How should I store my pizza cake?
This cake is best stored in an airtight container or under a cake dome in the fridge or in a cool place out of direct sunlight.
How long does pizza cake keep?
This cake is best enjoyed within a day or so, but we'll keep up to 5 days in the fridge or 2-3 days in a cool place.

Can I leave this pizza cake out on the counter?
This cake should be stored in a sealed container somewhere cool. It shouldn't be left out on the counter, especially if your kitchen is warm.
Can I make pizza cake ahead?
Yes, you could make this cake ahead.
For example, you could make the sponge cakes, cool them, and then wrap them tightly and place them in the fridge until you're ready to decorate them next day.
You could even place the wrapped sponges in the freezer, if you need a little more time.
Can I freeze pizza cake?
This cake actually freezes really well.
If you're planning to give it as a gift and can't do so immediately, the I recommend wrapping it carefully and placing in an airtight container in the freezer. Defrost it in the refrigerator before gifting it.
If you have leftover cake and want to store it then I'd recommend cutting it into slices and then freezing them with a little baking paper between each one. That way you can remove and defrost just what you want, when you want it.
What is the best way to defrost pizza cake?
This cake is best defrosted in the refrigerator. Keep it covered so that it doesn't take on the flavours of other things in the fridge.
Can I make this pizza cake in a different quantity?
You can indeed alter this recipe to make a larger or smaller cake.
To do so, simply scroll down to the recipe card found at the bottom of this page and click or hover over the servings number. A slider will appear that you can use to adjust the serving number, which will also automatically adjust all the ingredient quantities you need.
If you choose to make just a bigger cake, bear in mind that you’ll need to use correspondingly sized cake tins. So for example, if you go from 16 to 20 portions, you’ll have increased the batter quantities by 1/4, so will need tins that are either 1/4 large (ie 25cm wide) or 1/4 deeper.
This will also affect the cooking time, so keep an eye on your cake so that you don’t under or overbake it.
How about if you want to make an extra layer? Well, the default recipe makes 2 layers, shown as 16 slices, so you can use a bit of maths to make a taller cake.
To make extra layers, use these amounts on the slider:
- 16 servings on the slider = enough batter for 2 layers
- 24 servings = 3 layers
- 32 servings = 4 layers
For a three-layer cake or more, you might need doweling (long sticks) to support the layers. Here is a great explanation on how to dowel a cake.
If you have any questions about changing the quantities, just ask!
Can I make this pizza cake in individual cupcakes?
This isn't something that I have tried, but it would be very cute for a pizza themed party though.
It should be possible to use the sponge recipe to make 24 cupcakes. You would then use the buttercream to decorate the tops of the cakes and make miniature crusts and decorations with sugar paste.
Can I make this pizza cake in a different tin/tray?
Yes, in theory, you could do this pizza as a 2-layer tray bake instead, and then decorate it to look like a large rectangular pizza pie.
Again, this isn't something I've tried, but you would need to use a tray with enough depth to allow for the batter to rise in the oven. You would also need to experiment with the cooking time as this would be affected by the different sized tray.

Can I make this pizza cake recipe in a stand mixer such as a KitchenAid or Kenwood Mixer?
You can absolutely make the sponge for this pizza cake in a stand mixer if you wish.
I'd recommend using the paddle attachment to make light work of creaming the butter and sugar, but take care to only mix briefly once you've added the flour, as otherwise you could end up with a tough sponge with a close texture.
Can I make this pizza cake recipe with a food processor?
I wouldn't recommend making this cake in a food processor unless it has a paddle attachment.
Using the blade attachment wouldn't incorporate much air into the butter and sugar during the creaming stage and could stretch the gluten in the flour.
How can I make sure my cake sponge is perfectly cooked?
Make sure that your oven is fully preheated before placing the cakes on a central shelf and closing the door immediately and gently.
Keep an eye on your cakes during the final 10-15 minutes of cooking so that you can make sure they don't overcook.
When your cakes look dry and risen all the way across the surface. gently open the oven door and press gently on the centre of each the cakes. The cakes should spring back rather than leaving an indentation. If not, gently close the door again.
If your cakes seem springy and cooked on top then the final test is to push a skewer into the centre of each cake. If the skewer comes out completely clean, the cakes are ready. If not, gently close the door and give the cakes a few more minutes.
Why didn't my cake rise?
If your cake didn't rise at all during the cooking process, then it's possible that your raising agents are no longer effective.
Although they last for a long time, both self-raising flour and baking powder can lose their efficacy over time. If so, you need to replace them with fresh ingredients and be sure to store them with the lid on in a cool, dry place.
If you don't think that's the cause, it may be that your batter sat for too long before your cakes went into the oven.
The raising agents in your batter start reacting together as soon as they meet with liquid. As they react together, they produce gas which form bubbles in the batter that help your cake to rise. However, if your batter sits for too long, much of this reaction will be lost before it has a chance to contribute to the rise of the cake.
Why did my sponge sink in the middle?
If your cake rose, and then sunk back down again, then it may be that your oven is too hot.
When an oven runs too hot, it can cause a cake to rise too quickly while it's still wet in the middle. When this happens, the batter isn't firm enough to hold the gas bubbles in place so as it cooks, it will expand and then collapse causing a dip in the centre.
Alternatively, if you saw your cake start to rise, opened the door to check on it and then later saw your cake sink, it's likely that opening the door was the problem. When you open the oven door, heat escapes and the temperature inside the oven drops rapidly causing the pockets of hot air inside the cake to fall back. Slamming the oven door can make this effect even worse.
Once the cake has sunken in this way it is unlikely to rise again, or at least not to the same degree as it would have if it had been left alone to cook.
Why did my sponge turn out dry/hard/burned/overcooked?
If you cake is dry, it could be that too little liquid was added to the batter, so do take care to stick to the quantities specified.
It could also be an issue with your oven or cooking time. Despite all ovens indicating the same standard set of temperatures on their dials, it's rare that any two ovens actually run at the exact same temperature. Some run too hot, some run too cold, some are hotter to one side, and some start off at the right temperature but that gradually rise past the indicated heat over time.
All this means that baking is as much as art as a science and you have to really get to know your oven before you can bake perfectly with it. This is partly why I always recommend that you keep an eye on your cake during the last 10-15 minutes of baking as this allows you to make a judgment call if your cake seems like it's done earlier than expected.
I also recommend investing in oven thermometer so that you can get to know how your oven behaves.
Try setting the thermometer somewhere visible inside the oven so that you can see how the temperature changes during the course of a bake. You can also experiment with putting it on one side or the other in the oven, or to the back versus the front. Even with fan ovens that are supposed to circulate the same temperature all the way around the oven space, you can get some really surprising variations.
Why did my sponge turn out wet/soft/undercooked?
If your sponge turns out liquid or undercooked, this usually means it wasn't given the recommended time to bake or the oven was simply too cold, meaning that the cake didn't have the opportunity to bake.
I recommend investing in oven thermometer so that you can get to know how your oven behaves.
It could also be that too much liquid was added to the batter, so do take care to stick to the quantities specified.
Why did my sponge stick to the tin?
Not all nonstick tins are created equal and some are more willing to release bakes than others. This is why I recommend lining your tins with baking paper on both the sides and the base.
You can never be too cautious, really, so if a recipe says that grease and flour is enough but you know that your bakes tend to stick, then go ahead and line with baking paper.
How can I add/change the flavours in my cake?
The sponge in this recipe is a simple Victoria sponge, flavoured with a touch of vanilla. The buttercream is also vanilla flavoured.
If you want to experiment, you could swap the vanilla for a touch of strawberry, peppermint or rose essence. All tend to be quite concentrated so you'll only need a few drops.
Alternatively, you could try natural flavourings such as orange or lemon zest and juice.
If using liquid flavouring, bear in mind that it may change the texture or behaviour of your buttercream, sugar paste or sponge. Similarly, alcohol-based flavourings and citrus juices may cause buttercream to split if too much is added, so use sparingly and with caution.
Print this pizza cake recipe
Pizza Cake Recipe
Ingredients
For the sponge
- 400 g (14.11 oz) white caster sugar (superfine sugar)
- 300 g (10.58 oz) salted butter
- 1 tsp vanilla bean paste
- 6 medium free range eggs
- 400 g (14.11 oz) self-raising white flour (self rising flour)
For the filling
- 1/2 tsp vanilla bean paste
- 300 g (10.58 oz) icing sugar (powdered sugar) powdered sugar
- 150 g (5.29 oz) salted butter
- 200 g (7.05 oz) jam
To cover
- 750 g (3.53 oz) white sugar paste
- 100 g (2.2 lb) yellow sugar paste (you will have offcuts)
- 1 tbsp (3.53 oz) cocoa powder (dutch processed)
For the toppings
- 125 g red sugar paste
- 10 g white sugar paste
- 40 g yellow sugar paste
- 25 g black sugar paste
- 20 g green sugar paste
Equipment
- 2 Round loose-bottomed 20cm (8") nonstick cake tin
Instructions
To make the sponge
- Preheat the oven to 180C (160C fan).
- Put the butter and sugar in a large bowl.
- Beat together until pale and fluffy.
- Add the eggs and vanilla to the bowl, along with a couple of spoonfuls of the flour to prevent curdling. Beat until you have a smooth, thin batter.
- Sift the remaining flour into the bowl and gently fold through until the flour is entirely incorporated. Don’t over-mix.
- Grease and line two loose-bottomed, straight-sided, 20cm cake tins, then divide the batter evenly between them and level off.
- Bake for approximately 20-25 minutes until the cakes are risen and gently golden.
- Allow to cool on a wire rack until cool enough to handle, then release the cakes from their tins and return them to the wire rack to cool completely.
- If necessary, once cool, you can trim the very tops of your cakes off to allow them to sit flat.
To fill and assemble
- In a fresh bowl, beat your vanilla, icing sugar (powdered sugar) and butter together until light, fluffy and significantly increased in volume.
- Take a completely flat board or plate, at least 25cm in diameter and spread a thin layer or frosting onto the center to help stop your cake from sliding around.
- Place one of your cakes top down on the board, then spread with half the remaining frosting.
- Spread the jam on top of the frosting – you might not need all of it.
- Place your second cake on top of the jam, again top-down to give nice clean edges.
- Use the remaining frosting to cover the whole cake in a thin layer.
- Now place your cake in the freezer to firm up the frosting while you prepare the covering. If you don’t have room in the freezer, a cold fridge will do.
To cover
- Knead your white sugar paste, yellow sugar paste and cocoa together until you have a brown sugar paste.
- Roll the brown sugar paste out to for a disc about 35cm in diameter. It’s easiest to do this between sheets of baking paper, or on a cornflour dusted surface.
- Lay your sugar paste over the cake and allow the sides to drop down.
- Working gently, ease and smooth the sugar paste down the sides of the cake until fully covered and trim off any excess at the base.
- Use your fingertips to press around the circumference of the pizza to create a ‘crust’.
For the tomato layer
- Roll out 100g red sugar paste very thinly so it is a little wider than your cake.
- Place the sugar paste on top of the cake and allow it to slightly ruffle and overlap as you do so – this helps it resemble tomato sauce.
For the cheese
- Use about 40g yellow sugar paste to form 8 small balls, then roll them out very thinly and unevenly. Place them on top of the pizza to resemble melted cheese.
For the olives
- Roll out about 10g icing and cut out little circles, then use a straw to cut the holes from the centre and create the look of sliced black olives. Scatter onto the cake.
For the basil leaves
- Roll about 20g green sugar paste out very thinly and cut out a few shapes to resemble basil leaves.
- Use your knife to score a little vein detail onto each leaf and then arrange on the cake.
For the mushrooms
- Use some of your brown sugar paste off cuts mixed with a little white sugar paste to give a mushroom shade.
- Roll out thinly and then cut our mushroom shapes with a sharp knife. Arrange on the cake.
For the pepperoni
- Mix about 25g red sugar paste with a tiny bit of black to create a darker red.
- Roll out quite thickly, then dot all over with tiny balls of white sugar paste.
- Roll out a little more to flatten the white sugar paste, then cut out discs to resemble slices of pepperoni. Arrange on the cake.
For the pepper
- For a final touch, grab a fine grater and a little black sugar paste and grate it over the cake to resemble black pepper.
To finish
- You can now make final alternations to your pizza. I recommend squeezing the crust from above and underneath at this stage to give it a perfect pizza shape.
- Your pizza cake is now ready to cut into slices and enjoy!
Video
Notes
Nutrition
Pin this pizza cake for later

More cake recipes to try
Have you got my book?

'This is a great kids cookery book. Emily is a star' - Simon Rimmer
'The book I'd like to force into any mother's kitchen' - Prue Leith
"A fab book with a plan." - Jane Devonshire, 2016 Masterchef UK winner
'Emily has managed to combine her mummy knowledge and passion for food to make a truly helpful and brilliant cookbook' - Priya Tew, RD, BSc (Hons), Msc
Get Your Kids to Eat Anything is an achievable 'how to' for parents in the battle to overcome picky eating and 'make new the norm'. Emily Leary's unique 5-phase programme looks at the issue of 'fussy eating' in a holistic way that links imagination with food, and which situates parents alongside - not in opposition to - their children.


Dacer says
Hi
Can I use vanilla sugar, not a fan of paste...
Thanks
Emily Leary says
Yes if you use vanilla sugar you can leave out the vanilla extract/paste. It does need to be a powdered sugar for the frosting - a granulated sugar won't work.